Skip to content

Everything buyers, sourcing managers, and quality teams need to know about plush toy pre-shipment inspection: when to schedule it, how AQL sampling works, what to check on the toy and the carton, which safety tests to run on site, and how to respond when a batch does not pass.
A pre-shipment inspection is the last checkpoint between a finished plush toy order and the customer who will open the carton. Everything before it has already happened: fabric approval, sampling, counter sample confirmation, and in-process checks on the production line. What remains is a single question. Does this specific batch, packed and ready to leave the factory, match the approved standard and the purchase order?
Buyers who skip this step, or perform it carelessly, often learn the answer only after the goods reach a warehouse thousands of kilometers away. By then, a loose eye, a mislabeled carton, or a missing warning label is no longer a quick fix. It becomes a return, a delayed launch, a marketplace complaint, or a customs hold, and the cost of each is many times higher than the cost of an inspection.
This guide explains how to do a plush toy pre-shipment inspection from start to finish. It covers timing, preparation, sampling logic, product and packaging checks, safety and functional tests, reporting, and the decisions that follow a pass or a fail.
What Is a Plush Toy Pre-Shipment Inspection and Why Does It Matter?
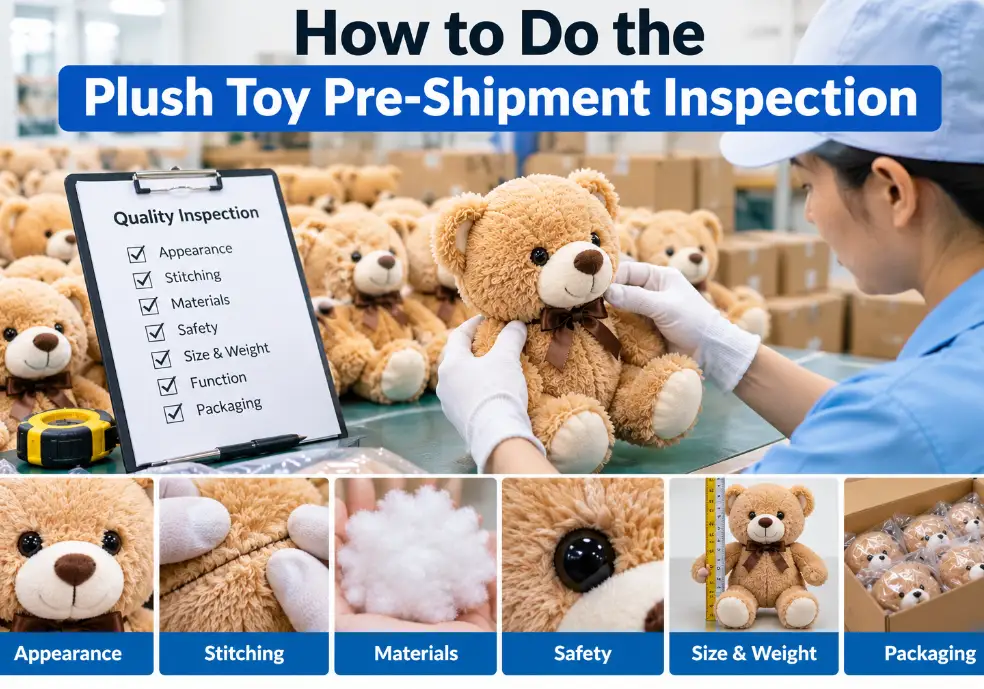
A plush toy pre-shipment inspection is a structured, sample-based quality check performed when an order is fully produced and at least 80 percent packed, in which an inspector compares randomly selected units and cartons against the approved sample, the specification, and the agreed acceptance limits to decide whether the shipment can be released.
It matters for three reasons. First, it is the last point at which a defect can be corrected cheaply. A seam problem found in the factory can be reworked in days; the same problem found at the destination port means returns, replacements, or discounts. Second, it creates objective evidence. A signed inspection report gives both parties a shared factual basis for releasing payment, negotiating a credit, or holding a shipment. Third, it protects compliance. Missing labels, wrong age grading, or loose small parts are not cosmetic problems; they decide whether a toy can legally be sold.
It is equally important to understand what the inspection is not. It is not a laboratory test, so it cannot confirm chemical content or formal certification results. It is not a repair step, because inspectors record findings rather than fix them. And it is a sample-based method, so it estimates the quality of the whole batch rather than examining every unit.
The Cost Logic Behind Pre-Shipment Inspection
The economics of inspection are easy to see once defects are priced by the stage at which they are found. A problem that is found on the inspection table costs the time to sort and repair the affected units. A problem found at the destination also costs international freight for returns or replacements, local handling, lost selling days, and sometimes a damaged relationship with a retailer or marketplace. The same defect, in other words, can cost ten times more simply because it was found later. A pre-shipment inspection costs a fixed fee per visit, which is usually small compared with the value of the order and tiny compared with the value of a rejected container.
Where Pre-Shipment Inspection Fits in the Quality Control Chain
| Control Stage | Timing | Main Purpose | Typical Finding |
|---|---|---|---|
| Incoming material inspection | Before production | Verify fabric, filling, eyes, labels | Color deviation, contaminated filling |
| First-off inspection | Start of production | Confirm setup against counter sample | Wrong stuffing density, offset embroidery |
| In-process inspection | During production | Catch drift while correction is cheap | Seam variation, loose accessories |
| Pre-shipment inspection | Order packed, before shipping | Approve or hold the finished batch | Defect rate above limit, carton errors |
| Container loading check | At loading | Verify quantity and condition in the container | Short count, damaged cartons |
When Should You Schedule the Pre-Shipment Inspection?
The correct time to schedule a plush toy pre-shipment inspection is when production is complete and at least 80 percent of the goods are packed in export cartons, with the remaining units finished and ready to be packed. At that point, the inspector can draw a representative sample from the packed goods while the factory still has time to react.
Inspecting too early produces a result that does not describe the final batch, because later units may be produced under different conditions. Inspecting too late leaves no time to rework, so a failed result becomes a choice between shipping known defects and missing the sailing date. The goal is to inspect when the batch is real, but the schedule still has room.
Plan the schedule backward from the cargo cut-off date. Allow time for the inspection itself, for report issuance, for a possible rework cycle, and for a re-inspection if needed. A buffer of several working days between the planned inspection and the cut-off is far cheaper than an air freight upgrade.

What to Do When Production Is Delayed
Production delays are the most common reason an inspection date has to move. When the factory reports that fewer than 80 percent of the goods will be packed on the agreed date, the buyer has three sensible choices: move the inspection to a later date, inspect the packed portion now and the remainder in a second visit, or approve a partial shipment. Each choice should be documented in writing, including which quantities each report covers. Splitting an inspection can work well, but only if the second visit samples the later units independently, because a good result on the first half of the order says nothing certain about the second half.
Readiness Conditions Before Booking the Inspection
| Readiness Condition | Minimum Standard | Why It Matters |
|---|---|---|
| Production status | 100% produced | Sample reflects the complete batch |
| Packing status | At least 80% packed in export cartons | Inspector can verify final packaging |
| Cartons accessible | Stacked and marked, not sealed in containers | Random carton selection must be possible |
| Reference samples | Approved sample available on site | Needed for visual comparison |
| Documents | PO, specifications, test reports at hand | Inspector checks against written standards |
| Rework buffer | Several days before cargo cut-off | Allows correction if the result is a fail |
Tip: Book the inspection before the schedule gets tight
Confirm the inspection date as soon as the production plan is fixed, and agree in writing with the factory that goods will be ready on that date. Ask for a daily packing update in the final week so you can move the booking if output slips. A slipped inspection that is rebooked early costs little. A rushed inspection done on half-packed goods gives you a result you cannot rely on, and a failed one with no buffer forces an expensive choice between delay and shipping the problem. Share the inspection date with your freight forwarder as well, so booking cut-offs, customs paperwork, and the inspection all follow one plan instead of three separate ones.
What Documents and Standards Should Be Ready Before the Inspector Arrives?
The inspector can only judge a batch against the standards they are given. If the approved sample, the specification, and the acceptance limits are not defined before the visit, the inspection turns into a subjective opinion, and disputes with the factory become almost certain.
The essential package has four parts: the purchase order with quantities, colorways, and packing instructions; the technical specification with dimensions, tolerances, materials, and construction notes; the approved sample or counter sample that serves as the physical reference; and the inspection criteria that state the AQL levels, defect classifications, and required tests. Test reports for the materials and the finished product should also be available so the inspector can confirm that the tested configuration matches what was produced.
Setting Stricter Limits for Special Plush Toy Types
Not every plush toy deserves the same inspection depth. Weighted plush toys, with beads or pellets sealed in inner pouches, need checks that the pouch is double-stitched, that no filling leaks, and that the toy’s weight matches the specification within tolerance. Plush toys with electronic modules need functional checks and a review of how the module and battery compartment are secured. Toys for infants and toddlers call for the strictest pull and seam checks and the tightest AQL limits, because the consequence of a failure is greater and the user is less able to avoid it. Writing these extra requirements into the inspection criteria in advance means the inspector can apply them consistently instead of improvising on the day.
Pre-Inspection Document Checklist
| Document | Content Required | Provided By | Used For |
|---|---|---|---|
| Purchase order | Quantity per SKU, colorway, delivery terms | Buyer | Quantity and assortment check |
| Technical specification | Dimensions, tolerances, materials, construction | Buyer | Measurement and workmanship check |
| Approved or counter sample | Physical reference unit, signed and dated | Buyer and factory | Visual comparison |
| Inspection criteria | AQL levels, defect classes, test list | Buyer | Pass or fail decision |
| Packing list and carton plan | Units per carton, carton size, weight | Factory | Carton and quantity verification |
| Label and marking artwork | Care labels, warnings, barcodes, shipping marks | Buyer | Label accuracy check |
| Test reports | Material and product safety results | Factory or lab | Compliance confirmation |
Tip: Put the reference sample on the inspection table
Send the inspection criteria to the inspector several days before the visit, and make sure the signed approved sample is physically on the table during the inspection, not locked in an office. Every visual judgment about color, shape, pile, and facial expression is a comparison, and a comparison needs the reference in sight. If the sample is missing, the inspector can only rely on photographs, which cannot show softness, stuffing firmness, or true color. Ask for a photo of the reference sample at the inspection station in the final report. If more than one colorway or size is being shipped, make sure every variant has its own signed reference, because a single sample cannot represent the whole assortment.
How Does AQL Sampling Work in a Plush Toy Pre-Shipment Inspection?
AQL, or Acceptable Quality Limit, is the statistical framework that tells an inspector how many units to examine and how many defects the batch can contain before it is rejected. Most buyers use the sampling plans in ISO 2859-1 or the equivalent ANSI/ASQ Z1.4, applied at General Inspection Level II, because this level balances inspection effort against confidence.
The process has three steps. The inspector first finds the lot size, meaning the total number of finished units in the batch. The lot size gives a sample size code letter, which gives the number of units to pull at random from different cartons. The inspector then counts defects in the sample and compares the count with the accept and reject points for each defect class.
Defects are normally grouped into three classes. Critical defects are those that could harm a child or break a legal requirement and are accepted at zero. Major defects would likely cause a customer to return the product. Minor defects are small departures that do not affect use or sale. Plush toys commonly use AQL 2.5 for major defects and AQL 4.0 for minor defects, although a stricter limit such as 1.5 for majors is common for premium or infant products.
Sample Sizes and Accept/Reject Points at General Inspection Level II
| Lot Size (Units) | Sample Size | Major AQL 2.5 (Accept / Reject) | Minor AQL 4.0 (Accept / Reject) |
|---|---|---|---|
| 501 – 1,200 | 80 | 5 / 6 | 7 / 8 |
| 1,201 – 3,200 | 125 | 7 / 8 | 10 / 11 |
| 3,201 – 10,000 | 200 | 10 / 11 | 14 / 15 |
| 10,001 – 35,000 | 315 | 14 / 15 | 21 / 22 |
| 35,001 – 150,000 | 500 | 21 / 22 | 21 / 22 |
How to Draw a Truly Random Sample
The sampling plan only protects the buyer if the sample is genuinely random. In practice, this means dividing the lot into its cartons, numbering them, and selecting cartons across all pallets and positions, then drawing units from different layers inside each selected carton. If the order contains several SKUs or colorways, the sample should be distributed in proportion to the quantity of each, so a large colorway is not represented by one lucky unit. The inspector should never accept a pile of units already set aside by the factory, because pre-selected units are by definition not random.
Plush Toy Defect Classification Examples
| Class | Tolerance | Typical Plush Toy Examples |
|---|---|---|
| Critical | Zero accepted | Broken needle or metal fragment, detached eye or nose, open seam exposing filling, missing mandatory warning |
| Major | AQL 2.5 (typical) | Wrong color or size outside tolerance, uneven stuffing, crooked face, weak seam, stained fabric, wrong label content |
| Minor | AQL 4.0 (typical) | Loose threads, slight pile flattening, small cosmetic marks, minor stitch irregularity, light creasing |
Tip: Define defect classes in the contract, not on inspection day
Agree in advance which problems count as critical, major, and minor, and write the list into the purchase order or the inspection criteria. Disputes happen when the inspector calls a crooked eye “major,” and the factory calls it “minor” after the fact. Add photographs of borderline cases as a visual reference set. Also state clearly that any critical defect, such as a needle fragment or a loose safety eye, triggers a hold on the whole batch regardless of the sample count, because critical defects are not statistical questions. Review the list again whenever a new design or material is introduced, since a new feature, such as a weighted pouch or an electronic module, creates defect types the old list never covered.
How Do You Inspect the Appearance, Workmanship, and Dimensions of the Toy?
The appearance and workmanship inspection is a unit-by-unit comparison of the sampled toys against the approved sample, covering shape, color, fabric, stuffing, facial features, stitching, and finishing. It is where most major and minor defects are found, so it deserves a fixed routine rather than a casual look.
A reliable routine starts with the toy at arm’s length to judge overall shape and proportion, then moves in close for fabric, stitching, and detail. The inspector squeezes the body to check stuffing firmness and distribution, lifts and rotates the toy to find asymmetry, and runs a hand along seams and pile to find loose areas. Color should be judged under consistent daylight-simulating lighting and compared directly with the reference sample, because color that looks right under warm factory lighting can look noticeably different in a retail store.
Dimensions are checked with a tape or ruler on a defined set of measurement points, such as total height, body width, head width, and limb length, and compared with the specification tolerance. Weight is worth recording as well, since a unit that is clearly lighter than its siblings usually has less stuffing.
Checking Embroidery and Facial Expression
The face is what a customer looks at first, and small shifts in eye spacing, nose height, or mouth curve change the character’s expression. Embroidered features should be checked for thread tension, color match, clean edges, and position relative to the approved sample. For toys with plastic eyes or noses, the inspector verifies the angle and the distance between the two eyes, the secure fit of the washer or backing, and the absence of scratches on the surface. A simple method is to hold the sample and the production unit side by side at the same height and compare them as a customer would. If two units look like different characters, the batch has a major defect even when every measurement is technically within tolerance.
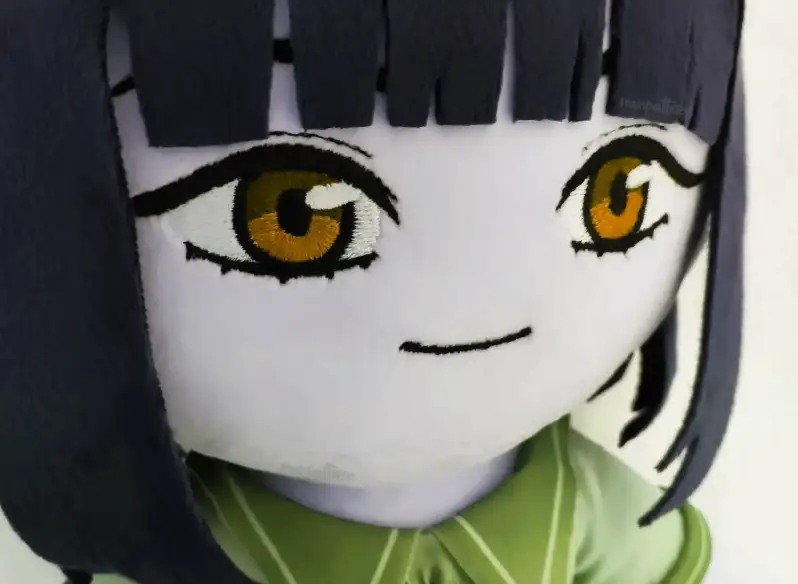
Appearance and Workmanship Checkpoints
| Checkpoint | What the Inspector Looks For | Common Defect Class |
|---|---|---|
| Overall shape and proportion | Silhouette matches approved sample, no sagging or distortion | Major |
| Color and fabric | Matches reference under standard light, no stains or pile damage | Major / Minor |
| Stuffing density | Even firmness, no hollow areas or lumps, correct weight | Major |
| Facial features | Eyes, nose, and mouth in the specified position, symmetric | Major |
| Seams and stitching | No gaps, puckering, skipped stitches, or exposed filling | Critical / Major |
| Dimensions | Key measurements within specified tolerance | Major |
| Finishing | No loose threads, glue marks, or fibers on the surface | Minor |
| Hangtag and sewn label | Correct position, secure attachment, readable print | Major / Minor |
Tip: Use one lighting setup and one reference set all day
Inspection results become inconsistent when color and shape are judged under changing light or from memory. Set up a fixed inspection table with the same lighting for the whole visit, place the approved sample beside it, and keep a small set of “acceptable” and “reject” photographs for borderline issues such as eye angle or pile direction. Inspectors tire over a long day, and a visual reference set keeps the first and the three-hundredth unit judged by the same standard. Record the weight of at least a few units from different cartons to spot stuffing variation early. Rotate the inspection of different SKUs so one tired hour does not decide the result for a single product, and note the time of day on the inspection sheet.
How Are Functional and Safety Tests Performed During the Inspection?
Functional and safety tests are the physical checks an inspector performs on site to confirm that a plush toy is secure, safe for the intended age group, and free from hidden hazards. They do not replace laboratory certification, but they confirm that the production batch behaves like the tested sample.
The most important on-site test is the pull test on every attached component. Eyes, noses, buttons, bows, and any other small part are pulled with the force and duration specified by the applicable toy standard for the age group, and any movement, loosening, or detachment is a critical defect. Seam strength is checked by applying firm tension along the main seams, especially at the neck, limbs, and ears, where stress concentrates. For toys with electronics, the inspector confirms that sounds, lights, or motion work, that the battery compartment is secured, and that the compartment cannot be opened by a small child without a tool where the standard requires it.
Needle detection deserves special attention. Broken sewing needles and metal fragments are among the most serious hazards in soft toys, so batches should pass a metal detector or needle detection machine, and the inspector should confirm the detector’s operation with a test piece and review the factory’s needle control records. Label and marking checks complete the section: the inspector verifies that required content, such as age warnings, manufacturer or importer details, batch or tracking information, and market marks, is present and correct for the destination market.
Verifying Market-Specific Labels and Warnings
Label requirements differ by destination, so the inspector needs a market checklist rather than general knowledge. For goods sold in the European Union, the checks usually include the conformity marking, the name and address of the manufacturer or importer, a type, batch, or serial reference, and the age-related warnings that apply to the product. For goods sold in the United States, children’s products commonly require permanent tracking information on the product and packaging, and the certificate documentation should be available on request. Other markets have their own marks and language rules. The buyer should supply approved label artwork and a written list of required content, and the inspector should compare every sampled label against it, including spelling, symbols, and the position of the label on the toy.
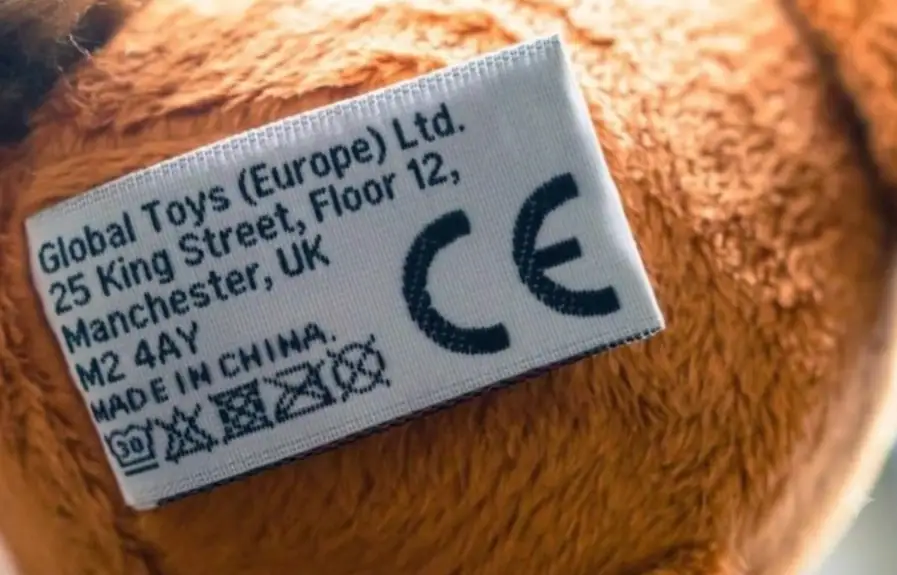
On-Site Functional and Safety Tests
| Test | Method | Failure Criterion | Class |
|---|---|---|---|
| Accessory pull test | Pull each eye, nose, and attached part per the applicable standard | Any loosening or detachment | Critical |
| Seam strength check | Apply firm tension at neck, limbs, ears, and base | Seam opens or filling is exposed | Critical / Major |
| Needle and metal detection | Run sampled and packed units through detector, verify with test piece | Any detection signal | Critical |
| Small parts review | Check for loose or detachable parts in toys for young children | Detached part fits the small-parts cylinder | Critical |
| Electronic function test | Operate sound, light, and motion features; check battery cover | Feature fails or battery cover opens easily | Major / Critical |
| Label and marking check | Compare with approved artwork and market requirements | Missing, wrong, or unreadable content | Major / Critical |
Tip: Test accessories from many cartons, not one convenient pile
Pull tests should cover every type of attached component, and they should be applied to units drawn from different cartons and different positions on the pallet. Production variation often shows up by shift or by operator, so a clean result from the first box proves little. Ask the inspector to record how many units were tested for each accessory type and what the result was. If a single unit fails a pull test, request additional testing of the same accessory type across more cartons before the batch is judged, rather than treating it as an isolated accident. Where the toy is intended for babies or toddlers, apply the stricter age-group method, and photograph the test setup so the method can be reviewed later.
How Do You Verify Packaging, Cartons, and Shipping Marks?
Packaging verification confirms that the right goods, in the right quantity, assortment, and condition, are packed for the right destination. A perfect toy that arrives in a crushed or mislabeled carton still creates a failed delivery, so this part of the inspection carries real weight.
The inspector first checks the quantity by counting cartons and confirming the units per carton against the packing list. Cartons are then selected at random from different pallets and positions, and each is opened. Inside, the inspector verifies the unit packaging, whether a polybag, window box, or hangtag display, the barcode and its scan result, the label content, and the carton assortment for color or size. Outside, the carton dimensions, gross weight, shipping marks, carton numbering, and any handling or orientation marks are verified against the instructions.
Many buyers also request a carton drop test or a compression check, particularly for large cartons or long routes. The purpose is to confirm that the carton protects the goods during handling, since plush toys are light but easily crushed or soiled when a carton collapses or tears.
Checking Compression and Vacuum Packing
Many plush toys are compressed or vacuum packed to reduce shipping volume. This saves freight cost, but it adds specific inspection points. The inspector should open sampled vacuum packs and check how well the toy recovers its shape, whether the fabric shows permanent creases or flattened pile, and whether the packaging film is intact and properly sealed. Over-compression is a common cause of poor shape recovery, especially in long-pile fabrics and in toys with firm stuffing. If a customer will receive the toy directly from the carton, shape recovery after unpacking is part of the product experience, and it should be judged as carefully as the toy’s stitching.

Carton, Packaging, and Marking Verification Points
| Item | Check Method | Acceptance Criterion |
|---|---|---|
| Total carton count | Count against the packing list | Matches order quantity |
| Units per carton and assortment | Open random cartons and count by SKU | Matches packing plan exactly |
| Unit packaging | Inspect polybag, box, hangtag, insert | Clean, intact, correct artwork |
| Barcode | Scan sampled units | Scans correctly and matches the SKU |
| Carton dimensions and weight | Measure and weigh sampled cartons | Within stated tolerance |
| Shipping marks and carton numbers | Compare with shipping instructions | Correct, legible, and consistent |
| Carton strength | Drop or compression test where requested | No tearing, collapse, or product damage |
Tip: Let the inspector choose the cartons
Random selection only works if the factory does not control it. Make clear that the inspector, not the factory staff, picks the cartons, and that cartons must be drawn from the top, middle, and bottom of different pallets. Mark each selected carton and keep a record of its number. Factories do not need to act in bad faith for this to matter, because well-packed cartons are often placed in the most accessible spots. If the inspector sees only easy-to-reach cartons, the sample describes the shipping area, not the batch. Once the cartons are opened, ask the inspector to check the lower layers inside each carton as well, not only the top row of toys.
How Should Inspection Results Be Documented and Reported?
An inspection report is the permanent record of what was examined, how it was examined, and what was found. Its value depends on specificity: a report that says “quality is acceptable” settles nothing, while a report that lists sample sizes, defect counts by class, photographs, and a clear pass or fail decision can support a payment release or a claim.
A complete plush toy inspection report should include the order details and inspection date, the lot size and sampling plan, the AQL levels applied, the defect count by class with photographs of every critical and major defect, the results of each functional and safety test, the carton and packaging findings, and a plain statement of the result. It should also record any conditions that limited the inspection, such as cartons that were not accessible or goods that were not yet packed.
The inspector should review the findings with the factory representative before leaving the site and obtain a signature acknowledging the results. This does not mean the factory must agree with the conclusions, but it prevents later arguments that the defects were never shown. Buyers should receive the report within a short, agreed time after the visit, so decisions about shipment can be made while the schedule is still flexible.
Reading the Report Beyond Pass or Fail
A pass or fail result is only the headline. The defect counts by class show whether the batch passed comfortably or only just. A pass with the defect count at the accept point should prompt closer attention on the next order, while a pass with very few defects supports a lighter inspection plan. Comparing the defect types over several reports reveals trends, such as the same seam problem appearing in each order, which points to a process issue that no single inspection can solve.
What Happens When the Pre-Shipment Inspection Fails?
A failed plush toy pre-shipment inspection means the number of defects in the sample exceeded the acceptance point for at least one defect class, or a critical defect was found. The batch is then held while the buyer and the factory decide how to correct it, and the shipment is not released until the corrected goods pass.
The right response depends on the type of defect. Cosmetic defects that affect some units, such as loose threads or surface marks, can usually be fixed by 100 percent sorting and rework. Defects built into the production process, such as insufficient stuffing or a systematic eye placement error, require investigation of the cause before rework begins; otherwise, the same defect returns. Critical defects, especially needle fragments or weak accessory attachment, justify full re-inspection and, in serious cases, rejection of the batch.
After rework, the factory should request a re-inspection with a fresh sample drawn from the corrected goods. The factory should also provide a written corrective action report that explains the root cause, what was changed, and how the change will be verified in future production runs.
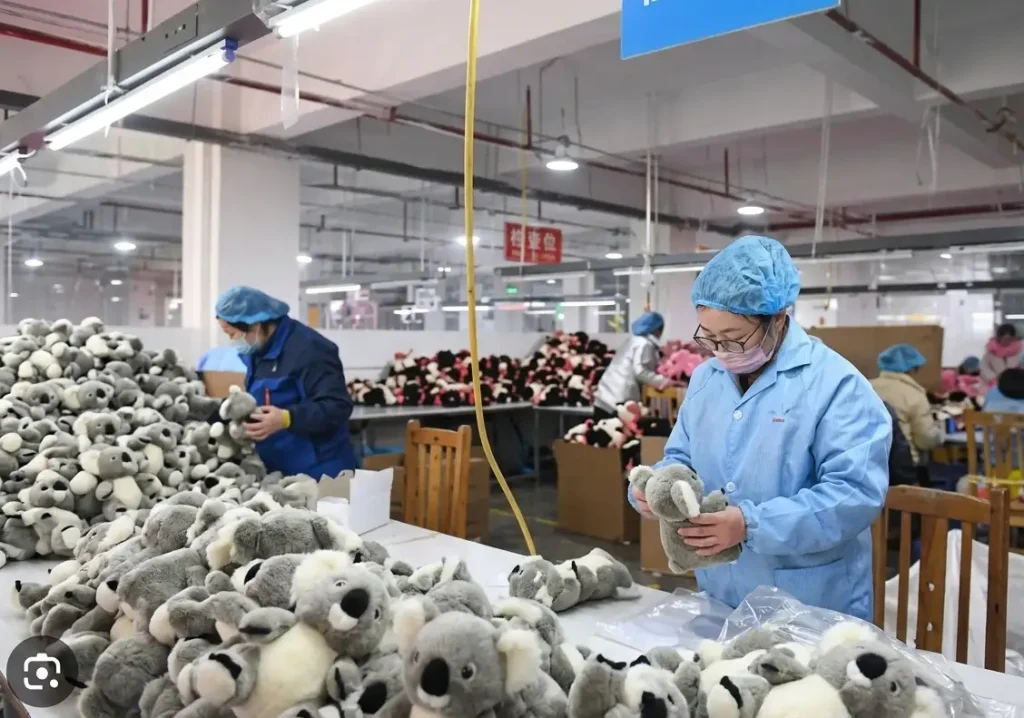
Photograph Standards for Defect Evidence
Photographs make the report useful to people who were not on site. Each critical or major defect should be photographed close up with a scale or ruler visible, and again from a distance with the carton number or unit number in the frame. Good photographs also show the reference sample beside the defective unit. For process-related defects, several examples are more convincing than one, since they show the problem is repeatable. Avoid editing or cropping the images beyond what is needed for clarity, so the factory and the buyer can both rely on them when discussing corrective action.
Inspection Outcomes and Recommended Actions
| Result | Meaning | Recommended Action | Next Step |
|---|---|---|---|
| Pass | Defects within acceptable limits, no critical defects | Release shipment and balance payment per contract | Container loading check |
| Pass with comments | Within limits but with notable minor findings | Ship and request improvement for the next order | Record in supplier file |
| Fail: cosmetic defects | Major or minor defects above the reject point | 100% sorting and rework of the batch | Re-inspection |
| Fail: process defect | Systematic problem across many units | Stop shipping, find the root cause, then rework | Re-inspection plus corrective action report |
| Fail: critical defect | Safety-related problem found | Hold the whole batch, full investigation, extra testing | Re-inspection or rejection |
Finding the Root Cause After a Failed Inspection
Rework fixes the units in front of you; root cause analysis fixes the next order. When the inspection fails, ask the factory to trace the defect back to the stage where it began. A loose eye might trace to an untrained operator, a worn attachment tool, or an incorrect washer size. Uneven stuffing might trace to a calibration drift on the stuffing machine. Weak seams might trace to a thread or tension setting change. Ask for the corrective action in writing, with a person responsible and a date for verification, and confirm the result in the next production run. A factory that can explain and fix the cause is a much safer partner than one that simply reworks and moves on.
Tip: Keep leverage until the final result is known
Structure payment terms so the balance is released only after a passing inspection report, and state this in the purchase agreement before production starts. This is not a sign of distrust. It gives both sides the same incentive to resolve defects quickly. After a failed inspection, insist on a re-inspection by the same inspection method and standard, not a quick photo from the factory. Also ask for the root cause in writing. A factory that only reworks the visible defects without explaining why they happened will usually repeat them in the next order. Finally, keep every report, photograph, and correction record in a supplier file, because the pattern across several orders often tells you more than any single inspection.
Should You Use Factory Self-Inspection, Your Own Team, or a Third-Party Inspector?
Three inspection models are common for plush toy orders: the factory’s own quality team, the buyer’s own staff or agent, and an independent third-party inspection company. Each has a role, and the right choice depends on order value, supplier history, and the risk of the product category.
Factory self-inspection is fast and constant, but it carries an unavoidable conflict of interest, since the same organization produces and approves the goods. A buyer’s own staff understand the product best, but travel costs and availability limit how often they can attend. Independent third-party inspectors offer objectivity and a standard report format, and they are especially useful for first orders with a new factory, large-volume orders, and products for young children where a defect has legal consequences.
Making Inspection Part of a Routine Calendar
Inspection works best as a repeating step in the order calendar rather than an exception. Many buyers add the inspection date to the production schedule at order confirmation, with a second reserved slot for re-inspection. This habit removes the pressure to skip the visit when the schedule is tight, because the time is already planned. It also lets the factory arrange packing, cartons, and staff in advance, which makes the visit smoother and the result more representative of normal conditions.
Comparison of Pre-Shipment Inspection Models
| Model | Strength | Limitation | Best Used For |
|---|---|---|---|
| Factory self-inspection | Fast, continuous, no extra cost | Conflict of interest | Routine orders with proven suppliers |
| Buyer’s own team or agent | Deep product knowledge, direct control | Travel cost, limited availability | Key products and developing suppliers |
| Independent third party | Objective, standardized report | Per-visit fee, needs clear criteria | First orders, large volume, children’s products |
Conclusion
A plush toy pre-shipment inspection is not a formality that comes at the end of production. It is the step that turns an expectation of quality into verified evidence, while there is still time to act on it. A good inspection starts with clear standards, a signed reference sample, and written acceptance limits. It continues with random sampling, careful checks of appearance, workmanship, safety, and packaging, and ends with a documented result that drives a clear decision.
Buyers who treat inspection as part of the production plan, not as a last-minute rescue, see fewer disputes, fewer returns, and more predictable deliveries. The investment is small compared with the cost of one rejected shipment, and the discipline it builds in the supply chain improves every later order.
Frequently Asked Questions
Q1. How long does a plush toy pre-shipment inspection take?
Most inspections for a single product and a moderate lot size are completed within one working day by one inspector. Larger lots, many SKUs, or additional tests such as carton drop and electronics checks can extend the visit to two days or require more than one inspector. Planning should also include time for the report to be written and reviewed, since the shipment decision depends on it.
Q2. What AQL level should I choose for plush toys?
Many buyers use AQL 2.5 for major defects and AQL 4.0 for minor defects at General Inspection Level II, with zero tolerance for critical defects. Products for infants and toddlers, premium retail items, or buyers with strict retailer requirements often use tighter limits such as 1.5 for major defects. The right level depends on the product risk, the order value, and the customer’s tolerance for returns.
Q3. Can the inspection be done after the goods are loaded into the container?
It is possible, but it is a poor practice. Once cartons are stacked in a container, random selection is limited, and rework is expensive or impossible. The inspection should be completed while cartons are accessible, with a separate container loading check to confirm quantity and condition at loading. This sequence keeps the quality decision separate from the logistics decision.
Q4. Does a pre-shipment inspection replace product safety testing?
No. A pre-shipment inspection confirms that the finished batch is consistent with the approved sample and the specification, and it performs basic physical checks. Laboratory testing for chemical content, mechanical and physical properties, and flammability is a separate process that should be completed on production materials or finished samples before shipment, and the inspector should confirm that the report matches the product being shipped.
Q5. What should I do if the inspector and the factory disagree about a defect?
Return to the written standard. Compare the unit with the approved sample and with the defect classification agreed in the purchase order or inspection criteria. A photograph of the disputed unit beside the reference sample usually resolves the issue. If the standard does not cover the case, the buyer should make the final decision and then update the criteria so the same question does not appear again.
Q6. Is it acceptable to inspect only a few cartons instead of following an AQL plan?
Checking a handful of cartons gives an impression but not a reliable estimate, because there is no defined sample size and no accept or reject rule. A statistical plan makes the result repeatable and defensible. If budget limits the inspection, it is better to reduce the number of additional tests than to abandon the sampling plan.
Q7. How often should I inspect repeat orders from the same factory?
A new supplier should be inspected on every order until the results are consistently good. After a track record of passing results, many buyers move to periodic inspections or reduced sampling, while keeping full inspection for new designs, new materials, and any order where the factory has changed a process, a subcontractor, or the production line.