Skip to content

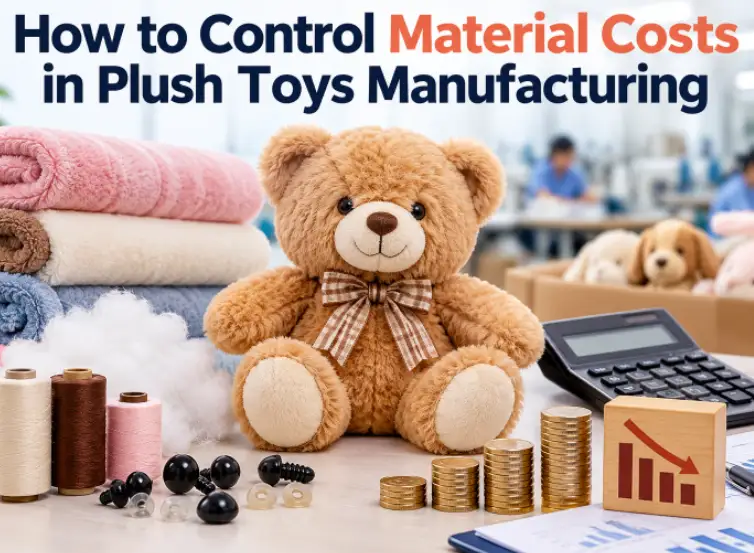
How to Control Material Costs in Plush Toys Manufacturing is an important topic for brands, wholesalers, and manufacturers looking to improve profit margins. From plush fabrics and stuffing to accessories and packaging, every material choice affects the final product cost.
However, reducing expenses should never come at the expense of quality, safety, or durability. By optimising toy designs, selecting cost-effective materials, reducing fabric waste, and working with reliable suppliers, businesses can achieve better cost efficiency. In this guide, we will share practical strategies to control material costs while maintaining the quality and appeal of your plush toys.
Ask any experienced plush toy buyer where the money goes, and the answer is almost always the same: materials. Fabric, filling, eyes, noses, thread, labels, hang tags, and packaging account for more than half of what a buyer pays per unit, and every one of those line items can drift upward without anyone noticing until the final invoice arrives. Labor rates and freight get most of the attention in sourcing discussions, but materials are where the biggest controllable savings sit.
The difficulty is that materials cost is not a single number you can negotiate once and forget. It is the combined result of dozens of decisions — which fabric is specified, how the pattern is laid out on the roll, how much filling goes into each body, which accessories are chosen, how many units are ordered, and how many finished toys are lost to defects. A plush toy project that controls these decisions deliberately can land 10 to 20 percent below an equivalent project that does not, without any visible change in product quality.
This guide explains how to control materials cost in plush toys manufacturing in a structured, repeatable way. It covers where the cost actually sits, which materials deserve the most scrutiny, how fabric yield and pattern efficiency change the real price per toy, how filling and accessory decisions can be optimized without compromising safety, how purchasing strategy and order planning reduce material premiums, and how quality control protects the material investment already made. Along the way, seven practical tips and eight reference tables give you tools you can apply directly to your next project.
Quick answer: Controlling material costs in plush toys manufacturing means managing the full chain from specification to finished goods — choosing fit-for-purpose fabric and filling, maximizing fabric yield through smart pattern design, simplifying accessories, consolidating material purchasing, and reducing scrap through early defect detection. The goal is not the cheapest material; it is the lowest total material cost per sellable toy.
Why Does Materials Cost Dominate Plush Toy Manufacturing Budgets?
Materials cost dominates plush toy manufacturing budgets because a plush toy is a material-intensive, labor-moderate product. Unlike electronics, where value is concentrated in a few high-cost components, a plush toy is built from many inexpensive inputs that add up quickly — and because most of them are consumed in volume, small per-unit differences multiply across thousands of pieces. In most custom plush projects, materials represent roughly 40 to 60 percent of the factory’s cost of goods, with labor, overhead, and margin sharing the remainder.
Materials cost control in plush toy manufacturing refers to the set of specification, design, purchasing, and quality practices that reduce the amount and unit price of material consumed per finished toy, while keeping safety, appearance, and durability at the level the target market requires. It is a different discipline from simply negotiating a lower unit price, because it addresses quantity as well as price — and quantity is where most hidden losses occur.
Typical Cost Structure of a Custom Plush Toy
| Cost Component | Typical Share of Unit Cost | How Controllable Is It? | Primary Control Lever |
|---|---|---|---|
| Outer fabric | 20%–30% | High | Fabric selection, pattern efficiency, yield |
| Filling (PP cotton and similar) | 5%–10% | Medium | Fill weight specification, density control |
| Accessories (eyes, noses, ribbons, embroidery) | 4%–10% | High | Design simplification, standard components |
| Thread, labels, hang tags | 2%–4% | Medium | Standardization, consolidated sourcing |
| Packaging | 5%–12% | High | Pack format, material grade, print complexity |
| Labor | 15%–25% | Medium | Construction complexity, efficiency |
| Overhead and margin | 10%–20% | Low to medium | Volume, relationship, payment terms |
What the table shows is that the four most controllable categories — outer fabric, accessories, packaging and filling — collectively represent a third to a half of unit cost. That is where a disciplined buyer should focus first, because a five percent improvement across these categories produces a larger saving than an aggressive negotiation on overhead or margin.
Where Materials Cost Quietly Leaks Out
Materials cost rarely rises because of one dramatic mistake. It rises through small, repeated leaks: a fabric specified with a higher pile than the design needs, a pattern that leaves 18 percent of every roll on the cutting-room floor, filling weight that creeps up with each production batch, an accessory that is custom-made when a standard part would do, and a defect rate that quietly writes off one toy in twenty. Each leak looks minor in isolation. Together, they can add 15 to 25 percent to the true materials cost of a project.
The leaks are easiest to see when you compare the material cost a quotation assumes with the material cost the factory actually consumes. A quotation may assume 88 percent fabric utilization and 3 percent scrap; if actual utilization is 78 percent and scrap is 7 percent, the real material cost per sellable unit is materially higher than the quoted figure — and somebody absorbs the difference, either the factory through reduced margin (which it will try to recover) or the buyer through change requests and price adjustments.
Understanding these leaks matters because it changes the question from “how do I get a lower price?” to “where is material being wasted, and who controls it?” That reframing is the foundation of every tip and tactic in the rest of this guide.
Which Plush Toy Materials Drive the Most Cost?
The plush toy materials that drive the most cost are outer fabric, packaging, accessories, and filling — in that order for most product types. Understanding the relative weight of each category, and the factors that make its price move, tells you where to spend your specification and negotiation effort. A buyer who treats every material as equally important will spread attention thinly; a buyer who ranks them by cost impact will concentrate effort where it pays.
Outer fabric is usually the single largest material line because it is both the most visible component and the most variable. The price of plush fabric depends on fiber type, pile height, weight per square meter, dyeing complexity, finishing treatments, and roll width. A short-pile polyester plush may cost a fraction of a long-pile faux fur or a specialty printed minky, and the gap between them can easily be two to four times per meter. Because a typical plush toy consumes anywhere from a quarter to well over a meter of fabric depending on size, that gap becomes a meaningful number at scale.

Ranking of Plush Toy Material Categories by Cost Influence
| Rank | Material Category | Main Price Drivers | Typical Optimization Opportunity |
|---|---|---|---|
| 1 | Outer fabric | Fiber, pile height, weight, finish, roll width | Fit-for-purpose fabric choice; improved yield |
| 2 | Packaging | Board grade, print coverage, inserts, window film | Simplified structure; fewer print colors |
| 3 | Accessories | Custom vs. standard, safety hardware, finish | Standard parts; fewer components per toy |
| 4 | Filling | Fiber grade, silicone treatment, fill weight | Right-sized fill weight; blended fill where suitable |
| 5 | Thread and trims | Thread type, ribbon width, label material | Standard colors; consolidated purchasing |
| 6 | Labels and hang tags | Material, print method, quantity | Standardized formats across product lines |
Why Cheapest per Meter Is Not Cheapest per Toy
One of the most common mistakes in plush toy sourcing is comparing fabric on price per meter alone. The real figure that matters is fabric cost per finished toy, which depends on how many toys can be cut from a meter after accounting for waste. A fabric that costs 12 percent more per meter but yields 15 percent more toys per roll is the cheaper option; a fabric that looks inexpensive but has a narrow usable width, directional pile that restricts pattern rotation, or inconsistent shade that forces extra cutting caution may cost more per toy than a pricier alternative.
The same logic applies to filling and accessories. A cheaper filling that compresses and requires heavier fill weights to achieve the same loft may end up costing more per toy than a slightly better grade used in smaller quantities. A cheaper eye that fails pull tests creates rework and retesting costs that dwarf the initial saving. Evaluating materials on a cost-per-sellable-toy basis — rather than cost per unit of purchase — is the single most important mindset shift in materials cost control.
Tip: Evaluate Every Material on Cost per Finished Toy, Not Price per Unit of Purchase
Before approving any material, convert its price into cost per finished toy. For fabric, divide the price per meter by the number of toys achievable per meter after waste. For filling, multiply price per kilogram by the grams used per toy. For accessories, add the per-piece price to any assembly time or failure rate the part introduces. Build a simple bill-of-materials sheet listing each component, its consumption per toy, its unit price, and its resulting cost per toy. Ask every supplier to fill in the same sheet. This single habit exposes false bargains immediately and gives you a factual basis for comparing alternatives, because it replaces headline prices with the number that actually determines your margin: what each sellable toy costs in materials.
How Does Fabric Selection Affect Materials Cost in Plush Toys?
Fabric selection affects materials cost in plush toys more than any other single decision, because outer fabric typically represents the largest material line and varies widely in price. The choice of fiber, pile height, weight, and finish determines not only the price per meter but also how efficiently the fabric cuts, how it behaves during sewing, and how much of it survives into the finished product. Selecting fabric well means matching the material to the design’s real needs rather than defaulting to the most luxurious option.
Fit-for-purpose fabric selection starts with the product’s market position and use case. A promotional plush distributed at events does not need the same hand-feel as a premium collectible sold through boutique retail, and a pillow-style plush used for decoration does not face the same wash and wear demands as a child’s sleeping companion. Defining the target tier before choosing fabric prevents both over-specification, which wastes money, and under-specification, which damages the brand.
Common Plush Fabric Types and Relative Cost Considerations
| Fabric Type | Typical Feel | Relative Cost Level | Cost Considerations |
|---|---|---|---|
| Short-pile polyester plush | Smooth, light, versatile | Low | Widely available; good yield; ideal for promotional and mass-market toys |
| Velboa | Dense, flat, uniform | Low to medium | Stable cutting behavior; limited softness compared with minky |
| Minky (dot or smooth) | Very soft, stretchy | Medium | Stretch can complicate cutting and sewing; strong perceived value |
| Long-pile faux fur | Fluffy, realistic | Medium to high | Directional pile reduces layout flexibility; shedding increases cleanup |
| Printed or jacquard plush | Patterned, detailed | High | Print or weave setup costs; higher minimums; waste from pattern matching |
| Specialty textures (sherpa, chenille, velvet) | Distinctive surface | Medium to high | Limited supplier choice; price premiums for small volumes |
Pile Height, Weight and Roll Width
Beyond fabric type, three technical specifications strongly influence cost. Pile height determines how much fiber is used per square meter, so taller piles cost more and also tend to produce more cutting waste because directional pile restricts how pieces can be arranged. Fabric weight, measured in grams per square meter, correlates directly with fiber consumption and therefore price; specifying a heavier fabric than the design needs adds cost without adding visible value. Roll width affects yield: a wider usable width generally allows more efficient nesting of pattern pieces, particularly for larger toys, and can improve utilization by several percentage points.
These specifications should be written into the material sheet explicitly, not left to the supplier’s discretion. When a buyer specifies “soft plush fabric,” the supplier chooses the grade that suits its margin. When a buyer specifies fiber type, pile height, weight range, and minimum usable width, quotations become directly comparable, and the buyer controls the cost drivers instead of the supplier.
Using Fabric Tiers Within a Product Line
A practical strategy for controlling fabric cost across a product line is tiering. Reserve premium fabrics for hero items and hero zones — a collectible’s face panel or a signature character’s belly — while using standard-grade fabric for the rest of the body where the difference is imperceptible to the customer. Contrast panels in a lower-cost fabric, for example, can reduce premium material consumption by 30 to 50 percent on a given design while preserving the visual impact that drives purchase decisions.
Tip: Write Fabric Specifications as Measurable Parameters, Not Descriptions
Replace vague descriptions such as “super soft plush” with measurable parameters: fiber composition, pile height in millimeters, weight in grams per square meter, minimum usable roll width, and acceptable shade tolerance against an approved swatch. Attach a physical reference swatch to the specification and require every supplier to quote against it. Measurable specifications prevent quiet downgrades during bulk production, make quotations genuinely comparable, and give you a clear basis for rejecting out-of-spec fabric on arrival. They also let you test whether a lower-cost alternative can meet the same parameters, which is often the fastest route to a legitimate saving. Parameters turn fabric from a subjective choice into a controllable cost variable.
How Do Pattern Design and Cutting Efficiency Reduce Fabric Waste?
Pattern design and cutting efficiency reduce fabric waste by increasing the proportion of each fabric roll that ends up inside finished toys rather than in the offcut bin. This proportion is called fabric utilization or marker efficiency, and it is one of the most powerful and least visible drivers of plush toy materials cost. A project cutting at 90 percent utilization consumes about 15 percent less fabric than the same project cutting at 78 percent — a difference large enough to outweigh most negotiated price reductions.
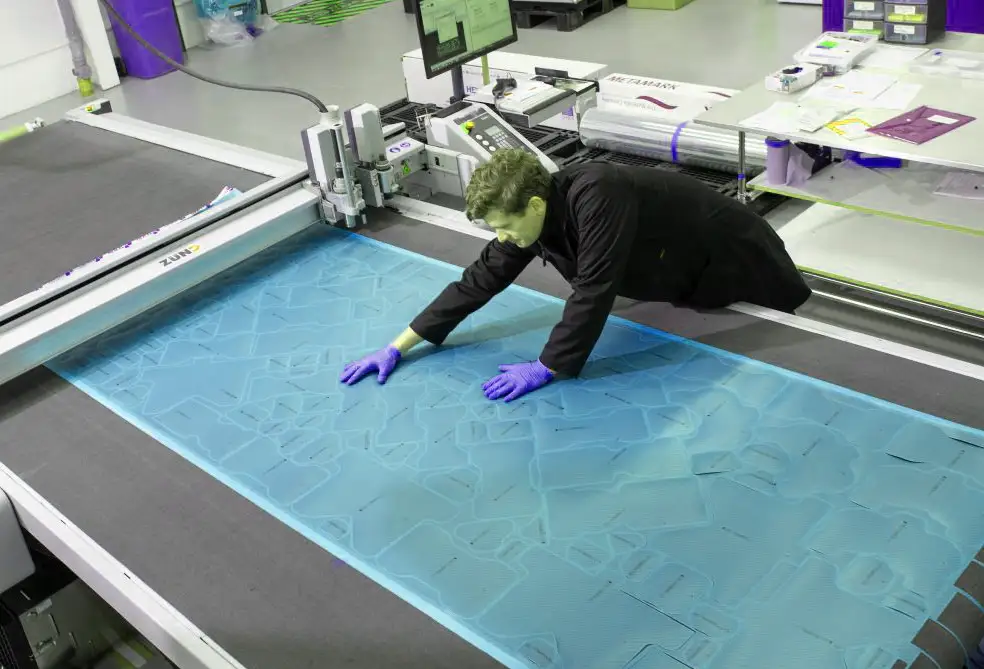
Fabric utilization is influenced by three factors: the shape and number of pattern pieces, the pile direction constraints of the fabric, and the skill of the pattern maker or the software used to nest pieces on the marker. Curved, irregular pieces such as ears, limbs, and head gussets leave gaps when arranged on a rectangular fabric width, and those gaps are the source of most waste. Good pattern design anticipates this by splitting, merging, or reshaping pieces so they nest together with less dead space, without changing the finished toy’s appearance.
Fabric Utilization Benchmarks and Their Effect on Material Cost
| Utilization Level | Typical Situation | Fabric Needed per 1,000 Toys (Index) | Cost Implication |
|---|---|---|---|
| Below 75% | Manual layout, complex pieces, rigid pile direction | 133 | Significant waste; investigate pattern and layout |
| 75%–82% | Experienced manual marker with limited optimization | 122–133 | Common baseline for custom designs |
| 82%–88% | Software-assisted nesting with pattern adjustments | 114–122 | Good performance for most plush toys |
| 88%–92% | Optimized pattern design, flexible fabric, efficient layout | 109–114 | Strong performance; achievable on simpler shapes |
| Above 92% | Simple geometric pieces, multi-size nesting | Below 109 | Excellent; uncommon on organic character shapes |
The index in the table assumes 100 represents the theoretical fabric area contained in the finished pieces. A utilization level of 82 percent therefore means 122 units of fabric are purchased for every 100 units that appear in the toy — and the extra 22 units are pure cost. Reducing that gap by even five percentage points on a high-volume program produces substantial savings.
Digital Pattern Making and Marker Optimization
Digital pattern making allows pieces to be adjusted, mirrored, and nested with software that tests thousands of arrangements in seconds. Compared with manual layout, it commonly improves utilization by three to six percentage points, particularly on designs with many small pieces. Software also makes it easy to test the effect of small design changes — for example, trimming an ear by two millimeters or splitting a body panel — on overall fabric consumption before a single meter is cut.
Buyers do not need to operate the software themselves, but they can ask the right questions. What utilization does the marker achieve on this design? What would it be with a minor pattern revision? Has the factory benchmarked this against similar projects? Factories that track marker efficiency as a metric tend to control it; factories that cannot answer the question usually are not measuring it.
Cutting Method, Layering and Offcut Reuse
Cutting method influences both accuracy and waste. Die cutting is efficient for high-volume, stable shapes and produces consistent pieces, but requires tooling that only pays off at sufficient quantity. Computerized cutting suits mid-volume and complex designs because it needs no dies and can nest flexibly. Manual cutting from paper patterns remains common for small runs but typically yields the lowest utilization and the highest variation between pieces.
Tip: Ask for the Marker Efficiency Figure Before Approving the Quotation
Request the fabric utilization percentage the factory assumed when calculating the quotation, and ask how it was derived — from an actual marker for your pattern or from a generic estimate. If the figure is below 80 percent for a standard character shape, ask whether pattern adjustments could raise it. Request a short written commitment on utilization for bulk production, or at minimum a clause that allows a price review if actual consumption differs significantly. Even a modest improvement matters: moving from 80 to 86 percent utilization reduces fabric purchased by about 7 percent. Buyers who ask this single question often discover that quoted material costs were padded with generous waste allowances that never needed to exist.
How Can Filling and Accessory Choices Lower Materials Cost Without Compromising Quality?
Filling and accessory choices can lower materials cost without compromising quality when they are specified to match the product’s actual function, safety requirements, and market tier rather than defaulting to higher-cost options. Together, filling and accessories typically account for 10 to 20 percent of unit cost, and both categories offer opportunities to reduce cost through standardization, right-sizing and smarter component selection — provided safety requirements are never traded away.
Filling cost is driven by two variables: the price per kilogram of the fiber and the weight used per toy. The fiber grade affects loft, resilience, and shape retention. Higher-grade fibers recover better after compression and feel softer, which can justify a premium on hero products; standard-grade fibers are adequate for many promotional and mass-market items. The weight variable is equally important and often neglected: if production operators are free to add extra filling to correct shape or firmness, average fill weight drifts upward, and so does cost.

Filling Options and Their Cost and Performance Trade-Offs
| Filling Option | Relative Cost | Performance Characteristics | Best Use Case |
|---|---|---|---|
| Standard PP cotton | Low | Adequate loft; moderate resilience | Promotional and value-tier plush |
| High-loft siliconized PP cotton | Medium | Soft feel; strong shape recovery | Retail and gift-tier plush |
| Recycled polyester fiber | Medium | Comparable feel; sustainability positioning | Brands with environmental claims |
| Blended fill (fiber with foam or pellets in selected zones) | Low to medium | Weight and structure in specific areas | Weighted, seated or posed designs |
| Memory foam or molded inserts | High | Defined structure; slow recovery | Specialty cushions and premium items |
Controlling Fill Weight at the Production Line
Fill weight control is a straightforward discipline that pays for itself quickly. The approach is to establish a target fill weight with an acceptable tolerance during sample approval, record it on the production sheet, and weigh a sample of filled bodies at regular intervals on the line. A tolerance of plus or minus three to five percent is typical. Because filling is a bulk material, a two-gram overfill on a 60-gram toy is more than three percent of filling cost — and across a 20,000-piece order, that adds up to forty kilograms of fiber that no customer can see.
Accessories: Standard Components, Fewer Parts, Safer Choices
Accessories — safety eyes, noses, buttons, ribbons, bells, zippers, embroidery and printed details — contribute to charm and brand character, but each addition raises cost, assembly time and risk. Standard catalog components generally cost less and carry shorter lead times than custom-made ones, which usually require tooling and higher minimums. Where a custom accessory is part of the brand identity, it is worth the investment; where it is a minor detail, a standard alternative often looks nearly identical at a fraction of the cost.
Embroidery can replace several types of hard accessories. Embroidered eyes, noses, and mouths are cheaper in many cases, eliminate choking-hazard components for young children, and avoid pull-test failures — though dense embroidery adds machine time, so the comparison should be made on actual cost rather than assumption. Safety remains non-negotiable: whichever option is chosen must meet the standards of the destination market, and components for children under three must be designed to resist the force tests required by those standards.
Tip: Fix a Target Fill Weight and Audit It on the Line
During sample approval, weigh the approved sample’s filling and record the figure as the target fill weight, with a tolerance of roughly plus or minus four percent. Add this target to the production specification and ask the factory to weigh at least five filled bodies per batch before final closing, logging the results. Pair this with an accessory review: list every non-fabric component on the design and ask whether it adds visible value to the customer, or whether a standard part or embroidery would deliver the same effect. Together, these two steps typically recover one to three percent of unit cost, with no impact on appearance, because they remove invisible excess rather than visible features.
How Do Order Quantity, Purchasing Strategy and Supplier Management Cut Materials Cost?
Order quantity, purchasing strategy, and supplier management cut materials cost by reducing the premium paid on small, fragmented, or last-minute material purchases. Fabric mills, filling suppliers and accessory vendors all offer better pricing at higher volumes, and their minimum order quantities often determine whether a custom material is economical at all. Buyers who understand how upstream minimums work can structure their orders — or their product lines — to reach better pricing tiers without overcommitting inventory.
Plush fabric is typically sold in rolls, and custom-dyed or custom-printed fabric carries minimums that may be several hundred meters per color. A small order that requires a custom color may therefore carry a high effective price per toy, because the factory either buys more fabric than needed or pays a premium for a small production run at the mill. Choosing a color from the mill’s existing range, or consolidating colors across several designs so that one fabric order serves multiple products, can remove that premium entirely.
Purchasing Strategies for Reducing Plush Toy Materials Cost
| Strategy | How It Works | Typical Benefit | Watch-Out |
|---|---|---|---|
| Use stock colors and existing fabric ranges | Select from mill-available shades instead of custom dyeing | Avoids dye minimums; shorter lead time | Limited color matching to brand palette |
| Consolidate fabric across designs | Use the same base fabric for multiple toys in a collection | Reaches volume tiers; reduces leftover rolls | Requires design coordination |
| Combine orders into a single production window | Place related SKUs together | Better material pricing; efficient scheduling | Requires forecasting discipline |
| Standardize accessories | Use the same eyes, noses and labels across the range | Larger component batches; lower unit price | May limit design differentiation |
| Plan material orders ahead of peak season | Secure fabric and trims before demand surges | Avoids rush premiums and shortages | Ties up cash earlier |
| Agree price validity and adjustment rules | Define how raw material swings affect price | Protects against surprise increases | Needs clear reference indices or evidence |
Managing Raw Material Price Fluctuation
Polyester fiber prices follow petrochemical markets and can move meaningfully over a few months. Plush fabric and filling prices therefore carry some uncertainty that neither buyer nor factory can eliminate. What can be done is to manage the exposure: agree on a quotation validity period, define how long fabric prices are held after order confirmation, and set transparent rules for price adjustment if raw material costs move beyond a defined threshold. A clear, symmetrical mechanism — in which prices can fall as well as rise — protects both parties and avoids the arguments that arise when increases are announced without evidence.

Tip: Consolidate Materials Across Your Collection Before You Place Orders
Before finalizing designs for a new collection, review the full range and look for opportunities to share materials: the same base fabric in different colors from one mill, the same safety eyes across multiple characters, the same label format on every item, and the same carton size for packing. Present the consolidated material list to the factory and ask for revised pricing based on combined quantities. Sharing a material across four designs at 1,000 pieces each is often cheaper than buying four separate materials at 1,000 pieces each, because the mill and component supplier see a single 4,000-piece commitment. This approach costs nothing but planning time and frequently delivers one of the largest single reductions in material premiums.
How Do Design Simplification and Value Engineering Reduce Plush Toy Materials Cost?
Design simplification and value engineering reduce plush toy materials cost by removing material, parts, and processes that add expense without adding perceived value. Value engineering is the systematic review of a design to deliver the same function and appeal at lower cost. In plush toy manufacturing, it means asking, for every panel, accessory, and finishing detail, whether the customer would notice if it were simplified — and if the answer is no, simplifying it.
The most effective time to apply value engineering is during sample development, before the pattern is locked and before materials are purchased. Changes at this stage cost almost nothing, because only a sample needs to be remade. The same change after bulk fabric has been ordered may be impossible or expensive. Many buyers treat sampling as a purely aesthetic approval step; treating it as a cost-engineering step as well is one of the most valuable adjustments a buyer can make.
Design Features and Their Effect on Material Consumption and Cost
| Design Feature | Material Impact | Simplification Option | Typical Saving Potential |
|---|---|---|---|
| Many small body panels | More seams, more trim loss, more cutting waste | Merge panels where shape allows | 2%–5% of fabric cost |
| Oversized limbs or head | Higher fabric and fill consumption | Reduce proportions by small increments | 3%–8% of fabric and fill |
| Multi-color patchwork | Multiple fabrics, higher minimums, more offcuts | Use printing or embroidery for details | Varies by volume |
| Long-pile fur with intricate cutting | High fabric cost; directional waste | Use medium pile; limit fur to key areas | 5%–12% of fabric cost |
| Detailed embroidery everywhere | Thread, stabilizer, machine time | Concentrate embroidery on face or logo | 1%–4% of unit cost |
| Hidden internal components | Added parts that customers never see | Review necessity; replace with simpler support | 1%–3% of unit cost |
Size Optimization and the Cube-Law Effect
Plush toy size has a nonlinear effect on materials cost. Fabric area scales roughly with the square of a toy’s linear dimensions, while filling volume scales roughly with the cube. A toy that is ten percent taller than another of the same design therefore uses about 21 percent more fabric and about 33 percent more filling. This means a small size reduction — from 30 centimeters to 28, for example — can lower materials cost noticeably, especially for filling-intensive designs, while remaining barely perceptible to the customer.
Size optimization is particularly useful when a toy sits just above a pricing threshold, a shipping carton size, or a retail shelf constraint. A small reduction can bring the product into a more economical packaging format or allow more units per carton, lowering both material and logistics cost simultaneously.
Packaging as a Materials Cost Lever
Packaging is often treated as an afterthought, yet it can account for 5 to 12 percent of unit cost, and in giftable or retail-ready formats even more. Over-engineered packaging — multi-layer rigid boxes, magnetic closures, custom inserts, full-coverage printing, window films — adds cost that customers may not value in proportion. A well-designed simple carton or poly bag with a quality hang tag can protect the product and present it attractively at a fraction of the cost of elaborate alternatives.
Packaging optimization is not about being cheap; it is about matching the packaging to the sales channel. E-commerce items shipped in outer cartons need protection and efficient dimensions, not shelf appeal. Retail items need visual impact at the point of sale. Promotional items often need only a polybag and a label. Specifying packaging by channel rather than by habit removes unnecessary cost from channels that do not need it.

Tip: Run a Value-Engineering Review During Sampling, Not After
When the first sample arrives, review it with two questions: what could be removed without the customer noticing, and what could be simplified without changing the look? Walk through every panel, accessory, embroidery area, and packaging component. Ask the factory to estimate the material savings from each potential simplification, then decide which to adopt before the second sample is produced. Request the same review on packaging, comparing the proposed structure against a simpler alternative using a drop test and a cost estimate. Because changes at the sampling stage affect only a prototype, they cost little; the same changes after bulk fabric purchase may be impossible. This single review often identifies savings of three to eight percent of unit cost that would otherwise remain locked in for the life of the product.
How Does Quality Control Protect Your Materials Investment?
Quality control protects your materials investment by catching defects early, when only a small amount of material has been consumed, rather than late, when a finished toy has absorbed fabric, filling, accessories, labor, and packaging. Every rejected toy is a total loss of its material content, and the later in the process a defect is found, the more material is lost with it. Effective quality control is therefore a materials cost control tool, not just a compliance requirement.
The cost of a defect rises sharply as the product advances. A fabric flaw caught during incoming inspection costs only the flawed meters. The same flaw caught after cutting costs the cut pieces; after sewing, it costs the sewn toy; after packing, it costs the toy plus its packaging. Establishing inspection checkpoints at incoming materials, after cutting, after sewing, after filling, and at final packing reduces the average cost per defect by catching problems at the cheapest point.
Inspection Checkpoints and the Material Value at Risk
| Checkpoint | What Is Checked | Material Value at Risk If Defect Missed | Typical Action |
|---|---|---|---|
| Incoming fabric | Shade, pile consistency, flaws, width, weight | Fabric only (lowest) | Reject or claim; adjust marker around flaws |
| After cutting | Piece accuracy, matching, pile direction | Fabric plus cutting labor | Recut only affected pieces |
| After sewing | Seam strength, symmetry, accessory attachment | Fabric, trims, sewing labor | Repair seams; remove failed units |
| After filling | Fill weight, shape, lumps | Fabric, trims, filling, labor | Refill or correct; adjust operator practice |
| Final inspection | Appearance, safety checks, metal detection, labeling | Complete toy (highest) | Rework or segregate before packing |
| Pre-shipment audit | Carton counts, packaging, sampling plan | Complete toy plus packaging and freight | Hold shipment until corrected |
Reducing Scrap Through Process Discipline
Scrap reduction is mostly about process discipline rather than inspection alone. Clear work instructions, trained operators, approved production samples at each workstation, and feedback loops that show operators their own defect rates all reduce scrap before inspectors need to find it. A factory that tracks defects by cause — mis-cut pieces, seam failures, eye attachment problems, stains — can correct the underlying process, while a factory that only counts rejects cannot.
Buyers can support this by agreeing on acceptable defect levels and sampling plans in advance, sharing photographs of recurring problems, and encouraging corrective action rather than merely rejecting goods. Reducing a defect rate from six percent to three percent saves three percent of total materials cost on the order, which is equivalent to a meaningful reduction in unit price without any price negotiation at all.
Tip: Track Scrap and Defect Rates by Production Stage and Review Them Every Order
Ask the factory to report scrap and defect rates by stage — incoming fabric, cutting, sewing, filling, and final packing — rather than a single total figure. Compare these numbers across orders and set improvement targets for the stages with the highest material value at risk. If cutting scrap is high, revisit marker efficiency; if sewing defects are high, review operator training and work instructions; if final-stage rejects are high, tighten earlier inspection checkpoints. Share targets openly with the factory and treat the data as a joint improvement tool, not a punishment mechanism. Stage-level data converts quality from a pass-or-fail event into a continuous cost control process, and it makes hidden material losses visible so they can be managed.
How to Build a Materials Cost Control Plan for Your Plush Toy Project?
A materials cost control plan is a simple, documented framework that assigns targets, owners and review points to each material category in a plush toy project. It converts the individual tactics described in this guide into a repeatable process that can be applied to every new design. The plan does not need to be complex; a one-page sheet reviewed at each project milestone is usually enough to keep material costs visible and under control.
The plan works best when it follows the project timeline. At the design stage, the focus is specification and simplification. At the sampling stage, it shifts to yield, fill weight, and accessory decisions. At the ordering stage, it covers purchasing strategy, consolidation, and price validity. During production, it centers on utilization, scrap, and quality checkpoints. After shipment, it closes the loop by comparing planned and actual material consumption so that the next project starts with better data.

Conclusion
Controlling material costs in plush toys manufacturing is not a matter of finding the cheapest fabric or pushing a supplier to the lowest possible price. It is a disciplined process that begins with specification, continues through design and sampling, is shaped by purchasing strategy, and is protected by quality control. Each stage offers practical opportunities to reduce waste, avoid over-specification, and keep every unit of material productive.
The seven tips in this guide — evaluating materials on cost per finished toy, writing measurable fabric specifications, asking for marker efficiency, fixing fill weight targets, consolidating materials across a collection, running value-engineering reviews during sampling, and tracking scrap by stage — work together. None requires special technology, and all can be started on the next project. Buyers who apply them consistently typically find that material costs fall by a meaningful margin while product quality holds steady or improves, because the savings come from eliminating waste rather than from compromising the product.
FAQ
Q1: What percentage of plush toy cost is materials, and how much can realistically be saved?
Materials commonly represent about 40 to 60 percent of the factory cost of a custom plush toy, with outer fabric as the largest single component. Realistic savings depend on how much avoidable waste exists in the starting point, but buyers who systematically improve fabric yield, right-size filling, simplify accessories, and reduce scrap commonly achieve reductions of 8 to 15 percent in total material cost, and sometimes more on first-time projects where specifications were loosely defined. These savings come from efficiency, not quality reduction, so they are repeatable and durable.
Q2: Is it better to choose a cheaper fabric or improve fabric utilization to reduce cost?
Both can help, but improving utilization is often the safer first step because it reduces cost without changing how the product looks or feels. A cheaper fabric may alter hand-feel, color depth, or durability, which can affect customer perception and reviews. Improving utilization from 80 to 88 percent, for instance, cuts fabric purchased by roughly nine percent while leaving the finished toy unchanged. Where a cheaper fabric is considered, test it against the approved sample and confirm that it meets the same measurable parameters before switching.
Q3: How does order quantity affect plush toy materials cost?
Order quantity affects materials cost because mills and component suppliers set minimums and price tiers based on volume. Larger orders reach better pricing tiers and spread fixed costs such as dye setup, printing setup, and tooling over more units. Small orders, especially those requiring custom colors or custom accessories, often carry higher effective prices per toy. Consolidating several designs onto shared fabrics and components can reach better tiers without increasing the quantity of any single design, which is often the most practical solution for smaller buyers.
Q4: Can filling be reduced to save money without affecting safety?
Filling can be optimized, but it should be done through controlled specification rather than ad hoc reduction. Establish a target fill weight at sample approval, set a tolerance, and audit it during production. Reducing filling below the amount needed for shape and seam stress can create soft, collapsed products and put extra strain on seams, which may affect safety performance. The objective is to eliminate overfilling, not to underfill. Any change to fill weight should be confirmed through sample review and, where relevant, repeated safety testing.
Q5: How can small or first-time buyers control materials cost without large volumes?
Small buyers can control materials cost by choosing stock fabric colors and standard accessories, keeping designs simple, limiting the number of different materials across a collection, and being specific in the specification so quotations are comparable. Using fewer, shared materials across several small designs can unlock pricing that individual designs could not. Starting with a straightforward design and building complexity in later orders also reduces early waste. Clear communication and realistic forecasts help factories plan material purchases and often lead to more favorable pricing.
Q6: How do I know if a quotation overstates material consumption?
Ask for the assumed fabric consumption per toy, the fabric utilization percentage, the fill weight, and the scrap allowance used to build the quotation. Compare these against similar products and against any benchmarks from earlier orders. A fabric utilization below 80 percent, a scrap allowance above five percent, or a fill weight noticeably higher than the approved sample is worth questioning. A transparent factory will explain its assumptions and may adjust them if you suggest pattern improvements or tighter process controls.
Q7: Does controlling materials cost mean sacrificing quality or safety?
No. Properly executed materials cost control removes waste, over-specification, and invisible excess, none of which contribute to quality. Safety-critical items — compliant fabrics, secure accessories, tested filling, proper labeling — should never be traded for savings. In practice, disciplined material control often improves quality because clearer specifications, better process discipline and stage-level inspection reduce variation and defects. The aim is to spend materials budget where it creates value for the customer and to stop spending it where it does not.