Skip to content
A finished plush toy sitting on a retail shelf looks simple — a soft outer fabric, a rounded shape, an embroidered face, a squeeze that returns instantly to form. That apparent simplicity is deceptive. Between a design sketch and a shelf-ready product sits a production sequence with more than a dozen distinct stages, each with its own tolerances, failure points, and quality checkpoints. Buyers who understand this sequence in detail make better sourcing decisions — they know what questions to ask, what a realistic timeline looks like, and where quality problems are most likely to originate.
This guide walks through the complete plush toy production process from initial design through final shipment, explaining what happens at each stage, why it matters, and what separates a well-managed production run from one that generates costly surprises. Whether you are sourcing your first custom plush toy or refining an existing supply chain, understanding this process end-to-end is the foundation of making informed decisions at every stage of development.
What Are the Main Stages of Plush Toy Production?
Plush toy production is not a single manufacturing step but a coordinated sequence of design, sourcing, sampling, and manufacturing stages that must happen in a specific order for the finished product to meet its intended specification. Skipping or compressing any stage in this sequence does not save time — it transfers risk downstream, where problems are more expensive to fix and harder to trace back to their origin.
Understanding the full sequence matters most at the moment a buyer is comparing timelines or quotations from different production partners, because a quoted timeline that appears shorter than a competitor’s may simply reflect fewer checkpoints rather than a genuinely more efficient process. A production partner who compresses sampling into a single round, skips a mid-production inspection, or treats packaging as an afterthought is not moving faster through the same process — they are removing steps that exist specifically to catch problems before they reach the buyer.
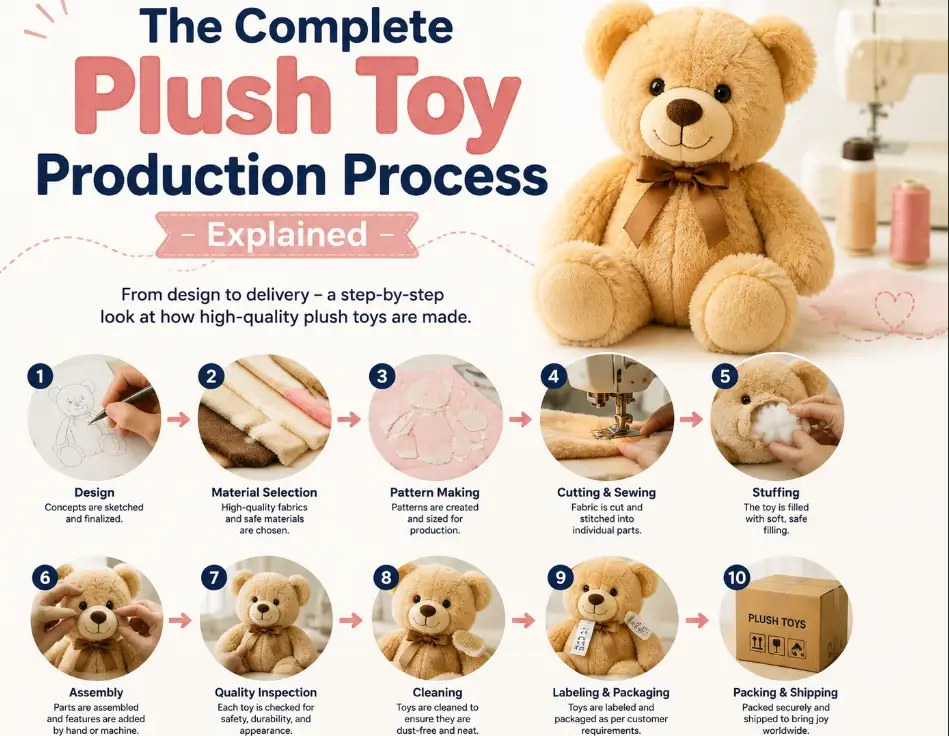
The main stages of plush toy production are design and development, material sourcing, pattern making and grading, sampling and approval, cutting, sewing and assembly, stuffing, surface decoration, quality control and safety testing, and packaging and shipping preparation. Each stage feeds directly into the next, and a weakness introduced early — an imprecise pattern, an unverified material — tends to compound rather than resolve as the product moves through subsequent stages.
Plush Toy Production Process — Stage-by-Stage Overview
| Stage | What Happens | Typical Duration | Primary Risk If Skipped |
|---|---|---|---|
| Design & Development | Concept sketches, 2D/3D renderings, technical spec sheet | 3–7 days | Ambiguous brief leads to inaccurate sample |
| Material Sourcing | Fabric, filling, and accessory selection and procurement | 3–10 days | Inconsistent hand-feel, compliance gaps |
| Pattern Making & Grading | 2D pattern pieces drafted and sized from the 3D design | 2–5 days | Distorted proportions, seam misalignment |
| Sampling & Approval | Prototype built, reviewed, revised until approved | 10–20 days (all rounds) | Bulk run replicates an unapproved design |
| Cutting | Fabric cut into pattern pieces at scale | 1–3 days per batch | Fabric waste, directional nap errors |
| Sewing & Assembly | Pieces stitched, turned, and joined into the toy body | 5–15 days depending on volume | Weak seams, safety accessory failures |
| Stuffing | Filling material added to achieve specified density | Concurrent with sewing | Inconsistent firmness and shape retention |
| Surface Decoration | Embroidery, printing, or appliqué applied | Concurrent with production | Off-register designs, color mismatch |
| QC & Safety Testing | In-line, final, and pre-shipment inspection plus lab testing | 2–10 days | Non-compliant or defective units ship |
| Packaging & Shipping Prep | Folding, bagging, cartoning, labeling, palletizing | 1–3 days | Damage in transit, retailer compliance rejection |
Tip: Ask any prospective factory to walk you through their internal production flowchart, not just their marketing description of the process. A factory that can show you a documented, stage-by-stage workflow — with named checkpoints and responsible departments — is demonstrating operational maturity that a verbal summary cannot.
How Does the Design and Development Stage Work?
Every plush toy production run begins with a design concept, but the distance between a rough concept and a manufacturable design is often underestimated. A concept sketch communicates the general idea of a character or shape; a manufacturable design specifies the exact proportions, seam placement, fabric transitions, and construction logic needed to translate a two-dimensional idea into a three-dimensional soft object that can actually be sewn, stuffed, and shipped at scale.
The design and development stage works by converting a creative concept into a complete technical package — front, side, and back views; a color specification referenced to a standard color system such as Pantone; a materials list; approximate dimensions; and construction notes describing how major elements such as limbs, ears, or accessories attach to the body. This technical package becomes the reference document that every subsequent stage of production is measured against.
Why a Technical Spec Sheet Matters More Than a Pretty Rendering
A visually polished 3D rendering can create false confidence about design readiness. Renderings communicate what a design should look like; they do not communicate how it should be built. A technical spec sheet — including seam allowances, pattern piece count, stitch type by section, filling density target, and safety accessory specifications — is what a pattern maker and sewing team actually work from. Designs that go into sampling without this documentation tend to produce first samples that miss the mark on construction details even when the overall silhouette looks correct, because the sampling team was forced to guess at specifications the rendering never addressed.
Design complexity has a direct and predictable relationship to both cost and lead time. A simple rounded body shape with minimal appendages and basic embroidery is significantly faster and cheaper to develop than a design with multiple articulated limbs, layered fabric transitions, weighted components, or fine facial detailing. Buyers evaluating a design for the first time should ask their development contact to flag which specific elements of the design add complexity — this conversation, held before sampling begins, prevents costly redesign cycles later.
How Are Materials Selected and Sourced for Plush Toy Production?
Materials account for a substantial share of both the cost and the quality outcome of a finished plush toy, which makes material selection one of the highest-leverage decisions in the entire production process. The outer fabric determines hand-feel, appearance, and durability; the filling determines shape retention and compliance; the thread, safety accessories, and any internal components determine long-term structural integrity.
Materials are selected and sourced for plush toy production by matching the design’s aesthetic and functional requirements against the technical properties of available fabric, filling, and accessory options — pile height and density for fabric, fiber grade and loft for filling, pull-test rating for safety eyes and noses — while simultaneously verifying that each material carries the compliance documentation required for the toy’s target market. This dual requirement, aesthetic fit and compliance verification, means material sourcing is not purely a design decision; it is also a regulatory one.

Key Material Categories and Selection Criteria
| Material Category | Common Options | Key Selection Criteria |
|---|---|---|
| Outer Fabric | Minky, Velboa, faux fur, short-pile plush, organic cotton | Pile height, softness, colorfastness, certification status |
| Filling | PP cotton (polyester fiberfill), memory foam beads, weighted pellets | Density grade, loft recovery, compliance test report |
| Safety Accessories | Plastic safety eyes/noses, embroidered features, shank buttons | Pull-test strength, size relative to age grading |
| Thread | Polyester core-spun, cotton-wrapped polyester | Tensile strength, colorfastness, seam durability |
| Internal Components | Sound modules, weighted inserts, articulated joints | Compliance with electronic/mechanical safety standards |
Why Fabric Pile Height and Density Matter More Than Buyers Expect
Two fabrics can look nearly identical in a photograph and feel completely different in hand. Pile height — how long the fibers stand off the fabric backing — and density — how tightly those fibers are packed — together determine softness, drape, and how well the fabric holds a sculpted shape after stuffing. A low-density, long-pile fabric feels plush but can appear matted or uneven after repeated handling; a higher-density, shorter-pile fabric holds detail and shape better but has a different tactile character. Neither option is universally correct — the right choice depends on the design’s silhouette and the product’s intended use, and requesting physical fabric swatches rather than relying on a photograph or product code is the only reliable way to evaluate this before committing to a design.
Tip: Always request physical fabric and filling swatches before finalizing a design, not just a supplier’s digital fabric catalog. Photographs cannot convey pile height, density, or hand-feel accurately, and a fabric that looks correct on screen can feel noticeably different once it reaches your hands.
The Role of Compliance Documentation in Material Sourcing
For toys destined for regulated markets, every material component that will be part of the finished product should be traceable to a supplier who can provide relevant compliance documentation — chemical test reports for fabric and filling, pull-test certificates for safety accessories, and flammability data where applicable. Sourcing materials without this documentation does not eliminate the compliance requirement; it simply postpones the point at which the gap is discovered, typically during final product testing, when correcting it costs significantly more than it would have at the sourcing stage.
What Happens During Pattern Making and Grading?
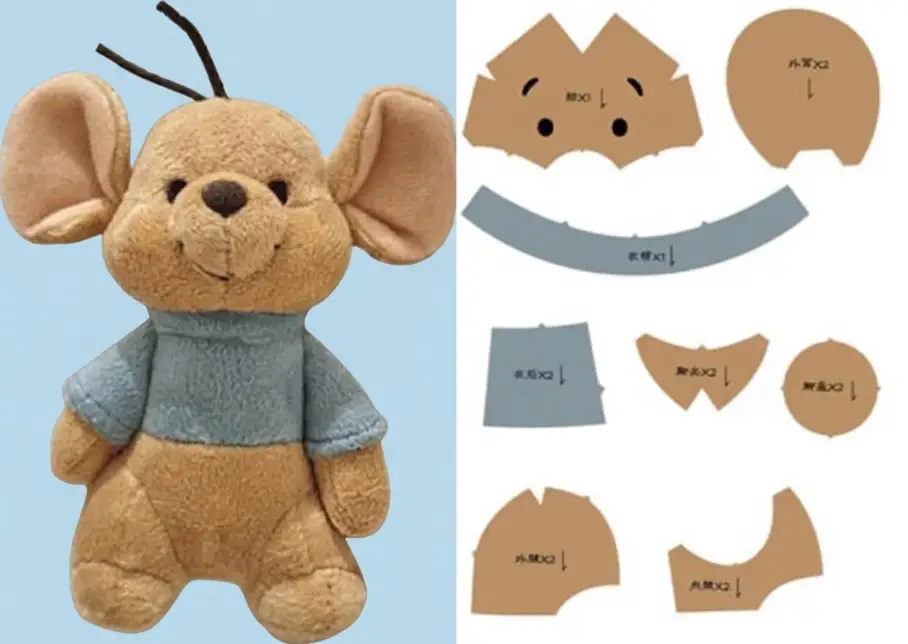
Pattern making is the technical translation step between a 3D design concept and the flat pieces of fabric that will actually be cut and sewn. This stage is often invisible to buyers because it produces no visually impressive output — just paper or digital pattern pieces — but it is one of the most technically demanding stages in the entire process, because it determines whether the finished toy will actually match the intended proportions.
Pattern making and grading work by decomposing the 3D design into individual 2D pattern pieces — body panels, limb pieces, ear or tail components — each cut with the correct curvature, seam allowance, and directional orientation so that when sewn together and stuffed, the pieces reconstruct the intended three-dimensional form. Grading then scales this master pattern up or down to produce accurate pattern sets for every size variant the product will be offered in, since simply scaling a flat image does not preserve the proportional relationships that make a design work in three dimensions.
Why Pattern Accuracy Determines Sampling Success
A skilled pattern maker can anticipate how fabric will behave once stuffed — where seams need extra ease to avoid puckering, where curves need to be adjusted to account for filling expansion, and how directional fabrics such as faux fur need to be oriented so the pile lies in a consistent direction across every panel.
An inexperienced pattern maker working from the same design brief can produce technically functional pieces that nonetheless yield a first sample with visibly asymmetrical features, puckered seams, or a silhouette that doesn’t match the intended character proportions. This is one of the most common reasons a first sample requires more revision rounds than a buyer expects — the underlying issue is not the sewing execution but the pattern the sewing team was given to work from.
How Does the Sampling Process Work Before Bulk Production?
Sampling is the stage where a design moves from technical documentation into a physical, evaluable object for the first time — and it is also the stage where the largest share of design and construction issues are identified and resolved before they can affect an entire production run. No matter how detailed the technical spec sheet, certain issues only become visible once a physical prototype exists to be examined and handled.
The sampling process works through an iterative build-review-revise cycle: the factory produces a first sample based on the approved design and materials, the buyer reviews it against the technical spec and design intent, feedback is documented and returned to the factory, and the factory produces a revised sample incorporating that feedback. This cycle repeats until the buyer signs off on a final approved sample, which then becomes the reference standard — the “golden sample” — that all bulk production units are measured against.
Types of Plush Toy Production Samples and Their Purpose
| Sample Type | Purpose | What to Evaluate |
|---|---|---|
| First (Proto) Sample | Initial physical translation of the design | Overall proportion, silhouette accuracy, fabric feel |
| Revised Sample(s) | Incorporates feedback from prior round | Whether specific corrections were properly applied |
| Pre-Production Sample | Built using bulk-production materials and processes | Consistency with what mass production will actually yield |
| Golden Sample | Final approved reference standard | Serves as the QC benchmark for the entire production run |
| Shipping/Top-of-Production Sample | Pulled from the actual bulk run before shipment | Confirms bulk output matches the golden sample |
Tip: Give sampling feedback in writing, item by item, rather than as a general verbal impression. A note such as “the left ear sits 4mm lower than the right ear; please align both ears symmetrically to the reference sketch” produces a far more accurate correction than “the face looks a little off.” Specific, documented feedback is also what allows you to verify precisely which corrections were and were not applied in the next round.
Why a Pre-Production Sample Is Worth the Extra Round
A design sample approved during early sampling rounds is often built with more hand-finishing attention than a bulk production line will apply at scale, because early samples are typically made individually by a skilled sampling technician rather than on a production line optimized for volume. A pre-production sample — built using the same materials, machinery, and workflow that bulk production will actually use — reveals whether the approved design can be replicated consistently at production speed, or whether certain details that looked fine in a hand-finished sample will be difficult to execute consistently across thousands of units. Requesting this additional sample round adds time but substantially reduces the risk of discovering a systemic quality issue only after bulk production has already begun.
How Is Fabric Cut for Plush Toy Production?
Cutting is the first stage where the approved pattern is applied at production scale, transforming rolls of fabric into the individual pieces that will become the toy’s body panels. Precision at this stage directly determines how well the finished pieces will align during sewing — a pattern piece cut even a few millimeters off-grain can produce a visibly asymmetrical or puckered finished toy, regardless of how accurate the sewing work that follows may be.
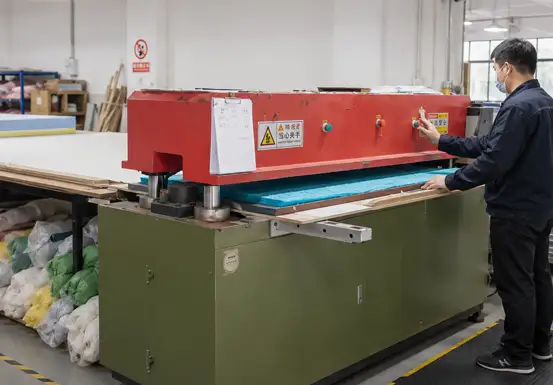
Fabric is cut for plush toy production using either manual cutting with cutting templates for smaller or highly customized runs, or computerized cutting systems that stack multiple fabric layers and cut many pattern sets simultaneously for larger volume orders — with the cutting method chosen based on order volume, fabric type, and the precision tolerance the design requires. Directional fabrics such as faux fur or velboa require particular attention during cutting, since every pattern piece must be oriented so the pile direction runs consistently across the finished toy; a mismatched pile direction between adjacent panels creates a visible color and texture inconsistency once the pieces are sewn together.
Fabric Cutting Methods Compared
| Cutting Method | Best Suited For | Key Consideration |
|---|---|---|
| Manual Die Cutting | Small runs, highly customized shapes | Requires skilled operators for consistent accuracy |
| Computerized Multi-Layer Cutting | Medium to large production volumes | Faster and more consistent, but requires precise pattern digitization |
| Laser Cutting | Fine detail work, synthetic fabrics that fray easily | Seals fabric edges but not suitable for all fiber types |
How Fabric Waste Is Minimized During Cutting
Fabric represents a significant share of material cost, which makes cutting layout efficiency a meaningful cost factor as well as a technical one. Pattern pieces are arranged on the fabric layout — a process called marker making — to minimize the gaps between pieces while still respecting directional pile requirements, since a marker that ignores fabric nap in favor of tighter piece placement will produce visibly inconsistent panels once assembled.
Experienced cutting departments typically achieve fabric utilization rates in the range of 80 to 90 percent for standard plush designs, with more complex, irregularly shaped patterns falling toward the lower end of that range. Buyers working on high-volume orders can sometimes reduce per-unit fabric cost by adjusting design elements slightly to improve how efficiently pattern pieces nest together — a conversation worth having with the factory’s pattern team before finalizing a design intended for large production volumes.
What Does the Sewing and Assembly Process Involve?
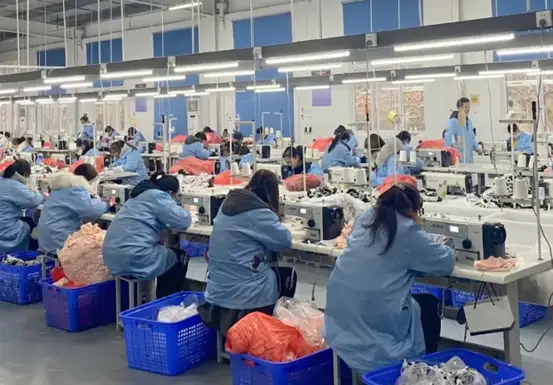
Sewing and assembly is where individual cut pieces become a recognizable three-dimensional toy body, and it is typically the most labor-intensive stage of the entire production process. This stage requires skilled operators who understand not just straight-line stitching but the sequencing logic of soft-toy construction — which seams must be sewn before the piece is turned right-side out, where openings must be left for stuffing, and how curved seams need to be clipped or notched to lie flat once turned.
The sewing and assembly process involves joining pattern pieces in a specific construction sequence — typically completing internal seams first, then joining major body sections, leaving a stuffing opening, turning the piece right-side out, and attaching safety accessories and appendages such as limbs, ears, or tails at the points specified in the pattern. Seam type and stitch density are chosen based on the stress the seam will bear in use — seams around limbs and high-manipulation areas typically require reinforced or double-stitched construction, since these are the points most likely to experience repeated stress from handling.
Why Safety Accessory Attachment Is a Critical Control Point
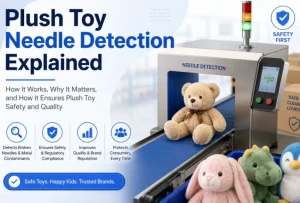
The attachment of safety eyes, noses, and other small components is one of the most scrutinized steps in the entire sewing process, because a poorly secured accessory represents a direct safety hazard if it detaches during use. Safety accessories with washer-lock backing must be secured with sufficient force and correctly seated washers, and pull-test verification — physically testing that the attached component withstands a specified pulling force without detaching — should occur as a standard step during assembly, not only during final inspection. This is a case where a control that happens too late in the process cannot fully compensate for a step that was rushed earlier.
Tip 4: Ask specifically whether safety accessories are pull-tested during the sewing stage itself, not only at final inspection. In-process pull testing catches attachment problems while the piece can still be corrected easily; discovering the same problem at final inspection means either reworking a finished unit or scrapping it entirely.
How Is Stuffing Density Controlled During Production?
Stuffing is the stage that gives a plush toy its final form, firmness, and huggable quality — and it is a stage that is easy to underestimate because it appears procedurally simple: filling material is added to a sewn shell through the stuffing opening, and the opening is then closed. In practice, achieving consistent stuffing density across an entire production run at the scale of hundreds or thousands of units requires deliberate process control, because inconsistent stuffing is one of the most common quality complaints in finished plush toys.
Stuffing density is controlled during production by specifying a target fill weight for each size and shape of toy, training stuffing operators to distribute filling evenly by hand or with weighted dispensing equipment rather than by visual judgment alone, and periodically weighing finished units against the target specification to catch drift before it affects a large batch. A toy that is under-stuffed appears flat and loses its intended shape; a toy that is over-stuffed can place excess strain on seams, increasing the likelihood of seam failure during shipping or normal use.
Why Filling Type Affects More Than Just Softness
Different filling materials behave differently under repeated compression. Standard PP cotton (polyester fiberfill) offers good loft recovery at a relatively low cost, making it the standard choice for most plush toys. Memory foam bead fillings create a different tactile experience — a more moldable, weighted feel — but require different sewing and seam reinforcement approaches because loose beads redistribute more than solid fiberfill and place different stress patterns on internal seams. Weighted fillings, often used in comfort or sensory-focused plush products, require additional attention to internal containment, since a torn inner compartment can release small weighted pellets that present a distinct safety concern separate from standard filling material.
How Stuffing Equipment Differs From Manual Filling
Larger factories often use pneumatic stuffing machines that dispense a pre-calibrated volume of filling through a nozzle inserted into the stuffing opening, which improves consistency compared to fully manual filling by hand but still requires a skilled operator to guide distribution into limbs, ears, and other narrow extremities that a machine nozzle cannot reach evenly on its own.
Most production runs use a hybrid approach — machine dispensing for the main body cavity, followed by manual hand-packing to fill extremities and achieve the final shape — and the skill of the operators performing this manual finishing step is often what separates a batch with consistent, well-shaped units from one with visible firmness variation between pieces. Buyers touring a facility or reviewing production video should look specifically at how extremities such as ears, paws, and tails are being finished, since this is where stuffing inconsistency is most likely to appear even when overall body fill weight is well controlled.
How Are Embroidery, Printing, and Surface Decoration Applied?
Facial features and surface decoration are what give a plush toy its character and personality, and this stage — whether executed through embroidery, printing, or appliqué — has an outsized effect on how the finished product is perceived, because faces are the first element most people focus on when evaluating a plush toy’s quality and appeal.
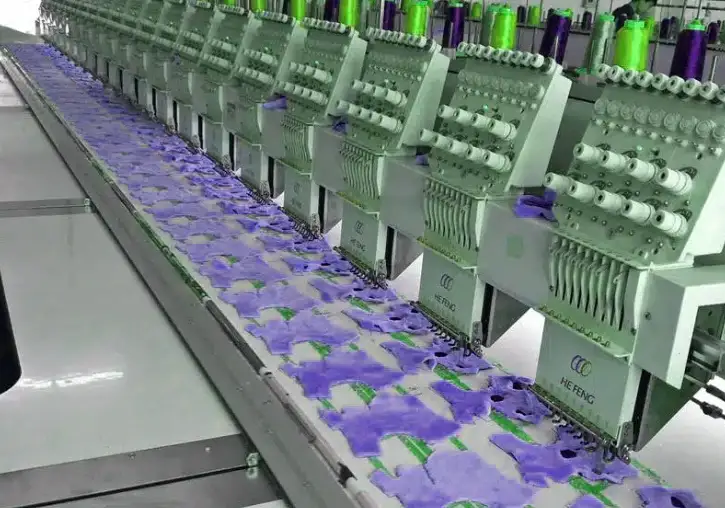
Embroidery, printing, and surface decoration are applied at a stage-appropriate point in the production sequence — typically before final assembly for flat panel pieces, since it is far easier to achieve precise, consistent placement on a flat piece of fabric than on an already-stuffed three-dimensional form — using digitized embroidery files that specify stitch type, density, and color sequence, or screen printing and heat transfer processes for designs that call for a flatter, more graphic finish rather than a raised, textured embroidered look.
Surface Decoration Methods Compared
| Decoration Method | Best For | Key Quality Factor |
|---|---|---|
| Embroidery | Facial features, logos, textured detail | Digitizing accuracy, thread tension, placement registration |
| Screen Printing | Flat graphic designs, large color areas | Color matching, ink adhesion, washability |
| Heat Transfer | Fine detail graphics, photographic-style designs | Transfer adhesion durability, edge cracking resistance |
| Appliqué | Layered fabric accents, dimensional details | Edge securing, fray prevention |
Tip: Request a digitized embroidery proof and a physical stitched-out sample before bulk production begins, not just a visual mockup of the design. Digitizing quality significantly affects how a design translates into stitches — a design that looks clean as a flat image can appear muddy or lose fine detail once it is actually embroidered, and this is only fully visible in a physical stitched sample.
What Quality Control Checkpoints Exist Throughout Production?
Quality control in plush toy manufacturing is most effective when it is distributed across multiple checkpoints throughout the production sequence rather than concentrated in a single inspection at the very end. A single final inspection can catch defective finished units, but it cannot prevent the underlying process issues that generated the defects in the first place — and by the time a problem is caught only at final inspection, the labor and material cost of the defective units has already been fully incurred.
Quality control checkpoints throughout plush toy production typically include incoming material inspection, in-process inspection during cutting and sewing, a mid-production inspection once a meaningful percentage of the order is complete, and a final random inspection before packing and shipment — with each checkpoint designed to catch a specific category of defect at the point in the process where it is cheapest and easiest to correct.
Quality Control Checkpoints in Plush Toy Production
| QC Checkpoint | Timing | What It Catches |
|---|---|---|
| Incoming Material Inspection | Before cutting begins | Fabric defects, color inconsistency, filling contamination |
| In-Process Inspection | During cutting and sewing | Seam quality, accessory attachment, stitching consistency |
| During Production Check (DUPRO) | Once 20–40% of order is complete | Systemic issues before they affect the full batch |
| Pre-Shipment Inspection (PSI) | After production, before shipment | Final random sample against AQL sampling standards |
Why AQL Sampling Is the Industry Standard for Final Inspection
Acceptable Quality Level (AQL) sampling is a statistical inspection method that examines a defined random sample size from a completed order rather than every single unit, using accepted industry standards to determine how many defects in that sample are acceptable before the entire batch is rejected or requires full re-inspection. This method is widely used because 100 percent inspection of every unit is rarely practical at production scale, and a properly designed random sample provides a statistically reliable picture of the batch’s overall quality level without the time and cost of inspecting every piece individually.
Tip: Request the specific AQL level being applied to your order — commonly AQL 2.5 for general merchandise or a tighter AQL 1.5 for higher-value or safety-sensitive products — rather than assuming a default standard is being used. The AQL level directly determines how many defective units are considered acceptable in a passed inspection, and different buyers have very different risk tolerances for this threshold.
How Is Safety Testing and Compliance Handled?
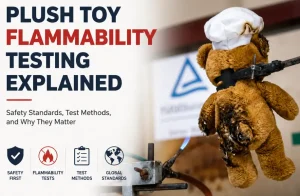
Safety testing is a distinct process from general quality control, focused specifically on verifying that a plush toy meets the regulatory requirements of its intended market rather than simply meeting the buyer’s own aesthetic and construction standards. For toys sold in the United States, this typically means testing against ASTM F963 and CPSIA requirements; for the European market, EN71 compliance is the relevant standard. Both frameworks address mechanical and physical safety — small parts, sharp points, cord and strap length — as well as chemical safety, including limits on heavy metals and restricted substances in fabric, filling, dyes, and accessory materials.
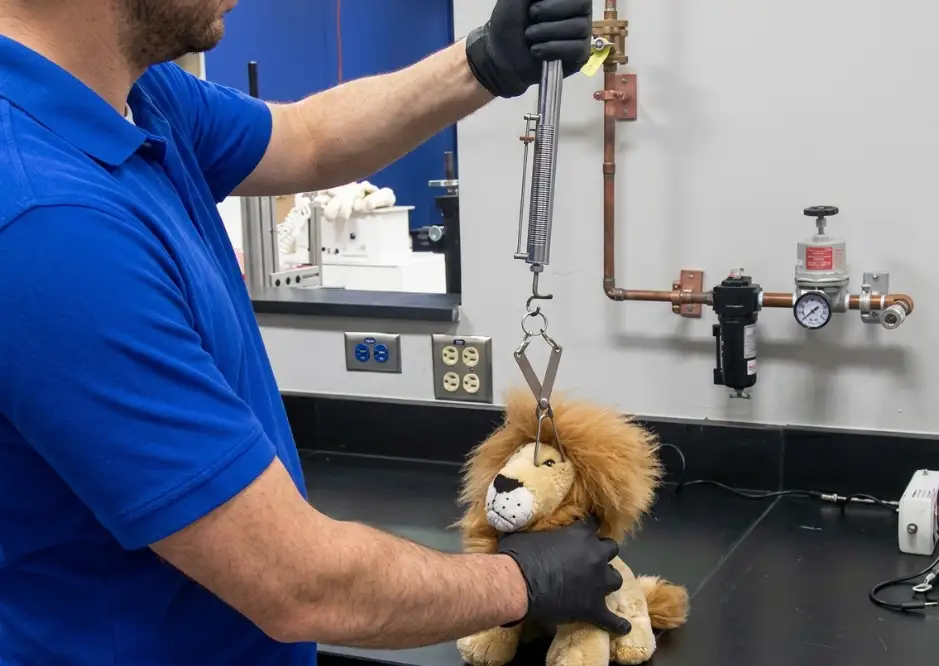
Safety testing and compliance are handled by submitting representative production samples to an accredited third-party testing laboratory, which evaluates the product against the applicable standard’s mechanical, physical, and chemical requirements and issues a test report documenting pass or fail results for each tested parameter. This testing should occur on samples that reflect the actual bulk production materials and construction — testing an early prototype built with different materials than the bulk run does not provide a valid compliance verification for the units that will actually ship.
Why Testing Timing Matters as Much as Testing Itself
A compliance test conducted too early in the development process — before materials and construction have been finalized — provides limited practical assurance, because any subsequent material substitution or construction change technically invalidates the original test result. The most reliable approach is to conduct compliance testing on the approved pre-production or golden sample, using the exact materials, accessories, and construction methods that bulk production will replicate, so that the test result accurately reflects what will actually ship to customers.
Why a Material Substitution After Testing Requires Retesting
It is not uncommon for a factory to substitute a material mid-production — a different fabric lot, an alternate filling supplier, a revised accessory source — often because of a supply shortage rather than any intent to reduce quality. However well-intentioned, any such substitution technically invalidates a compliance test report that was issued against the original material specification, because the test result applies specifically to the materials that were actually tested, not to the product category in general.
Buyers should include a contractual requirement that any material substitution be disclosed and, where the substituted material has not previously been tested, retested before the affected units ship. This is a detail that is easy to overlook in a purchase agreement, but that closes one of the more common gaps through which non-compliant units end up shipping despite an apparently valid test report on file.
How Are Finished Plush Toys Packaged and Prepared for Shipment?
Packaging is the final production stage before a plush toy leaves the factory, and it serves multiple functions simultaneously: protecting the product during transit, presenting it appropriately for its sales channel, and meeting any labeling or documentation requirements the destination market or specific retailer requires. A well-made plush toy can still arrive damaged, mislabeled, or non-compliant if packaging is treated as an afterthought rather than a planned stage of the production process.
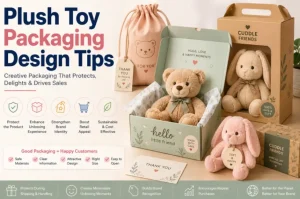
Finished plush toys are packaged and prepared for shipment by folding or shaping each unit for consistent presentation, sealing units in polybags with any required safety warnings printed on the bag itself, applying retail packaging such as headers, hang tags, or printed boxes where applicable, and then cartoning units according to a specified pack configuration before palletizing cartons for freight. Compression or vacuum packing is sometimes used for larger plush items to reduce shipping volume, though this technique requires care to avoid permanently distorting long-pile fabrics or delicate shapes.
Tip: Confirm polybag safety warning requirements early in the packaging planning process, not as a last-minute addition. Markets such as the United States require specific suffocation warning language on polybags above a defined size threshold, and packaging that omits this language can be flagged during compliance review or at customs, creating a delay that is entirely avoidable with earlier planning.
How Long Does the Entire Plush Toy Production Process Take?
Total production timeline is one of the most frequently asked questions by buyers planning a launch, and it is also one of the most commonly underestimated, because buyers often mentally account for bulk production time while overlooking the design, sampling, and pre-production stages that typically consume a comparable or even greater share of the total calendar.
The entire plush toy production process, from initial design brief to finished goods ready for shipment, typically takes eight to sixteen weeks for a custom design, depending on design complexity, the number of sampling revision rounds required, order volume, and current factory capacity utilization — with sampling and approval often representing three to five weeks of that total timeline on its own.
Typical Plush Toy Production Timeline by Phase
| Production Phase | Typical Timeline Range |
|---|---|
| Design & Technical Spec Development | 1–2 weeks |
| Material Sourcing | 1–2 weeks (often parallel with design) |
| Sampling & Revision Rounds | 3–5 weeks (1–3 rounds typical) |
| Bulk Production (Cutting Through Packaging) | 3–6 weeks, volume dependent |
| Final QC & Compliance Testing | 3–7 days |
| Shipping Preparation & Documentation | 2–4 days |
Buyers planning a launch around a fixed date — a seasonal retail window or a specific e-commerce launch — should work backward from that date using the upper end of these ranges, since sampling revisions, material lead times, and current production schedule congestion routinely push actual timelines toward the longer end of the typical range rather than the shorter one.

Conclusion
The plush toy production process is a long, technically layered sequence in which every stage depends on the quality of the work completed before it. A design brief that lacks technical specificity produces sampling delays. A material choice made without compliance verification produces testing failures. A pattern cut without attention to fabric grain produces a visibly flawed finished piece no amount of careful sewing can fully correct. Understanding this sequence — not just as a list of manufacturing steps but as a chain of dependencies — is what allows buyers to ask better questions, set realistic timelines, and recognize where a production partner’s process discipline is genuinely strong versus merely presented well.
Buyers who take the time to understand each stage of this process are better equipped to evaluate quotations, review sampling feedback meaningfully, and identify quality risks before they become expensive problems. The investment in understanding the process pays off across every order that follows, not just the first one.
FAQ
Q1: How many sampling revision rounds should a buyer expect before a design is ready for bulk production?
Most custom plush toy designs require between one and three revision rounds before reaching an approved golden sample, though this varies significantly with design complexity and the precision of the original technical spec sheet. A simple design with a clear, detailed brief may be approved after a single revision. A design with multiple appendages, fine facial detailing, or an unusual silhouette often requires two to three rounds as fit, proportion, and construction details are refined. Buyers should build a realistic sampling timeline that accounts for at least two rounds as a baseline expectation, and treat a first-round approval as a favorable outcome rather than the default assumption.
Q2: What is the difference between a proto sample and a pre-production sample, and is the extra round really necessary?
A proto sample is typically hand-built by a skilled sampling technician early in development to confirm design accuracy and proportion. A pre-production sample is built using the actual bulk production materials, machinery, and workflow the factory will use for the full order, which reveals whether the approved design can be consistently replicated at production scale rather than only by an especially skilled individual working on a single piece. The extra round adds time to the schedule but meaningfully reduces the risk of discovering, only after bulk production has started, that certain construction details do not translate reliably from a hand-finished sample to a production line — a discovery that is far more costly to correct once hundreds or thousands of units are already in process.
Q3: Why do two toys made from what appears to be the same fabric feel noticeably different in hand?
Apparent similarity in a fabric photo or product name does not guarantee equivalent pile height, density, or fiber quality. Two fabrics both marketed as “short-pile plush” can differ substantially in how tightly the fibers are packed and how the fabric drapes once sewn and stuffed, producing a noticeably different tactile result even though both fall under the same general fabric category. This is why requesting physical swatches, rather than relying on fabric names or catalog photos, is a necessary step for any buyer who wants a predictable outcome from their material selection.
Q4: At what point in the production process should safety compliance testing actually happen?
Safety compliance testing should be conducted on the approved pre-production or golden sample — built using the exact materials, accessories, and construction methods that bulk production will replicate — rather than on an early prototype that may use different or placeholder materials. Testing conducted too early in development provides a limited and potentially misleading assurance, since any subsequent change to materials or construction technically invalidates the original test result. Testing the sample that most closely mirrors what will actually ship is the only way to ensure the compliance documentation accurately reflects the finished product.
Q5: Why does stuffing density vary between units even when the same filling material is used throughout an order?
Stuffing density variation typically results from inconsistent process control rather than material variability itself. When filling is added by visual judgment alone rather than to a specified target weight, individual operators naturally introduce variation based on their own sense of “how full it should feel.” This is why factories with strong process discipline specify a target fill weight per size and shape, train operators against that specific target, and periodically weigh finished units to catch drift early. Buyers evaluating a factory’s stuffing consistency should ask specifically whether fill weight is checked by weighing samples during production, not only assessed visually or by touch.
Q6: How much of the total production timeline is typically consumed by stages other than bulk manufacturing itself?
Design, material sourcing, and sampling frequently account for four to seven weeks of an eight-to-sixteen-week total timeline — often a larger share of the calendar than the bulk manufacturing stage itself, particularly for a first custom order where no prior approved pattern or golden sample exists to shorten the process. Buyers who mentally budget time only for the bulk production phase and treat sampling as a quick formality routinely find their actual launch dates pushed later than planned. Building a realistic project timeline means giving the design and sampling phases the same deliberate scheduling attention as the manufacturing phase, not treating them as a brief prelude to the “real” production work.
Q7: If a factory substitutes a fabric or filling supplier partway through a large order, does the finished product still match what was originally approved?
Not necessarily, and this is a risk buyers should actively guard against rather than assume will not occur. A mid-order material substitution — even one driven by a genuine supply shortage rather than any intent to cut cost — can change hand-feel, colorfastness, or compliance status compared to the originally approved golden sample, and a substitution that is not disclosed may not be discovered until the buyer physically compares finished units against the approved sample. Building a contractual requirement for disclosure of any material substitution, along with a right to request updated samples or retesting when a substitution occurs, is the most reliable way to ensure that what ships matches what was actually approved, rather than a close approximation that happened to be more readily available at the time.