Skip to content
Whether you’re a toy designer, a small business owner launching a custom plush line, or a craft enthusiast curious about the industry, understanding how plush toy patterns are made is the foundation of everything. From the first pencil sketch to a factory-ready tech pack, pattern creation is both a craft and a science — blending artistic vision with precise engineering.

What Is a Plush Toy Pattern?
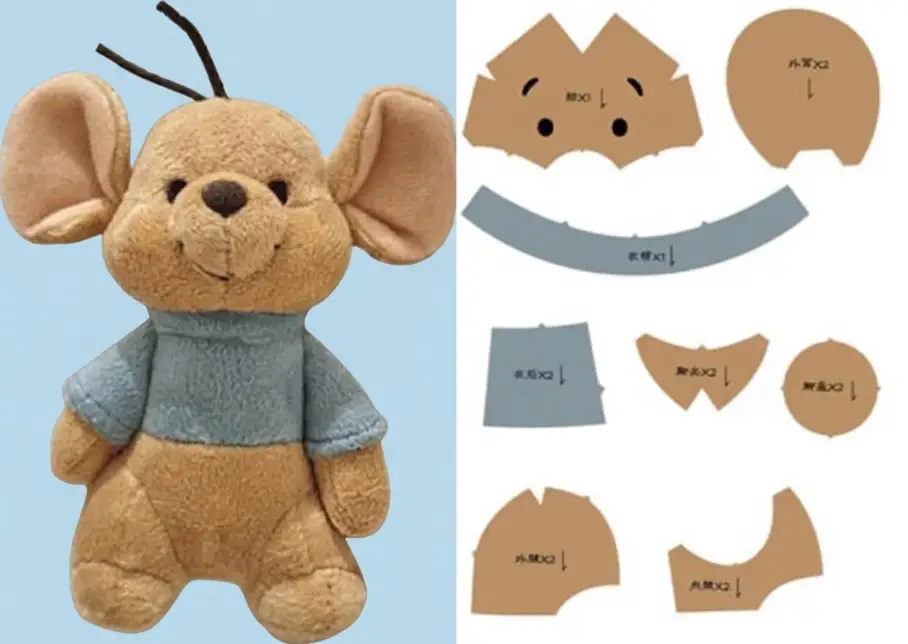
A plush toy pattern is a set of 2D template pieces — like a jigsaw puzzle — that, when cut from fabric and sewn together, form a 3D stuffed toy. Each panel represents a surface area of the final toy, accounting for seam allowances, stretch direction, and assembly order. Think of it as the blueprint that bridges imagination and physical form.
In technical terms, patterns are part of a broader document called a tech pack or product specification sheet, which includes material callouts, stitching instructions, stuffing density, labeling requirements, and quality checkpoints.
Key Facts: Plush Toy Pattern Basics
| Element | Description | Industry Standard |
|---|---|---|
| Seam Allowance | Extra fabric margin beyond the stitch line | 5–10 mm in mass production |
| Grain Line | Direction indicator aligning fabric with pile or stretch | Parallel to fabric selvage |
| Notches | Small marks indicating panel alignment points | Spaced every 3–5 cm on curves |
| Pattern Pieces Count | Number of panels in a typical plush toy | 6–30 pieces depending on complexity |
| Scale Accuracy | Tolerance accepted in production cutting | ±1–2 mm per piece |
The Step-by-Step Process of Making Plush Toy Patterns
Concept Sketching and Ideation
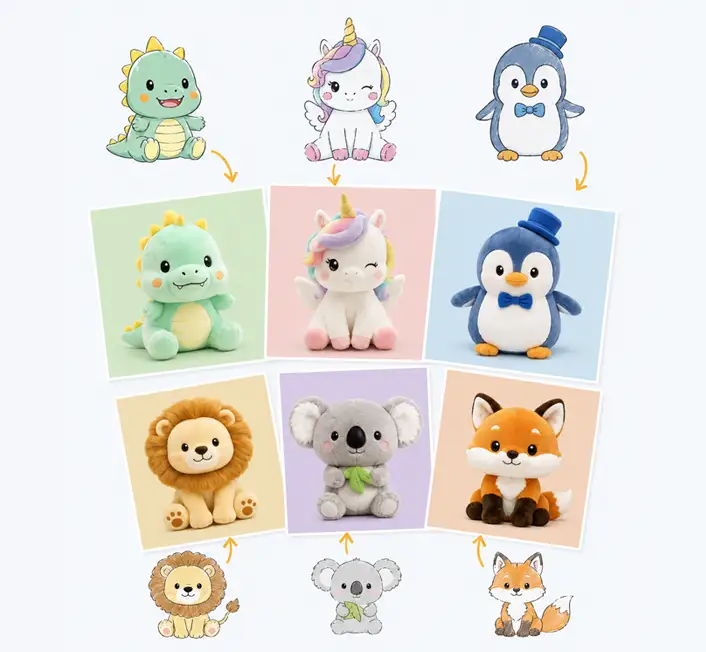
Every plush toy begins as a concept — often a rough sketch on paper or a digital illustration. Designers work from multiple angles (front, side, back, top) to establish proportions, limb placement, and facial feature positioning. This is where the toy’s character, personality, and target audience are decided.
Creating the 3D Prototype (Maquette)
Before any flat pattern is drawn, most professional designers build a 3D prototype — also called a maquette or sample mock-up — using muslin, felt, or non-stretch cotton. This physical model acts as a reference object from which pattern pieces are reverse-engineered.
Reverse engineering from a maquette
The maquette is carefully cut apart at its seam lines. Each piece is pressed flat, traced onto paper, and cleaned up — straightening edges, smoothing curves, and adding seam allowances. This hands-on method is especially valuable for organic, rounded shapes like bear heads or round animal bodies, where 3D surface geometry doesn’t easily translate to 2D geometry without physical reference.
Key Facts: Prototyping Methods Compared
| Method | Best For | Time Investment | Accuracy |
|---|---|---|---|
| Maquette draping | Organic, rounded shapes | High | Very high |
| Flat pattern drafting | Geometric, angular toys | Medium | High |
| Digital 3D modeling | Complex multi-part designs | Medium | Very high |
| Sloper adaptation | Variations of existing designs | Low | Moderate–high |
Digital Pattern Making and CAD Software
Modern plush toy production increasingly relies on computer-aided design (CAD) software to digitize and refine patterns. Programs like Adobe Illustrator, Optitex, or specialized textile CAD tools allow designers to work with precision, easily mirror pattern pieces, and generate graded pattern sets for multiple size variants.
Benefits of digital pattern files
Digital patterns (typically saved as .DXF or .AI files) can be sent directly to factories for CNC cutting machines, eliminating human error in manual cutting. They also enable rapid iteration — a designer can adjust a dart placement or seam curve in minutes and produce a new sample the same day.
Material Selection and Its Impact on Pattern Design
The choice of fabric fundamentally changes how a pattern must be engineered. Minky, sherpa, faux fur, velboa, and fleece all behave differently — they have varying degrees of stretch, pile direction, and thickness — each of which must be factored into seam allowances and grain line markings.
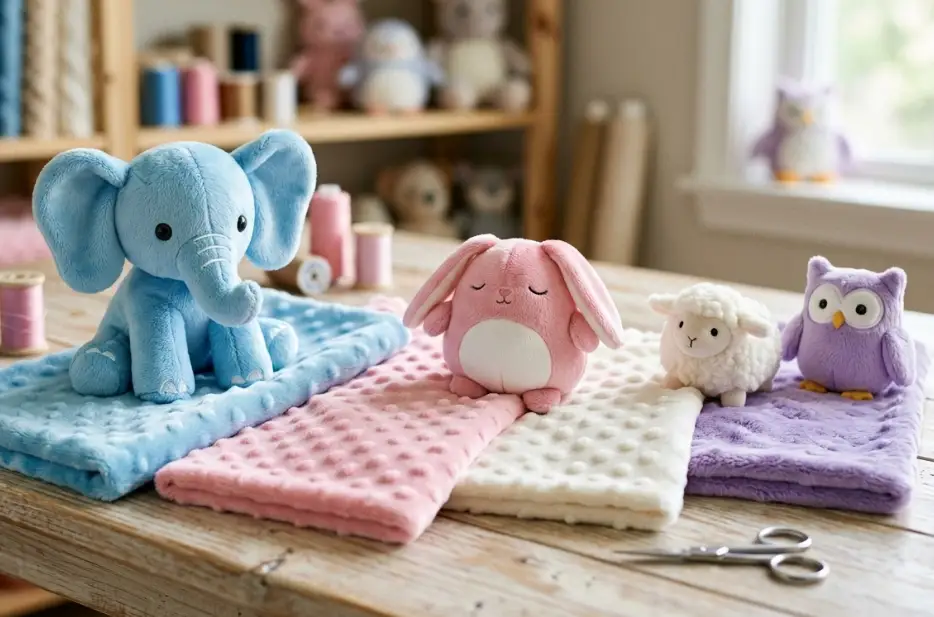
Common plush fabrics and their pattern implications
Key Facts: Fabric Types in Plush Toy Manufacturing
| Fabric Type | Pile Length | Stretch Level | Common Use Case |
|---|---|---|---|
| Minky (cuddle fabric) | 1–2 mm | Moderate 4-way | Baby toys, smooth animals |
| Faux fur | 3–80 mm | Low to none | Realistic stuffed animals |
| Velboa | 2–3 mm | Moderate 2-way | General plush toys |
| Sherpa / Teddy fleece | 4–6 mm | Low | Bears, textured characters |
| Anti-pill fleece | Flat | High 4-way | Budget toys, simple shapes |
Grading, Nesting, and Production-Ready Patterns
Once a pattern is approved at the sample stage, it undergoes grading — the process of scaling the pattern up or down to create a range of sizes. For plush toys, this might mean producing a keychain version (10 cm), a standard toy (30 cm), and a jumbo version (60 cm) from the same design family.
Pattern nesting for efficient fabric use
Before production begins, pattern pieces are arranged — or “nested” — on a virtual fabric spread to minimize material waste. This process, known as marker making, is critical for cost control. Efficient nesting can reduce fabric waste by 10–20%, which at industrial volumes translates to significant savings. Factories typically perform nesting using automated CAM (computer-aided manufacturing) software.
Key Facts: Production Pattern Specifications
| Specification | Requirement | Why It Matters |
|---|---|---|
| File format | .DXF, .AI, or .PDF 1:1 scale | Factory CNC compatibility |
| Seam allowance label | Must be explicitly noted on each piece | Prevents cutting errors |
| Pile direction arrows | Required on all fur/velboa pieces | Ensures consistent texture flow |
| Notch type | V-notch or T-notch specified | Guides panel alignment during sewing |
| Opening placement | Marked with “leave open” annotation | Indicates turning and stuffing point |
From Pattern to Finished Toy: Assembly Overview
With production-ready patterns in hand, factories cut fabric using die-cutting or CNC blade machines, bundle panels by color and piece, and route them to sewing stations. Workers sew panels together following the stitching sequence specified in the tech pack, leaving a small opening for turning and stuffing.

After stuffing — with PP cotton, memory foam, or pellets depending on the design — the toy is hand-stitched closed, safety eyes and accessories are attached, and the toy moves to quality control.
Understanding this end-to-end flow helps designers create patterns that are not only aesthetically accurate but also sewn efficiently at scale — a crucial distinction between hobbyist pattern making and professional toy development.
Frequently Asked Questions
What software do professional plush toy pattern makers use?
Most professionals use a combination of Adobe Illustrator for vector pattern drawing and specialized textile CAD tools like Optitex, Gemini CAD, or Lectra. Some designers also use Inkscape (free) for simpler patterns. For 3D visualization before flatting, ZBrush or Blender may be used to model the toy first, then projected into 2D panels.
How many pattern pieces does a typical plush toy have?
A simple plush toy — like a basic bear or pillow character — may only need 6 to 10 pattern pieces. More complex designs, such as poseable animals with articulated limbs or licensed character plush with detailed facial features, can require 20 to 30 or more individual panels. Each seam line in the final toy corresponds to the edge of a pattern piece.
What is a seam allowance and why does it matter?
A seam allowance is the strip of fabric between the cutting line and the stitch line. It’s essential because it gives the sewing machine room to create a secure seam without the stitching falling at the very edge of the fabric, which would fray and fail. For plush toys, seam allowances typically range from 5 mm to 10 mm, with smaller allowances used on tight curves and larger ones on straight edges.
Can I make a plush toy pattern from a drawing or photo?
Yes, but it requires interpretation. A 2D drawing must be analyzed from multiple angles to understand the toy’s 3D volume. Many designers start by building a rough 3D mock-up from inexpensive fabric based on the artwork, then reverse-engineer the pattern from that physical form. Simply tracing a flat illustration will not account for the three-dimensional curvature needed to create a realistic stuffed toy.
What is the difference between a plush toy pattern and a tech pack?
A pattern is just the set of 2D template pieces for cutting fabric. A tech pack (technical package) is a comprehensive production document that includes the pattern, material specifications, thread colors, stitching types, stuffing weight, label placement, safety eye sizing, quality control checkpoints, and packaging instructions. Factories need both to manufacture a toy correctly and consistently.
How does fabric stretch affect pattern making?
Stretch-prone fabrics like minky or fleece will expand during sewing and stuffing, meaning the final toy will be slightly larger than the flat pattern suggests. Experienced pattern makers compensate by slightly reducing pattern dimensions, testing with actual production fabric, and adjusting based on how much the material “grows” under stuffing pressure. The grain line on a pattern piece indicates which direction the fabric’s stretch should run.
How long does it take to develop a plush toy pattern from scratch?
For a simple design, an experienced pattern maker might complete a draft pattern in 1 to 3 days. A complex licensed character with great detail accuracy could take 2 to 4 weeks, including multiple sample rounds. The full product development cycle — from concept to approved production sample — typically ranges from 60 to 120 days, depending on revision rounds, factory communication, and shipping time for samples.
What safety standards apply to plush toy patterns and construction?
Plush toys sold in the US must comply with ASTM F963 (Standard Consumer Safety Specification for Toy Safety), while EU markets require CE marking and EN 71 compliance. Patterns must account for minimum seam strength requirements, safety eye placement rules (typically not allowed for children under 3), and stuffing material safety. The pattern’s construction method — stitch type, seam depth — directly affects whether a toy will pass pull-force and seam-burst testing.