Skip to content

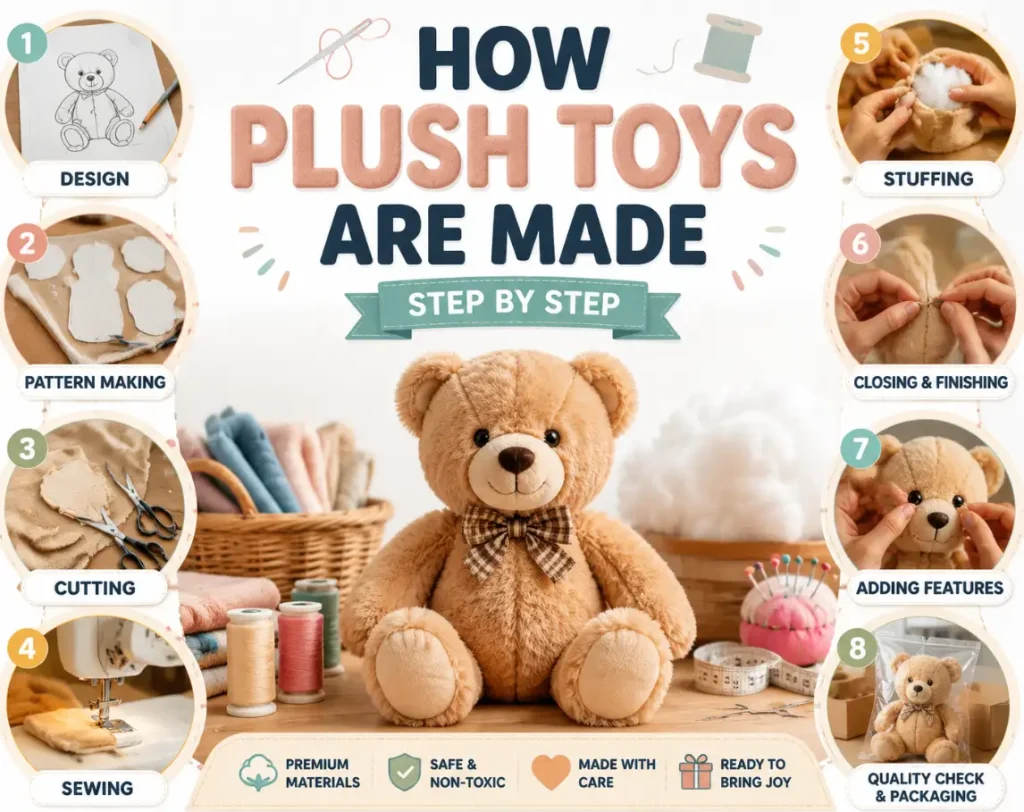
How Plush Toys Are Made Step by Step is a complete guide that reveals the journey of transforming creative ideas into lovable plush products, covering every stage from concept design, material selection, pattern making, cutting, sewing, stuffing, finishing, and quality inspection, helping brands understand how professional plush toy manufacturers create safe, high-quality, and market-ready stuffed toys.
A complete walk-through of plush toy production — from design and pattern making to cutting, sewing, stuffing, safety assembly, and final packaging — explained stage by stage for buyers who want to understand what actually happens on the factory floor.
Plush toys look simple once they are finished — soft, rounded, and ready to hug. What that finished shape hides is a production sequence with ten distinct stages, each performed by a different specialist, using different equipment, and each capable of introducing a defect if it is rushed or skipped. Understanding how plush toys are actually made step by step is the fastest way for a buyer to understand where quality is built in, where it is lost, and what questions to ask a factory before placing an order.
This guide walks through the complete plush toy manufacturing process in the order it actually happens — design finalization, pattern making and grading, fabric selection and cutting, sewing, stuffing and shaping, safety component attachment, embroidery and surface decoration, quality inspection, and packaging — with a look at how long each stage typically takes and where the process is most likely to go wrong.
What Happens Before Cutting or Sewing Ever Begins?
Before a single piece of fabric is cut, a plush toy design has to be translated from a two-dimensional concept — a sketch, a character reference sheet, or a 3D render — into a set of technical specifications a factory can actually produce. This pre-production stage determines the shape, proportions, seam placement, and material list for everything that follows, and it is the stage where the most expensive mistakes are cheapest to fix.
The pre-production process for a plush toy typically includes technical drawing, material specification, a bill of materials, color matching, and construction of an initial pattern — all of which are reviewed and approved before any bulk material is purchased. Skipping or compressing this stage is the single most common reason custom plush toy projects run into multiple unplanned sampling rounds later.
Technical Drawing and Proportion Mapping
A design reference — whether it is a flat illustration, a licensed character sheet, or a rough concept sketch — has to be converted into a technical drawing that shows the toy from multiple angles: front, side, back, and any details like facial expression, paw shape, or accessory placement. Flat 2D artwork does not translate directly into a 3D plush form, because a flat character has proportions that were never designed to be sewn and stuffed.
A pattern maker has to interpret how a two-dimensional head-to-body ratio, for example, will look once it is filled with stuffing and given volume — heads generally need to be scaled down slightly and bodies scaled up compared to the flat artwork, or the finished plush ends up looking distorted compared to the original design intent.
Material Specification and the Bill of Materials
Every component of the plush toy — outer fabric, filling, safety eyes or embroidered eyes, thread, any accessories like ribbons or clothing — is specified in a bill of materials before pattern development begins. This document lists the exact fabric type and pile height, the filling material and density grade, the safety component specifications, and any trims or accessories, along with target compliance certifications for the destination market.
Tip: Lock the bill of materials before pattern development starts, not after the first sample is approved. Changing fabric pile height or filling density after the pattern has been cut for that material almost always requires a second pattern revision, because different fabric thicknesses behave differently once sewn and stuffed — a pattern cut for a short-pile fabric will not drape the same way on a long-pile substitute.
Color matching is handled separately from fabric selection, using a physical color reference system rather than a digital screen, since screens render color inconsistently across devices. A factory with a mature color management process will pull a physical swatch against a Pantone or similar reference and confirm it in writing before dyeing or sourcing fabric in bulk — a step that prevents the common problem of a finished plush toy arriving in a shade noticeably different from what was approved on screen.
Pre-Production Deliverables and What Each One Confirms
| Deliverable | What It Establishes | Typical Turnaround |
|---|---|---|
| Technical drawing (multi-angle) | Proportions, seam lines, construction feasibility | 2–4 days |
| Bill of materials | Exact fabric, filling, and accessory specifications | 1–2 days |
| Color reference matching | Approved physical color standard for dyeing/sourcing | 2–3 days |
| Initial pattern draft | First working pattern for sample cutting | 3–5 days |
| Compliance target confirmation | Which market standards the design must meet | 1 day |
How Is a Plush Toy Pattern Made and Graded?
Pattern making is the stage where a plush toy design becomes a physical, repeatable set of flat pieces that can be cut from fabric and sewn back together into the intended 3D shape. A plush toy pattern is made by breaking the approved design down into individual panel shapes — head, body, limbs, ears, tail, any separate face or belly panels — each drawn flat with seam allowances added, then tested by cutting a first version from sample fabric and sewing it to see whether the resulting shape matches the technical drawing.
This first pattern is almost never correct on the first attempt, because predicting exactly how a flat shape will behave once filled with soft stuffing requires experience and iteration rather than pure geometry. A pattern maker will typically cut, sew, and stuff two to four trial versions of a new design before the panel shapes are finalized — adjusting curve angles, dart placement, and seam allowances each time based on how the stuffed result compares to the target proportions.

Grading the Pattern for Multiple Sizes
If a plush toy is being produced in more than one size — a common requirement for product lines that offer small, medium, and large versions of the same character — the base pattern has to be graded, meaning scaled proportionally to each target size while preserving the same visual character. Grading a plush pattern is not simple linear scaling, because stuffing volume and fabric stretch do not scale at the same rate as a flat linear dimension; a pattern graded by naive percentage scaling frequently produces a larger version that looks proportionally “puffier” or a smaller version that looks flatter than the base size.
Tip: When ordering a plush toy in multiple sizes, ask to see and approve a physical sample of each graded size individually — not just the base size. A grading error is very difficult to catch from a technical pattern file alone; it only becomes visible once the graded pattern is actually cut, sewn, and stuffed.
Common Pattern Adjustments Made Between Trial Samples
| Issue Observed in Trial Sample | Pattern Adjustment | Effect on Final Shape |
|---|---|---|
| Head appears too small once stuffed | Increase head panel curve radius | Restores intended head-to-body ratio |
| Seams pucker at tight curves | Add relief notches or reduce seam allowance locally | Smoother curve, less fabric bunching |
| Limbs collapse or twist | Adjust limb panel width and add internal seam | Limbs hold shape and position correctly |
| Face panel misaligns with body seam | Adjust panel registration marks | Consistent face placement across units |
| Fabric pulls tight over stuffed belly | Add width or a gusset panel | Even stuffing distribution, no fabric strain |
How Is Fabric Selected and Cut for Plush Toy Production?
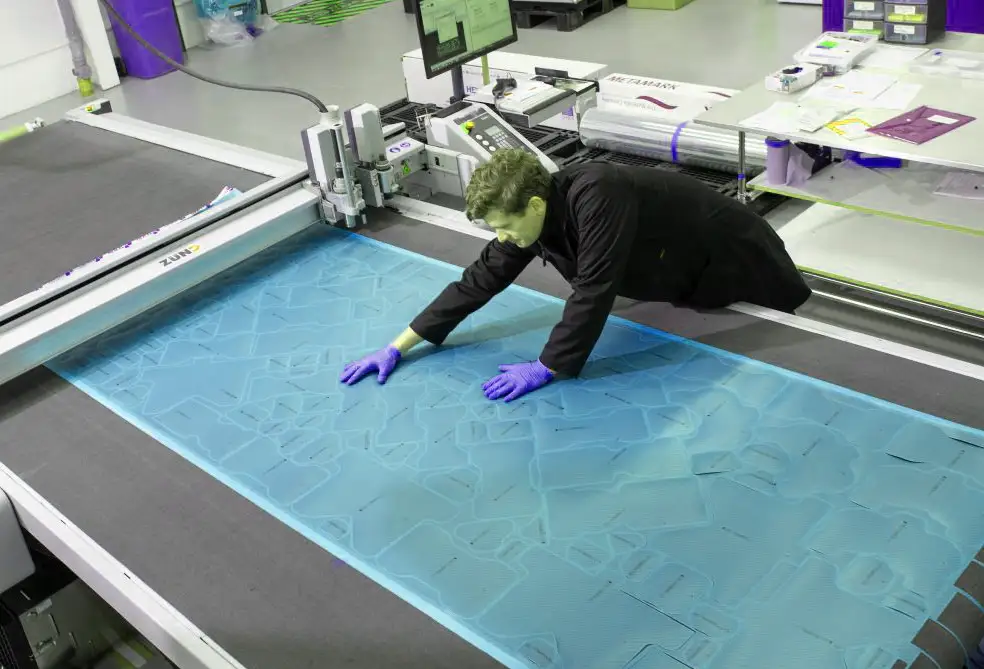
Fabric cutting is the stage where the finalized, graded pattern is used to cut fabric pieces at production volume. Plush toy fabric is cut using one of three main methods — hand cutting with a template, die cutting with a steel-rule cutting die, or computerized cutting using a knife or laser cutter — with the method selected based on order volume, pattern complexity, and required cutting precision.
Fabric direction matters more in plush toy cutting than in most other soft goods categories, because plush fabric has a distinct pile — the direction the fur or fleece fibers lie — that must run consistently across every panel of the same toy. Cutting panels with the pile running in inconsistent directions produces a finished plush toy where some panels catch the light differently or feel like they are stroking against the grain compared to adjacent panels, which is visually inconsistent even though every panel is technically cut to the correct size and shape.
Layout Planning and Fabric Utilization
Before cutting begins, a marker layout is planned — the arrangement of all pattern pieces on the fabric roll that both maintains consistent pile direction and minimizes wasted fabric between pieces. Layout planning has a direct cost impact: a poorly planned layout on a low-utilization marker can waste 12 to 18 percent more fabric than an efficient layout, and because fabric represents a significant share of total material cost, this difference shows up directly in the unit price.
Tip: Ask whether pile direction consistency is checked at the layout stage, not just at final inspection. A factory that plans pile direction into the marker layout before cutting avoids the problem entirely; a factory that only checks for it during quality inspection is relying on catching a defect after fabric has already been cut and sewn, which is a more expensive and less reliable way to control the same issue.
Plush Toy Fabric Cutting Methods Compared
| Cutting Method | Best Suited For | Precision Level | Typical Setup Cost |
|---|---|---|---|
| Hand cutting with template | Small orders, prototypes, complex one-off panels | Moderate, operator-dependent | Low — no tooling required |
| Die cutting (steel-rule die) | Medium to large orders of a stable design | High, very consistent | Moderate — die tooling required |
| Computerized knife/laser cutting | Large orders, complex multi-panel designs | Highest, minimal variance | Higher — programming and machine time |
After cutting, every panel is bundled and labeled by design, size, and pattern piece before moving to the sewing line, so that the correct pieces are matched together consistently across a production run that may involve thousands of individual panels moving through the factory at the same time.
How Are Plush Toy Pieces Sewn Together?
Sewing is the stage where individual cut panels are joined into the finished 3D shape of the plush toy, typically in a specific sequence — smaller detail pieces first, such as ears, eyes, or facial features, followed by the main body panels, leaving a stuffing opening unsewn until the toy has been filled. Plush toy sewing is performed on specialized industrial machines rather than standard garment machines, because plush fabric pile requires equipment that can handle thicker, more textured material without the pile getting caught or crushed in the seam.
Machine Types and What Each One Does
A typical plush toy production line uses several different sewing machine types for different tasks within the same toy. A single-needle lockstitch machine handles most straight and curved seams. An overlock or serger machine finishes raw fabric edges to prevent fraying. A specialized machine is often used for attaching safety eyes, noses, or joints, since these require a controlled, high-strength stitch that will not pull loose under the tension testing that safety-certified plush toys must pass.
Seam allowance consistency is one of the most important — and least visible from a finished product — quality factors in plush toy sewing. A seam sewn with too narrow an allowance risks the fabric pulling loose from the stitch line once the toy is stuffed and put under tension; a seam sewn with too wide an allowance changes the finished proportions compared to the approved pattern. Skilled plush toy sewing operators are trained to maintain seam allowance within roughly 1 millimeter of the specified measurement across an entire production run.
Tip: Request that the stuffing opening be positioned at a low-visibility seam — typically the back or underside of the toy — and hand-closed with a ladder stitch rather than a visible machine seam. This is standard practice among experienced plush manufacturers, but it is worth confirming explicitly for custom designs where the opening placement was not specified in the original brief.
Sewing Sequence and Machine Type by Task
| Sewing Task | Typical Machine Used | Sequence Position |
|---|---|---|
| Facial features, ears, small details | Single-needle lockstitch | First |
| Main body panel assembly | Single-needle lockstitch | Second |
| Raw edge finishing | Overlock/serger | Concurrent with assembly |
| Safety eye/nose/joint attachment | Specialized high-tension machine | Before or during body assembly |
| Stuffing opening closure | Hand-sewn ladder stitch | Final step, after stuffing |
How Is a Plush Toy Stuffed and Shaped?
Stuffing is the process of filling the sewn fabric shell with filling material to create the toy’s final volume, texture, and firmness, and it is typically done through the single opening left unsewn during the sewing stage. Plush toy stuffing is not simply filling the cavity until it is full — it requires distributing filling density unevenly and deliberately across different parts of the same toy, since a head, a torso, and a thin limb each need a different fill density to look and feel proportionally correct.
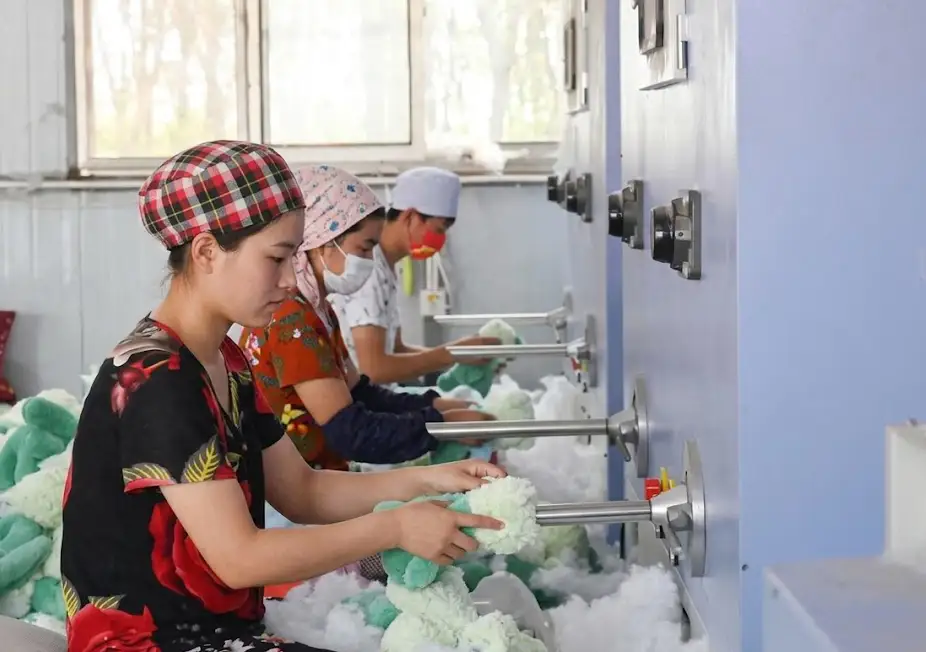
The most common filling material for mainstream plush toys is polyester fiberfill (PP cotton), chosen for its combination of softness, washability, resilience after compression, and low cost relative to alternatives. Weighted plush toys use an additional filling — typically plastic pellets or glass beads sewn into a separate inner pouch — to add controlled weight without changing the outer shape, and this inner pouch has to be sewn with reinforced seams to prevent pellet leakage under normal play stress.
Achieving Consistent Shape Across a Production Run
Maintaining consistent stuffing density across thousands of units in a single order is a skill-dependent process rather than a fully mechanized one, even in factories that use stuffing machines to blow filling into the cavity under pressure. A stuffing machine controls volume and speed, but the operator still shapes and hand-packs firmness into narrower areas like limbs, ears, and facial features, since a machine alone tends to distribute filling evenly by volume rather than by the varying density each body part actually needs.
Tip: Ask for the target stuffing weight per unit, not just a qualitative firmness description like “medium-firm.” A specific weight target — for example, 85 grams of PP cotton for a 25-centimeter plush — gives quality control a measurable checkpoint and gives the buyer a concrete way to detect underfilled units, which is one of the most common cost-cutting shortcuts in lower-quality production.
Common Plush Toy Filling Materials Compared
| Filling Material | Feel and Behavior | Typical Use Case |
|---|---|---|
| Polyester fiberfill (PP cotton) | Light, soft, resilient after compression, washable | Standard for most plush toys |
| Plastic pellets/beads | Adds weight and drape, does not add bulk | Weighted plush, sensory products |
| Memory foam fill | Slow-recovery softness, denser feel | Premium huggable/comfort plush |
| Recycled fiberfill | Comparable feel to virgin fiberfill, sustainability positioning | Eco-marketed plush lines |
| Bean/rice-style natural fill (rare) | Heavier, less washable, more allergen risk | Niche or regional products only |
After stuffing, the toy passes through a shaping check, where an inspector or the stuffing operator gently manipulates the toy by hand to confirm there are no lumps, gaps, or asymmetries before the stuffing opening is closed — since correcting a shaping issue after the opening is sewn shut requires cutting the seam back open, which slows the line and increases the risk of a visible repair mark.
How Are Safety Eyes, Joints, and Accessories Attached?
Safety components — plastic safety eyes and noses, joint discs for movable limbs, and any small attached accessories like bows or buttons — are among the most heavily regulated elements of plush toy construction, because a detached small part is the primary choking hazard that safety standards like ASTM F963 and EN71 are designed to prevent. Safety eyes and noses are attached using a washer-lock mechanism on the reverse side of the fabric, secured under mechanical pressure that is designed to require significantly more force to remove than a child could apply by hand or mouth.
Every batch of safety eyes and joints used in production is pull-tested before and during assembly — a sample is pulled with a calibrated force gauge to confirm it withstands the required tension, typically in the range of 90 newtons, without separating from the fabric. This testing is performed at the component level before full production and again on finished units during in-line quality checks, since a component that passes pull testing in isolation can still fail if it was attached incorrectly during sewing.
Age Grading Determines Component Choice
The specific safety component approach used depends heavily on the toy’s intended age grading. For plush toys marketed for children under three, small attached parts are typically avoided entirely in favor of embroidered or fully fabric-appliquéd features that cannot detach under any amount of force, since regulatory small-parts testing for this age group is significantly stricter than for general-audience plush.
Tip: For any plush toy intended for children under three, specify embroidered eyes and facial features at the brief stage rather than leaving it to the factory’s default judgment. Some factories default to safety-lock plastic eyes across their entire product range unless a buyer specifies otherwise, which can create a compliance gap if the intended market is infant- or toddler-focused.
Safety Component Options by Target Age Group
| Component Type | Attachment Method | Recommended Age Grading |
|---|---|---|
| Plastic safety-lock eyes/nose | Washer-lock mechanism, pull-tested | General audience, 3+ |
| Embroidered eyes/features | Stitched directly into fabric, no separable part | Infant/toddler, 0–3 |
| Joint discs (movable limbs) | Internal disc-and-washer assembly | General audience, 3+ |
| Sewn-on accessories (bows, buttons) | Reinforced stitch, no glue-only attachment | Age-dependent; avoided for 0–3 unless embroidered |
How Is Embroidery and Surface Decoration Applied?
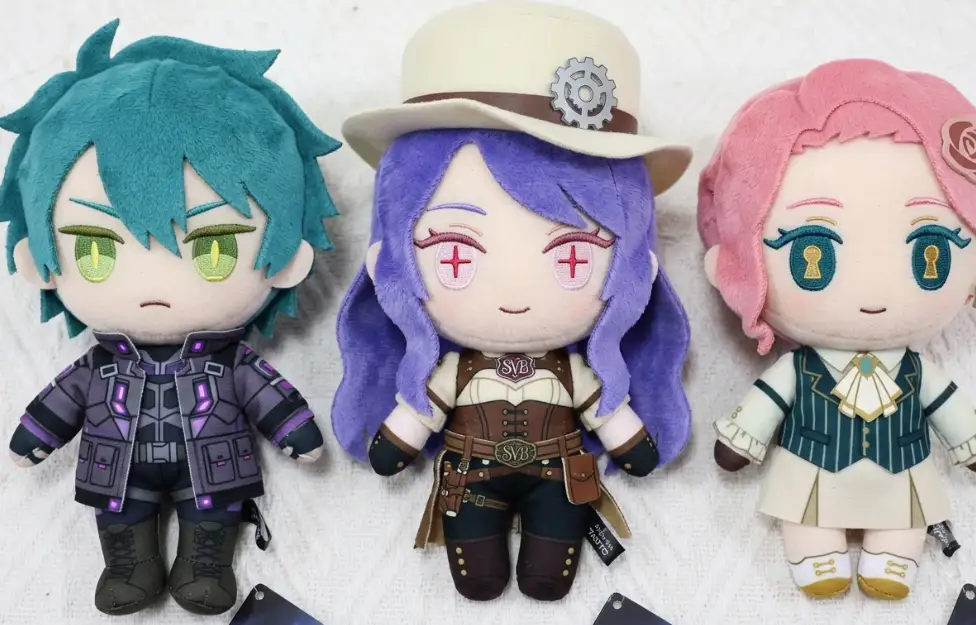
Embroidery, screen printing, and other surface decoration are typically applied to individual fabric panels before those panels are sewn into the 3D shape, not after — since embroidering or printing on a curved, stuffed surface is far less precise than working on a flat panel held under tension in an embroidery hoop or print frame. Embroidered details such as facial features, brand logos, or decorative patterns are digitized from the approved artwork into a stitch file that controls exactly how the embroidery machine moves, which stitch types it uses, and in what sequence colors are changed.
Why Digitizing Quality Affects the Finished Look
The quality of the digitized stitch file has a significant, and often underappreciated, effect on how the finished embroidery looks — particularly at small scale, where plush toy facial features are often only a few centimeters across. A poorly digitized file can produce puckering around dense stitch areas, gaps in fine detail lines, or thread breaks during production, all of which show up as inconsistent quality across a production run even when the underlying artwork was approved without issue.
Tip: Request a physical embroidery sample on the actual fabric before bulk production, not just a digital mockup of the stitch file. Embroidery density and stitch type interact differently with different plush fabric pile heights, and a stitch file that looks correct on a flat digital preview can pucker or distort once actually stitched onto a longer-pile fabric.
Surface Decoration Methods for Plush Toys
| Decoration Method | Best For | Durability Consideration |
|---|---|---|
| Embroidery | Facial features, logos, fine detail | Very durable, washable, resists fading |
| Screen printing | Large flat-color graphics on fabric panels | Can crack or fade with heavy washing over time |
| Fabric appliqué | Larger shaped color blocks, patches | Durable if stitched, less durable if only bonded |
| Heat transfer | Detailed multi-color graphics, short runs | Lower wash durability than embroidery or appliqué |
How Is Quality Control Performed Throughout Plush Toy Production?
Quality control in plush toy manufacturing is not a single inspection step at the end of the line — it is a series of checkpoints distributed across the entire process, each designed to catch a specific category of defect at the earliest point it can realistically be detected. Waiting until final inspection to check for a cutting or sewing defect means that defect has already traveled through several additional labor stages, making it far more expensive to catch late than early.
A well-structured plush toy QC system typically includes incoming material inspection, in-line checks during cutting and sewing, a post-stuffing shape and firmness check, safety component pull testing, and a final AQL-based inspection before packing — each staffed by a different point in the production line rather than concentrated entirely at the end.
AQL Sampling at Final Inspection
Final inspection is typically conducted using Acceptable Quality Limit (AQL) sampling, a statistical method that inspects a representative sample of the full order rather than every individual unit, with defects classified as critical, major, or minor based on severity. A critical defect — such as a loose safety eye — triggers immediate rejection of the batch regardless of how small the sample defect rate is, since critical defects represent a direct safety risk rather than a cosmetic inconsistency.
Quality Control Checkpoints Across the Plush Toy Production Line
| Checkpoint | Stage Performed | What It Catches |
|---|---|---|
| Incoming material inspection | Before cutting begins | Fabric flaws, wrong color lot, filling contamination |
| In-line cutting check | During/after cutting | Pile direction errors, panel size deviation |
| In-line sewing check | During assembly | Seam allowance drift, skipped stitches, misalignment |
| Safety component pull test | During/after attachment | Loose eyes, noses, joints below tension threshold |
| Post-stuffing shape check | After stuffing, before closure | Uneven fill, lumps, asymmetry |
| Final AQL inspection | Before packing | Aggregate defect rate across the full batch |
Buyers who commission an independent third-party inspection before shipment are adding an additional, unaffiliated checkpoint on top of the factory’s internal QC system — a step that is particularly valuable for first orders with a new supplier, where the buyer has no track record yet to rely on for confidence in the internal system alone.

How Are Plush Toys Packaged for Shipping?
Packaging is the final production stage, and it serves three distinct functions at once — protecting the toy during transit, presenting the product for retail sale if it is a retail-ready item, and providing the labeling required for legal compliance in the destination market. Plush toys are typically packaged using one of several formats depending on the sales channel: polybags for e-commerce fulfillment, printed header cards or hang tags for retail pegboard display, or full-color printed boxes for premium or gift-oriented products.
Compliance Labeling on Packaging
Packaging and any attached labels or hang tags must carry the compliance information required by the destination market — which typically includes age grading, choking hazard warnings where applicable, country of origin, fiber content, and any required safety certification markings. Labeling requirements differ meaningfully between markets; a plush toy compliant for the US market is not automatically compliant for the EU market without label adjustments, since the specific required warning language, symbols, and certification references differ between jurisdictions.
Common Plush Toy Packaging Formats and Their Use Cases
| Packaging Format | Typical Use Case | Key Consideration |
|---|---|---|
| Polybag with suffocation warning | E-commerce, bulk shipping | Warning label required in most markets |
| Header card / hang tag | Retail pegboard or hook display | Must include full compliance labeling |
| Printed window box | Retail shelf display, gifting | Higher unit cost, stronger shelf presence |
| Bulk carton, no individual packaging | Wholesale, promotional distribution | Lowest cost, no retail-ready presentation |
Polybag packaging in particular carries a specific compliance requirement in most markets: bags large enough to pose a suffocation risk must either include a printed warning or use a bag thin enough, or with ventilation holes, to fall outside the regulated size and thickness threshold — a detail that is easy to overlook in a packaging brief focused primarily on branding and appearance.
What Does the Full Plush Toy Production Timeline Look Like?
A complete plush toy production timeline — from design finalization through to a shipment-ready order — typically runs eight to twelve weeks for a new custom design at moderate order volume, though this range compresses significantly for reorders of an already-approved design, since the pattern, tooling, and material sourcing are already established.
Typical Plush Toy Production Timeline by Stage
| Stage | Typical Duration | Notes |
|---|---|---|
| Design finalization and BOM | 3–7 days | Faster with a complete initial brief |
| Pattern development and sampling | 10–20 days | 2–4 revision rounds is typical for new designs |
| Material sourcing (bulk) | 7–15 days | Longer for certified or custom-dyed fabric |
| Cutting | 3–7 days | Scales with order volume |
| Sewing and assembly | 10–20 days | Largest labor component of the timeline |
| Stuffing, QC, and finishing | 5–10 days | Runs partially in parallel with sewing |
| Packaging and shipment prep | 3–5 days | Includes final AQL inspection |
Reorders of an existing, approved design typically skip most of the pattern development and sampling stage entirely, reducing the total timeline to four to six weeks in many cases — one of the strongest arguments for investing the extra time in getting the pattern and sampling stage right on the first production run, since that investment pays off on every subsequent reorder.
How Does Order Volume Change the Way Plush Toys Are Produced?
The production process described above scales differently depending on order volume, and the differences are not just a matter of running the same steps longer — several stages are handled with fundamentally different methods once volume crosses certain thresholds. A small trial order of a few hundred units and a large reorder of tens of thousands of units are, in practical terms, produced through two different operational approaches even though both follow the same ten-stage sequence.
At low volume, cutting is frequently done by hand or with a simple template rather than an investment-heavy die or computerized cutting setup, since the tooling cost for die cutting is only justified once the fabric savings and speed gains outweigh the upfront investment. Sewing at low volume is often handled by a smaller, more flexible team capable of switching between different products throughout the day, while high-volume orders are run on dedicated lines where each operator repeats a single task — such as attaching one specific panel — hundreds or thousands of times in sequence, which improves both speed and stitch consistency compared to a single operator completing an entire toy from start to finish.
Why Larger Orders Often Achieve More Consistent Quality
Counterintuitively, larger production runs frequently achieve more consistent unit-to-unit quality than very small runs, not less. A dedicated production line where each worker specializes in one repeated task develops a level of consistency in that specific task that is difficult to match on a small run where a few operators are each handling multiple different construction steps. The tradeoff is flexibility — a large dedicated line is efficient for a stable, already-approved design, but it is not well suited to a project still in active design iteration, which is why sampling and trial production are almost always handled separately from the main production line regardless of the eventual order volume.
How Production Methods Shift Across Order Volume Tiers
| Production Stage | Low Volume (Sample/Trial) | High Volume (Bulk Production) |
|---|---|---|
| Cutting | Hand cutting with template | Die cutting or computerized cutting |
| Sewing team structure | Small flexible team, multi-task operators | Dedicated line, single-task specialization |
| Stuffing | Fully hand-packed | Machine-assisted with hand finishing |
| Quality control | 100% inspection often feasible | AQL statistical sampling |
| Unit cost trend | Higher per unit, fixed costs not amortized | Lower per unit as fixed costs spread across volume |
Understanding this shift matters for buyers planning a phased launch — a small initial order used to validate market demand will not be produced under identical operational conditions to the larger reorder that follows it, and a certain amount of natural quality variation between the trial batch and the full production batch should be expected as a normal consequence of this transition, not treated automatically as a quality control failure.

Conclusion
Making a plush toy is a longer and more specialized process than the finished product suggests — ten distinct stages, each requiring different equipment, different skills, and different quality checkpoints, all coordinated so that a flat sketch or reference image ends up as a soft, safe, consistently shaped product at production scale. Understanding this sequence step by step gives buyers a much more useful framework for evaluating a factory than looking at unit price alone: a supplier who can clearly explain their pattern grading process, their fabric pile-direction controls, their stuffing density targets, and their in-line QC checkpoints is demonstrating operational maturity that a price quote alone can never show.
The buyers who get the most reliable results from plush toy sourcing are the ones who ask about this process explicitly at each stage — requesting to see the graded pattern samples, the pull-test records for safety components, and the AQL inspection report — rather than treating the entire production process as a black box between placing an order and receiving a shipment.
Frequently Asked Questions
How many sampling rounds does a new plush toy design typically require before it is ready for mass production?
Most new custom plush toy designs go through two to four sampling rounds before the pattern, materials, and construction are fully approved for mass production. The first sample is almost never final — it establishes whether the overall proportions and construction approach are viable, and subsequent rounds refine specific details like seam curves, stuffing density, color accuracy, and embroidery placement. Designs with simpler geometry, such as a basic rounded animal shape, tend to require fewer rounds than designs with complex features like articulated limbs, multiple fabric textures, or fine embroidered detail. Buyers who provide a highly detailed brief with clear technical drawings, a complete bill of materials, and physical color references upfront typically reduce the number of revision rounds needed, since much of the ambiguity that drives additional sampling rounds is resolved before the first sample is even cut.
What is the difference between a hand-sewn stuffing opening closure and a machine-sewn one, and does it matter?
A hand-sewn stuffing opening uses a ladder stitch, a technique that pulls the two fabric edges together from the inside so the closure is nearly invisible from the outside of the toy, with no visible thread line or machine stitch pattern breaking up the surface. A machine-sewn closure is faster and lower-cost but leaves a visible seam line across the closing point, which is more noticeable on smooth or short-pile fabrics than on longer-pile fabrics where the fur naturally conceals surface stitching. For most mid-range and premium plush toys, a hand-sewn ladder stitch closure is the industry standard because it preserves the visual integrity of the design at the one point in construction where fabric has to be closed after the toy is already fully shaped and filled.
Can plush toys be produced without any small plastic parts at all, and what replaces them?
Yes — plush toys intended for infants and toddlers are frequently produced entirely without small plastic parts, replacing plastic safety eyes, noses, and any small attached accessories with embroidered or fabric-appliquéd equivalents that are permanently stitched into the surface fabric and cannot detach under any realistic force. This construction approach is common for the 0–3 age category specifically because small-parts regulatory testing is significantly stricter for this age group, and eliminating separable small components removes an entire category of potential compliance failure rather than relying solely on pull-test strength to meet the requirement. The tradeoff is primarily aesthetic and cost-related — embroidered features generally cost more in labor time than attaching a pre-made safety eye component, and some fine visual detail achievable with a molded plastic eye is harder to replicate precisely in embroidery.
Why do two plush toys made from what appears to be the same fabric sometimes feel noticeably different?
Fabric that appears visually similar can differ significantly in pile height, pile density, backing weight, and fiber composition — all specifications that affect how the finished plush feels to the touch but that are difficult to distinguish by looking at a photo or even a small swatch. Two suppliers quoting what they both describe as “short-pile plush” may be sourcing fabric from different mills with meaningfully different density and softness characteristics, and neither the unit price nor a general fabric name reveals this difference. This is one of the main reasons buyers are advised to request the specific fabric code or supplier reference, not just a category description, when comparing quotes or specifications between different production runs or different factories.
How is stuffing density controlled consistently across a large production order?
Stuffing density is controlled through a combination of a specified target weight per unit, calibrated stuffing machine settings that control the volume and pressure of filling dispensed into each cavity, and hand-packing by trained operators for areas that need additional density adjustment beyond what the machine delivers evenly, such as limbs, ears, or facial features. Quality control checks a sample of finished units against the target weight at intervals throughout the production run, catching drift in either direction before it affects a large portion of the order. Underfilling is the more common quality issue in lower-quality production, since it reduces material cost per unit, which is one of the reasons buyers are advised to request and verify a specific target fill weight rather than accepting a general firmness description alone.
What happens if a safety component fails pull testing during production?
If a safety component such as an eye, nose, or joint fails pull testing during in-line quality checks, the affected units are pulled from the line, and the attachment issue is investigated before production continues — the root cause is typically either a faulty component batch, an attachment machine calibration issue, or an operator technique inconsistency. Depending on the scope of the failure, the response ranges from adjusting the attachment machine and retesting a new sample to rejecting an entire batch of the safety components and sourcing a replacement batch if the failure is traced to the component itself rather than the attachment process. A mature quality system treats a pull-test failure as a stop-and-investigate trigger rather than something to be addressed only at final inspection, since continuing production on a compromised attachment process multiplies the number of affected units that will need rework or rejection later.
Does producing a plush toy in a smaller or larger size than the original sample change anything besides the overall scale?
Yes — resizing a plush toy design through pattern grading affects more than just overall scale, because stuffing volume, fabric drape, and structural proportions do not all scale at the same linear rate as the pattern dimensions. A design graded up to a significantly larger size may need adjusted seam allowances, additional internal structure to prevent sagging, and a higher stuffing density to avoid looking underfilled relative to its new volume, while a design graded down to a much smaller size may need simplified detail, since fine embroidered features or small accessories that read clearly at the original scale can become difficult to reproduce accurately, or even become a compliance concern, at a significantly reduced size. This is why factories typically produce and approve a physical sample of each significantly different size rather than assuming a graded pattern file alone will translate correctly across the full size range.
Which stage of plush toy production is most commonly rushed, and what problems does that create?
Pattern development and sampling are the stage most commonly compressed under timeline pressure, since it is the stage with the least visible output relative to the time it consumes — buyers often see it as preparation rather than production, and factories under order-book pressure sometimes push a design into bulk cutting after only one or two revision rounds instead of the two to four rounds a genuinely new design typically needs. The problems this creates rarely show up immediately; they surface once a full production run reveals proportion issues, stuffing inconsistencies, or seam problems that a more thorough sampling process would have caught on a single trial unit rather than across an entire batch. Because correcting a pattern flaw after bulk cutting has already started is far more expensive than catching it in sampling, rushing this specific stage is one of the least cost-effective shortcuts a buyer or factory can take, even though it is often where schedule pressure is applied first.