Skip to content
The cutting process is one of the most precision-critical stages in plush toy manufacturing. How fabric panels are cut directly determines seam alignment, material utilization, and the structural integrity of the finished toy. This guide breaks down every phase of the cutting workflow, from pattern preparation to quality verification.
What Is the Plush Toy Cutting Process?
The plush toy cutting process refers to the systematic conversion of raw plush fabric rolls into precisely shaped panels that are later assembled into finished products. In the context of soft toy production, cutting is not a single action but a multi-stage workflow encompassing fabric inspection, pattern placement, layering, mechanical or manual cutting, and panel sorting.
Each panel cut must match the approved pattern within tight dimensional tolerances — typically ±1 to ±2 mm — to ensure that downstream sewing operations produce consistent seam finishes and body proportions. Poor cutting accuracy is a primary source of rework costs and defect rates in plush toy manufacturing operations.
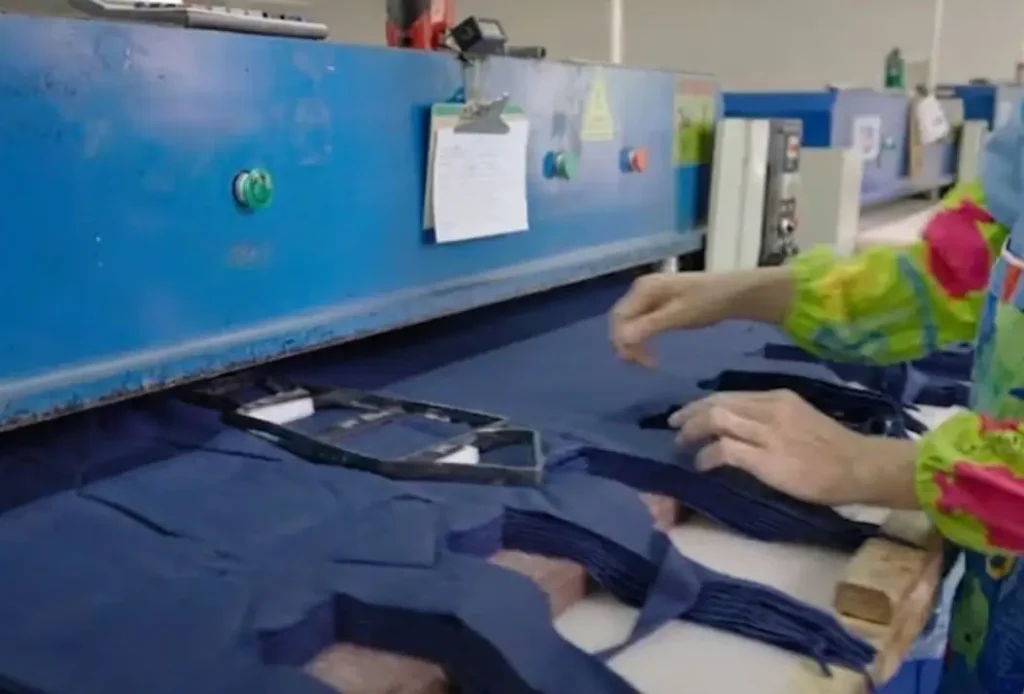
Cutting Process: Key Terminology and Definitions
| Term | Definition | Relevance to Plush Production |
|---|---|---|
| Pattern marker | Optimized layout diagram of all pattern pieces on a fabric width | Controls fabric yield; directly impacts material cost per unit |
| Fabric lay | Multiple fabric layers stacked for simultaneous cutting | Lay height typically 6–20 layers depending on fabric thickness |
| Notch mark | Small cut or mark indicating sewing alignment points | Critical for matching body seams, limb joints, and facial features |
| Nap direction | The directional grain of plush pile | All panels must align nap direction to prevent visual inconsistency |
| Cutting tolerance | Allowable dimensional deviation from pattern dimensions | Industry standard: ±1 mm for facial panels, ±2 mm for body panels |
Why Cutting Accuracy Directly Affects Finished Product Quality
In plush toy manufacturing, the body is assembled from numerous individual panels — typically 8 to 30 distinct pieces depending on the toy’s complexity. Each panel interacts with adjacent panels at sewing seams. A dimensional error in one panel creates cumulative misalignment across multiple seams, resulting in twisted limbs, asymmetrical facial expressions, uneven stuffing distribution, or structural weakness at stress points.
From a production engineering standpoint, the cutting stage functions as a defect amplifier: errors introduced here are replicated across every unit in the batch before any quality check occurs downstream. This makes cutting one of the highest-leverage control points in the entire soft toy production workflow.
Production Insight
Industry data suggests that up to 60% of plush toy sewing defects can be traced back to dimensional inaccuracies introduced during the cutting stage — making pre-cut inspection one of the most cost-effective quality interventions available.
Fabric Preparation Before Cutting Begins
Incoming Fabric Inspection
Before any fabric is placed on the cutting table, incoming material undergoes a systematic inspection process. Inspectors assess pile height uniformity, color consistency across the roll width, tensile strength, and identify any weaving defects, shade variations, or contamination. For products subject to CPSC regulations or EN 71 compliance, fabric must also be verified against approved material certifications.
Fabric rolls that fail inspection criteria are quarantined and returned to suppliers. Only approved rolls advance to the spreading and layering stage.
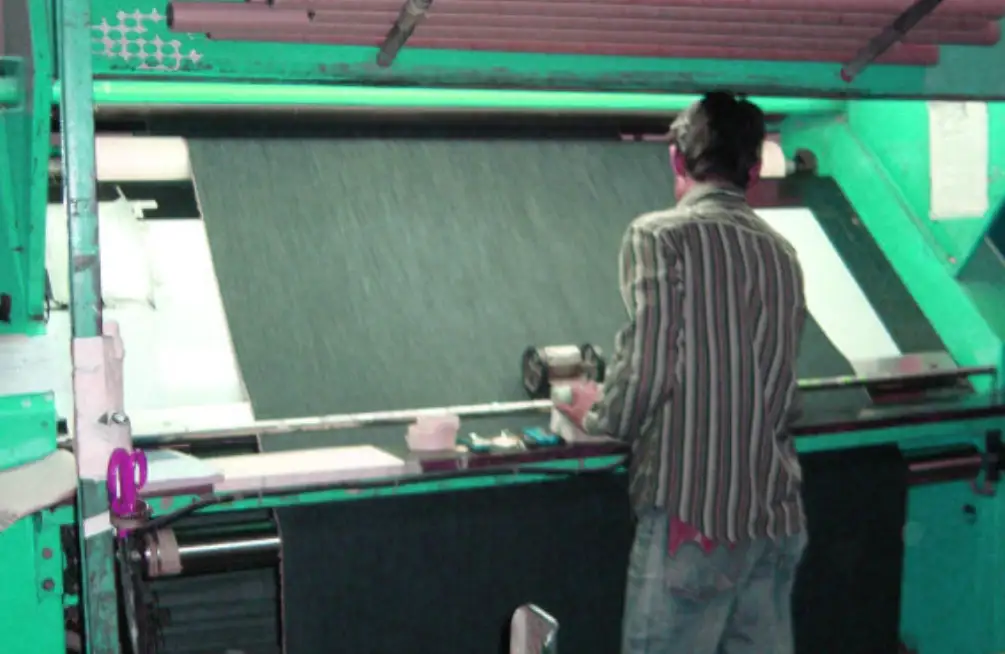
Fabric Relaxation and Spreading
Plush fabrics, particularly those with high polyester fiber content, undergo dimensional change when tension from roll storage is released. Standard practice requires fabric rolls to be allowed to relax on spreading tables for a minimum of 12 to 24 hours before cutting. Skipping this relaxation period leads to cut panels that shrink after spreading, causing seam puckering and dimensional drift in the finished toy.
Spreading involves pulling the relaxed fabric across the full length of the cutting table in flat, wrinkle-free layers. For high-volume production runs, automatic spreading machines control layer tension precisely, ensuring consistent fabric density across the full lay length.
Recommended Fabric Relaxation Parameters by Material Type
| Fabric Type | Relaxation Time | Recommended Lay Height | Special Handling Notes |
|---|---|---|---|
| Standard short-pile polyester | 12–16 hours | Up to 20 layers | Check nap direction uniformity per layer |
| Long-pile (fur-effect) plush | 18–24 hours | 6–10 layers | Face all nap in same direction; avoid compression |
| Minky / velboa fabric | 12 hours | Up to 15 layers | Static-prone; use anti-static spreading equipment |
| Sherpa/fleece blends | 16–20 hours | 8–12 layers | Check for width shrinkage after relaxation |
| Recycled rPET plush | 12–18 hours | Up to 18 layers | Verify pile density consistency before layering |
Pattern Marking and Placement Methods
Manual Pattern Layout
In smaller-scale production environments, pattern pieces are arranged manually on the top fabric layer using physical templates cut from card stock or rigid plastic. An operator positions each piece to minimize fabric waste while respecting nap direction requirements and any fabric print registration requirements. This method offers flexibility for short runs and custom designs but is slower and more subject to human variability in marker efficiency.
Computer-Aided Marker Making (CAD Marker)
In mid-to-large volume plush toy production, CAD marker making software generates optimized pattern placements digitally. The software calculates the most efficient nesting of all pattern pieces within the usable fabric width, accounting for nap direction constraints, seam allowances, and grain line restrictions. Typical fabric utilization improvements of 3% to 8% over manual layout are achievable through CAD marker optimization.
CAD markers are either printed directly onto a paper overlay placed on top of the fabric lay, or transmitted digitally to automated cutting systems for direct-cut execution without a printed marker.
Efficiency Tip
CAD marker making typically reduces fabric consumption by 3–8% per production run compared to manual layout. For high-volume orders exceeding 10,000 units, this translates to significant material cost savings over the course of an annual production program.
Core Cutting Methods Used in Plush Toy Manufacturing
The selection of cutting method depends on fabric type, production volume, panel complexity, and dimensional tolerance requirements. The three primary methods used in soft toy production each offer distinct trade-offs between speed, accuracy, and capital investment.
Band Knife Cutting
The band knife is a continuous-loop blade mounted vertically in a fixed cutting station. The operator feeds the layered fabric lay manually into the blade path, following the marker lines. Band knife cutting is well-suited for curved panels, irregular silhouettes, and thick pile fabrics where the blade needs to navigate complex contours without the friction limitations of reciprocating blades.
Skilled band knife operators can achieve dimensional accuracy within ±2 mm on complex panel shapes. However, operator skill variance introduces a consistency risk that must be managed through training standards and periodic sample checks.
Straight Knife (Hand Cutting) Machine
The straight knife machine uses a vertically oscillating blade mounted on a portable cutting head that the operator moves along the marker lines across the fabric lay. It is the most widely used cutting method in plush toy production globally due to its versatility, low equipment cost, and ability to handle a wide range of lay heights and fabric compositions.
Proper blade selection is critical: blade pitch, tooth configuration, and blade hardness must be matched to the specific fabric type to prevent snagging, pile distortion, or blade deflection on multi-layer lays.
Automated Cutting Systems (CAD Knife Cutter / Laser Cutter)
For high-precision requirements or high-volume programs, automated cutting systems offer the highest dimensional repeatability. CAD-controlled knife cutters receive digital marker files and execute the full cut sequence autonomously, delivering ±0.5 mm accuracy across all panels in the lay.
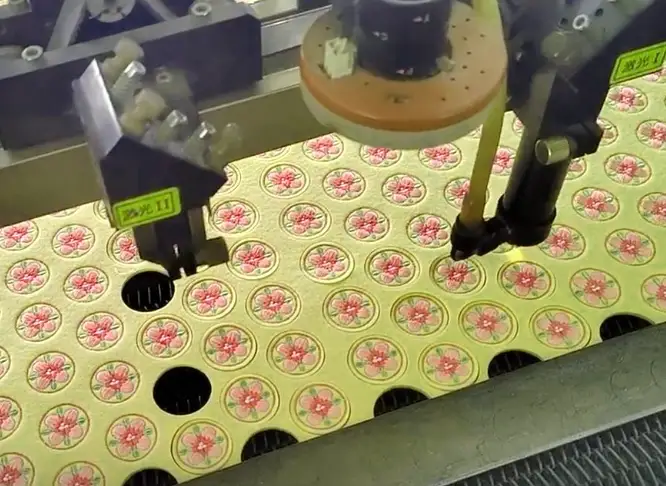
Laser cutting systems are used for specific fabric types where heat-sealing cut edges is beneficial, such as non-woven backing materials or certain synthetic blends where fraying must be minimized. However, laser cutting is generally not suitable for deep-pile fabrics due to heat discoloration of pile fiber tips.
Comparison of Plush Toy Cutting Methods by Key Performance Indicators
| Cutting Method | Dimensional Accuracy | Suitable Lay Height | Best Application | Production Speed |
|---|---|---|---|---|
| Manual band knife | ±2 mm | 6–18 layers | Complex curved panels, prototypes | Low–Medium |
| Straight knife machine | ±1.5–2 mm | Up to 20 layers | Standard body panels, mass production | Medium–High |
| CAD automated knife | ±0.5 mm | Up to 12 layers* | High precision, licensed character toys | High |
| Laser cutter | ±0.3 mm | 1–3 layers | Non-woven materials, appliqué details | Medium |
*Automated systems use vacuum tables to compress lay height; effective layer capacity varies by fabric density.
Nap Direction Control: The Often-Overlooked Critical Variable
Plush fabric has a directional fiber orientation — the pile nap — that reflects light differently depending on viewing angle. When panels from the same toy are cut with inconsistent nap direction, the finished toy exhibits visible color and sheen variation between body sections, even when all fabric came from the same roll.
Standard practice in quality plush toy production requires that all panels for a single toy have their nap running in the same specified direction. Pattern markers are annotated with nap direction arrows for each piece, and quality checks at the cutting stage include a random sampling audit of nap direction compliance before panels are bundled for sewing.
Pile Brushing After Cutting
Mechanical cutting compresses and sometimes mats the pile fibers at the cut edge. For premium products, cut panels undergo a brief brushing operation using rotating soft-bristle brushes to restore pile loft at the cut edge before sewing. This step is particularly important for long-pile fabric varieties where compressed edge fibers would be visible after seam assembly.
Quality Control Tip
Nap direction errors are among the most visually impactful and costly defects in plush toy production because they require disassembly of the finished toy to correct. Enforcing nap direction verification at the cutting stage — before panels reach sewing lines — eliminates this rework pathway entirely.
Panel Sorting, Bundling, and Traceability
After cutting, individual panels must be sorted by size and type, matched into complete component sets for each toy unit, and bundled for transfer to sewing workstations. In multi-color products, panels from different fabric rolls must be grouped to prevent cross-lot color variation within a single assembled toy.
Bundle Ticketing and Work Order Tracking
Each panel bundle is tagged with a work order identifier that connects it to the specific production batch, fabric lot, cutting date, and operator records. This traceability system enables efficient defect investigation, recall management, and process audit compliance — requirements that are particularly stringent for products subject to CPSIA or EN 71 certification.
Post-Cutting Quality Inspection Checkpoints
| Inspection Point | Parameter Checked | Acceptance Criteria | Action on Failure |
|---|---|---|---|
| Dimensional check | Panel length, width vs. pattern spec | ±1 mm (facial) / ±2 mm (body) | Reject panel; re-cut from same lay |
| Nap direction audit | Pile orientation vs. marker specification | 100% compliance required | Reject bundle; re-lay and re-cut |
| Edge quality | Cut edge cleanness, pile damage | No fraying; pile not matted >3 mm from edge | Edge trim or rejection depending on severity |
| Print/embroidery registration | Motif placement vs. cut panel boundary | Motif centered within ±2 mm of specification | Reject panel; review fabric printing alignment |
| Color consistency check | Visual shade match within bundle | No visible lot variation within one toy unit | Separate bundles by lot; reassign to single-lot batches |
Fabric Yield Optimization in Cutting Operations
Material cost represents 35% to 50% of total plush toy manufacturing cost of goods, making fabric yield optimization at the cutting stage a high-impact lever for unit economics. Yield is determined primarily by marker efficiency — the percentage of total fabric area occupied by cut panels versus waste.
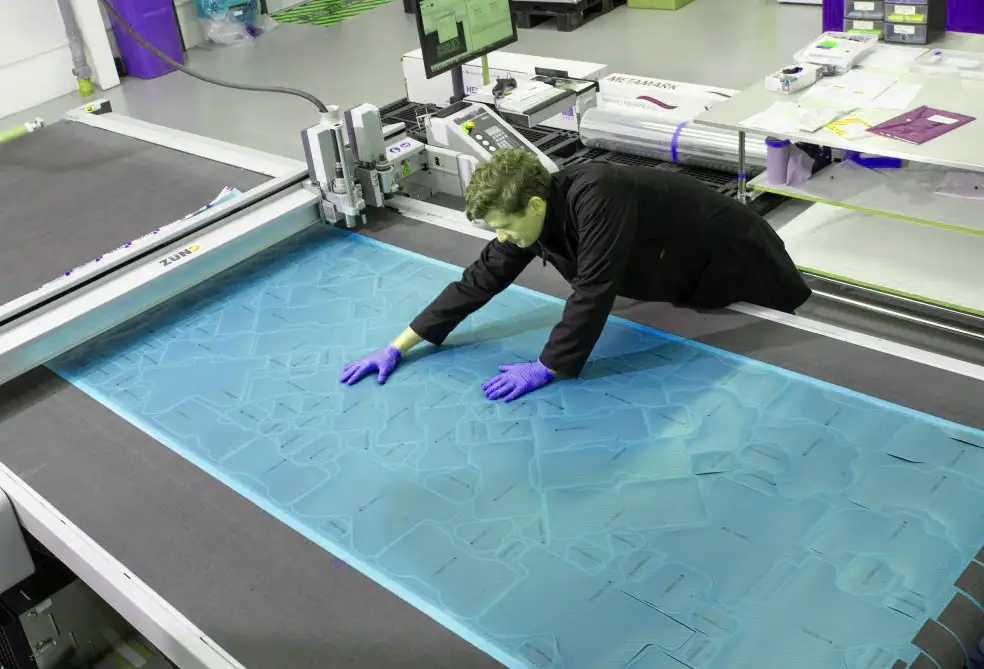
Best-practice manufacturers target marker efficiencies of 80% to 88% for standard plush toy panel sets. Complex body silhouettes with many curved pieces typically achieve lower marker efficiency than simpler geometric designs. Design-for-manufacture (DFM) reviews at the pattern development stage that evaluate panel nesting efficiency can meaningfully improve this metric before mass production begins.
Fabric Yield Benchmarks by Product Complexity
| Product Type | Typical Panel Count | Target Marker Efficiency | Average Fabric Waste Rate |
|---|---|---|---|
| Simple bear / basic animal | 8–12 panels | 82–88% | 12–18% |
| Character toy (moderate complexity) | 14–22 panels | 78–84% | 16–22% |
| Licensed character (high complexity) | 20–35 panels | 72–80% | 20–28% |
| Plush with accessories/clothing | 25–40+ panels | 70–78% | 22–30% |
Common Cutting Defects and Root Cause Analysis
Understanding the defect taxonomy of the cutting process allows quality teams to implement targeted corrective actions rather than applying generic inspection intensity across all parameters. The most frequently encountered cutting defects in plush toy production fall into four primary categories: dimensional deviation, nap errors, edge quality failures, and panel contamination.
Dimensional deviation most often originates from blade deflection on thick lays, worn cutting blades, or improper lay tension during spreading. Nap errors arise from insufficient marker annotation or operator training gaps. Edge quality failures typically indicate blade dulling, incorrect blade specification for the fabric type, or excessive lay compression that causes fabric deformation during the cut stroke.
Frequently Asked Questions
What cutting tolerance is acceptable for plush toy panels?
Industry-standard dimensional tolerance for plush toy cutting is ±1 mm for facial and detail panels where alignment precision is visually critical, and ±2 mm for larger body panels. High-precision programs using automated CAD cutting systems can consistently achieve ±0.5 mm across full production runs. Tolerances beyond these thresholds typically result in visible seam misalignment, asymmetrical body shapes, or difficulty in downstream sewing assembly that increases operator cycle time and defect rates.
Why does nap direction matter in plush toy fabric cutting?
The pile fiber of plush fabric reflects light directionally — viewing the fabric at different angles against or with the nap produces visibly different color saturation and sheen. When panels from the same toy are cut with inconsistent nap orientation, adjacent body sections appear as different shades under normal viewing conditions, even when cut from the same fabric roll. This is a visual defect that cannot be corrected after sewing assembly without disassembling the toy. All panels must be cut with the nap running in the direction specified on the pattern marker to prevent this issue.
How many fabric layers can be cut simultaneously in plush toy production?
The maximum practical lay height for plush toy fabric cutting depends on fabric type and the cutting method used. Standard short-pile polyester plush can be cut in lays of up to 20 layers using a straight knife machine. Long-pile and fur-effect fabrics are typically limited to 6–10 layers to prevent pile compression and blade deflection that would compromise dimensional accuracy on lower layers. Automated CAD knife cutters use vacuum table systems to compress lay height, allowing effective cutting of up to 12 compressed layers of medium-pile fabrics with maintained accuracy.
What is the difference between CAD marker making and manual pattern layout in plush cutting?
Manual pattern layout involves physically positioning pattern templates on the fabric surface by hand, relying on operator skill to minimize fabric waste. CAD marker making uses software to digitally optimize the arrangement of all pattern pieces on the available fabric width, applying algorithms that account for nap direction constraints, seam allowances, and grain line requirements to maximize the proportion of fabric occupied by panels. CAD marker making typically achieves 3% to 8% better fabric utilization compared to skilled manual layout, which translates directly into lower material cost per unit at production volumes. Additionally, digital markers eliminate human variability in marker efficiency across production shifts.
How does the cutting process affect CPSIA and EN 71 compliance for plush toys?
Cutting quality affects product safety compliance in several ways. Dimensional accuracy at cutting determines whether seam allowances are sufficient to withstand the tensile stress testing required under ASTM F963 and EN 71-1 — undersized seam allowances resulting from cutting deviation can cause seam failures during pull force tests. Panel traceability systems established at cutting (bundle ticketing linked to fabric lot records) are essential documentation for third-party lab certification and recall management obligations under CPSIA. For products with printed or embroidered surface elements, cutting registration accuracy also determines whether printed content meets placement specifications required in product artwork approvals.
Conclusion
The plush toy cutting process is a precision-driven manufacturing stage that directly determines product quality, material efficiency, and downstream production performance. From fabric relaxation through pattern placement, cutting method selection, nap direction control, and post-cut panel inspection, each step in the cutting workflow requires disciplined process adherence and appropriate tooling investment for the production volume and product complexity at hand.
Manufacturers who treat cutting as a high-leverage quality control point — rather than simply a preparatory step before sewing — consistently achieve lower defect rates, better fabric yield, and stronger compliance documentation across their plush toy programs.