Skip to content
How flat character art becomes a huggable, production-ready plush — technical flats, pattern making, fabric matching, and the sampling rounds that get it right.How flat character art becomes a huggable, production-ready plush — technical flats, pattern making, fabric matching, and the sampling rounds that get it right.
Turning a flat, 2D character illustration into a three-dimensional plush toy is one of the most technically demanding translations in soft goods design, because a drawing that reads perfectly on a screen or in a single frame does not automatically hold up in stitched fabric, viewed from every angle, and squeezed by a child’s hands.
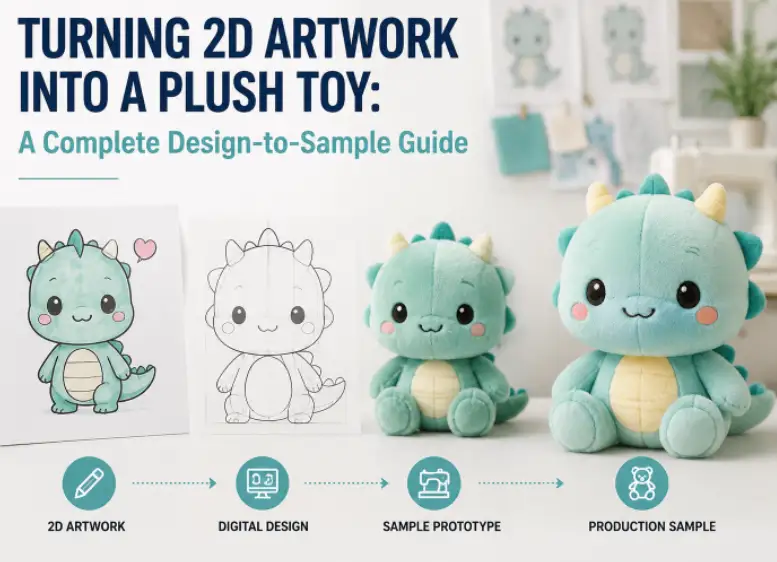
The process moves from concept art through technical flats, pattern development, fabric and color matching, and multiple rounds of physical sampling before a design is ready for mass production. This guide walks through each stage, the design compromises that are usually necessary, and the common mistakes that delay a plush toy program when the 2D-to-3D translation is rushed.
What Does It Mean to Turn 2D Artwork Into a Plush Toy?
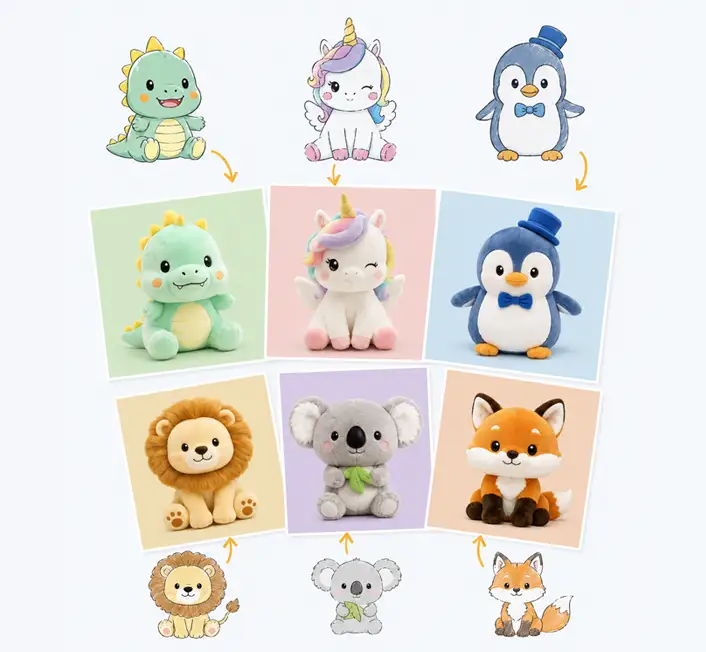
Turning 2D artwork into a plush toy means converting a flat illustration — typically a single front-facing character drawing — into a physical, stitched, stuffed object that must look recognizably like the original art from every viewing angle, not just the one the artist originally drew. This requires interpreting details the 2D art never had to address: what the character’s back looks like, how its proportions read once stuffed with polyester fiberfill, which fine linework can survive as embroidery or appliqué, and which details must be simplified or dropped entirely because fabric and stitching cannot reproduce them at production scale.
This translation is fundamentally a design and engineering exercise as much as an artistic one. A skilled plush pattern maker is effectively reverse-engineering a 3D form from a 2D reference, then building a repeatable, sewable pattern that a factory can cut and assemble consistently across thousands of units while still capturing the character’s recognizable silhouette, expression, and color palette.
Why 2D-to-3D Translation Is the Hardest Part of Plush Development
The gap between flat artwork and a stitched, stuffed object is the single biggest source of delay and revision in plush toy development, because a 2D illustration is inherently incomplete information for building a three-dimensional product. A character drawn facing forward gives no direct information about depth, back-of-head shape, or how limbs attach in three dimensions — all of which the pattern maker must infer or design from scratch while staying faithful to the character’s recognizable features.
Proportions are a particularly common friction point. Artwork optimized for a 2D composition, such as an oversized head relative to the body for stylistic appeal, does not automatically translate into a stable, huggable plush shape — an oversized head that looks charming in a drawing can make a stuffed plush top-heavy, difficult to display upright, or prone to flopping in a way that reads as poor quality rather than intentional style. Symmetry is another frequent issue: hand-drawn 2D art is rarely perfectly symmetrical, and small asymmetries that are invisible or charming in a single illustration become obvious and distracting once mirrored across a 3D stitched form.
Perspective and foreshortening present a related challenge. A character drawn with one arm extended toward the viewer or a head tilted at an angle relies on visual tricks that only work from the exact viewing angle the artist chose, and none of that foreshortening carries over into a physical object that will be seen and handled from every direction. The pattern maker has to make a judgment call about which pose elements are essential to the character’s identity and which are purely a function of that one illustrated moment, then design a more neutral, stable 3D pose that still reads as the same character from any angle.
2D Artwork Elements and Their 3D Plush Translation
| 2D Artwork Element | Challenge in 3D Plush Form | Common Solution |
|---|---|---|
| Front-facing pose only | No information on back, sides, or profile | The artist or pattern maker develops a full turnaround sheet |
| Fine linework and small details | Cannot be stitched or printed at a small scale reliably | Simplify to bold shapes; reserve fine detail for printed patches |
| Stylized oversized proportions | Can create an unstable or floppy stuffed form | Adjust proportions slightly for balance while preserving character identity |
| Gradient or painterly shading | Fabric and embroidery cannot reproduce soft gradients easily | Convert to flat color blocks or sublimation printing where appropriate |
| Asymmetrical hand-drawn details | Becomes visually obvious once mirrored in 3D form | Symmetrize key features while keeping intentional asymmetry as accents |
| Thin limbs or appendages | Difficult to stuff and stitch without tearing or thin spots | Widen slightly in the pattern to remain structurally sound |
The Step-by-Step Process: From Flat Design to Finished Plush
Converting artwork into a finished plush toy follows a fairly consistent sequence across the industry, even though the specific tools and turnaround time vary by design complexity. The process begins with a design review of the original artwork, followed by development of technical flats and a full turnaround, pattern making, first prototype construction, and then iterative sampling rounds until the design is approved for mass production.
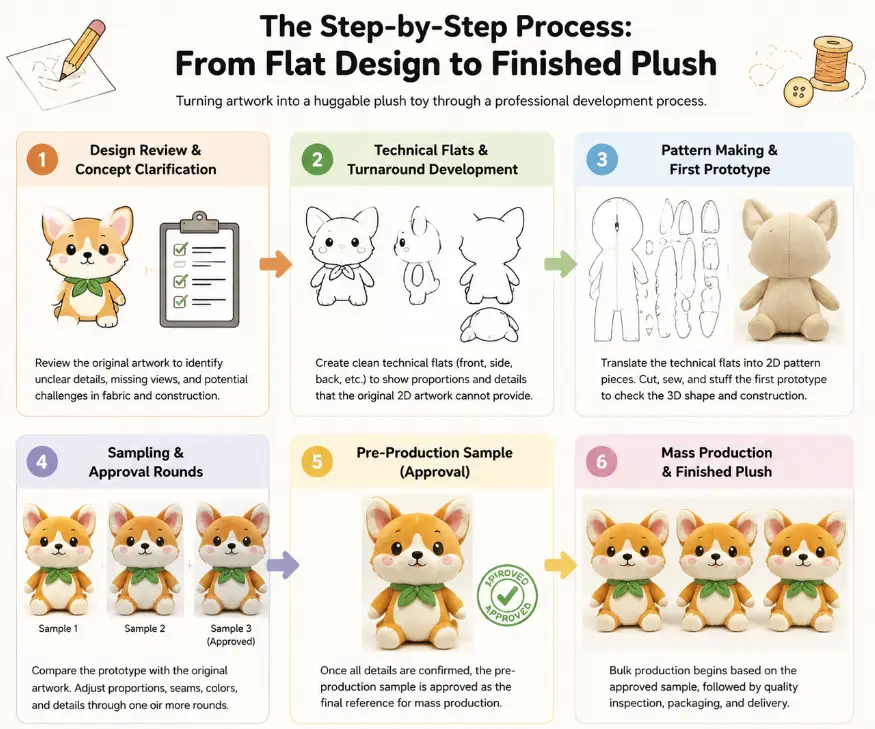
Design Review and Concept Clarification
Before any pattern work begins, the artwork is reviewed to identify ambiguous details, missing views, and elements likely to be difficult in fabric — a step that saves significant rework later if potential problems are flagged before pattern development starts rather than discovered mid-sampling.
Technical Flats and Turnaround Development
A technical flat is a clean, simplified line drawing of the character from multiple angles — typically front, back, side, and sometimes a three-quarter view — that gives the pattern maker the information a single 2D illustration cannot provide on its own. Where the original artwork only shows a front view, this stage often requires new artistic interpretation to imagine what the character’s back, profile, and proportions should logically look like.
Pattern Making and First Prototype
The pattern maker translates the technical flat into a set of 2D fabric pattern pieces that, once cut and stitched together, will form the intended 3D shape. This is a skilled, iterative task, since a pattern that looks correct on paper does not always assemble into the intended form once sewn and stuffed, requiring pattern adjustment even before the first prototype is considered final.
Sampling and Approval Rounds
Once a first prototype is built, it goes through one or more rounds of review against the original artwork, with adjustments made to proportions, seam placement, color matching, and surface details until the sample is approved as an accurate, production-ready representation of the character.
Plush Development Stages and Typical Timeframes
| Stage | Primary Output | Typical Duration |
|---|---|---|
| Design review | List of clarifications and flagged risk areas | 1–3 days |
| Technical flats and turnaround | Multi-angle line drawings of the character | 3–7 days |
| Pattern making | Cuttable fabric pattern pieces | 5–10 days |
| First prototype construction | Physical sample for initial review | 7–14 days |
| Sampling and revision rounds | Approved production-ready sample | 2–4 rounds, 1–2 weeks each |
Tip: Provide a full turnaround sheet whenever possible, even a rough one. A single front-facing illustration forces the pattern maker to guess at back-of-head shape, limb thickness, and profile silhouette — decisions that, if guessed incorrectly, often require an entire extra sampling round to correct.
Design Considerations: Simplifying Details for Fabric and Stitching
Not every detail in a 2D illustration can survive the translation into stitched fabric, and knowing which details to simplify — without losing what makes the character recognizable — is one of the core skills in plush development. Fine linework, small facial features, and detailed patterns generally need to be enlarged, simplified into bolder shapes, or reassigned to a printing or appliqué technique that can reproduce them reliably at production scale.
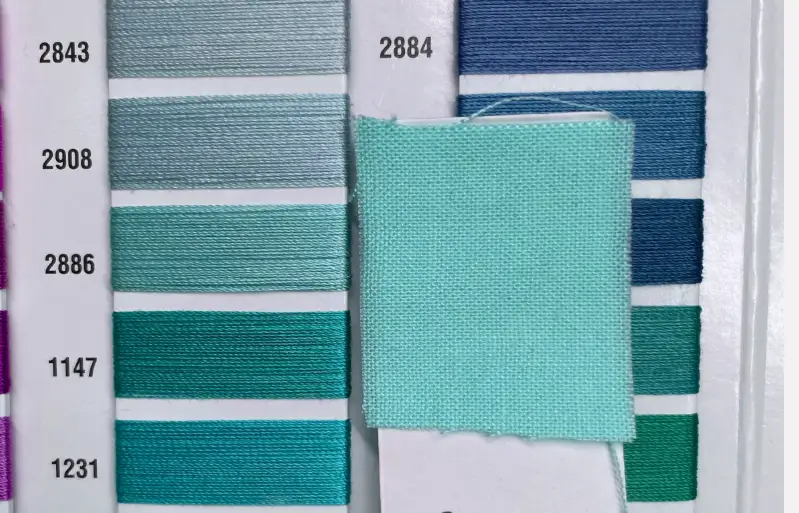
Color separation is another key consideration: a 2D illustration may use dozens of subtle shade variations that read fine on screen but cannot realistically be matched to that many distinct fabric colors without dramatically increasing cost and cutting complexity. Consolidating a palette down to a smaller number of core fabric colors, while preserving the values that most define the character’s recognizable look, keeps the design both faithful and manufacturable.
Common 2D Details and Their Plush-Safe Adaptations
| 2D Detail | Why It’s Difficult in Plush | Plush-Safe Adaptation |
|---|---|---|
| Tiny eyes or facial features | Hard to stitch accurately at a small scale | Enlarge slightly; use embroidery or safety eyes sized for visibility |
| Complex multi-color gradients | Fabric cannot blend color continuously like a digital gradient | Simplify to 2–3 flat color bands or use sublimation printing |
| Thin outlines around shapes | Difficult to stitch as a clean, durable seam line | Replace with a contrast-color fabric panel or topstitching |
| Fine pattern or texture detail | Lost at plush fabric scale or too costly to replicate | Represent with a simplified printed patch or embroidered accent |
| Very thin limbs or tails | Difficult to stuff evenly, prone to thin or lumpy spots | Widen the pattern piece slightly for stuffing stability |
Tip: Ask for a simplified “plush-ready” version of the character early rather than after the first prototype fails review. Identifying which fine details will be dropped or simplified before pattern making starts avoids building a prototype around a level of detail that fabric and stitching were never going to be able to reproduce.
Choosing Fabric, Colors, and Materials to Match Artwork
Fabric selection has a direct impact on how faithfully the finished plush matches the original artwork, since different fabric types render color, sheen, and texture very differently even when dyed to the same reference color code. Minky and other short-pile plush fabrics are commonly used for a soft, smooth look that reads close to a flat digital illustration, while longer pile fabrics add texture and dimension appropriate for characters with a fuzzy or fur-like appearance in the original art.
Color matching is typically done against a physical color standard such as a Pantone reference rather than a screen display, since on-screen colors vary between monitors and rarely translate directly to dyed fabric without adjustment. It is common for an initial fabric color match to look correct on a swatch but shift once cut and sewn into a full 3D form under different lighting, which is why color approval is usually confirmed on an actual sample rather than a swatch alone.
Reproducing Surface Details: Embroidery, Printing, and Appliqué
Surface details such as facial features, logos, or pattern accents are typically reproduced using embroidery, fabric appliqué, or direct sublimation printing, and each technique has different strengths depending on the level of detail and durability required. Embroidery holds up well to repeated handling and washing but is limited in fine detail and gradient reproduction.
Appliqué, where a separate fabric shape is stitched onto the surface, works well for bold color-blocked features but adds a visible seam edge. Sublimation printing can reproduce fine detail and gradients closely matching the original artwork, but is generally reserved for flat or low-curvature areas of the plush where the print will not distort significantly once the piece is stuffed.
Techniques for Reproducing Artwork Details on Plush
| Technique | Best For | Limitation |
|---|---|---|
| Embroidery | Facial features, logos, durable accents | Limited fine detail and gradient reproduction |
| Fabric appliqué | Bold color-blocked shapes and patches | Visible seam edge around the applied shape |
| Sublimation printing | Fine detail, gradients, photographic-style artwork | Best on flat areas; can distort on highly curved surfaces |
| Screen printing | Simple flat-color graphics on fabric panels | Less durable to heavy handling than embroidery |
| Safety eyes / molded features | Clearly defined eyes and noses on most plush styles | Fixed shapes; less flexible for highly stylized features |
Tip: Match fabric under the same lighting conditions the product will typically be seen in, not only under a color-matching lightbox. A fabric that matches a Pantone reference perfectly under standard lighting can still look noticeably different under warm retail lighting or daylight, and confirming the match under realistic conditions avoids a color complaint after the product ships.
Stuffing, Safety Features, and Internal Construction
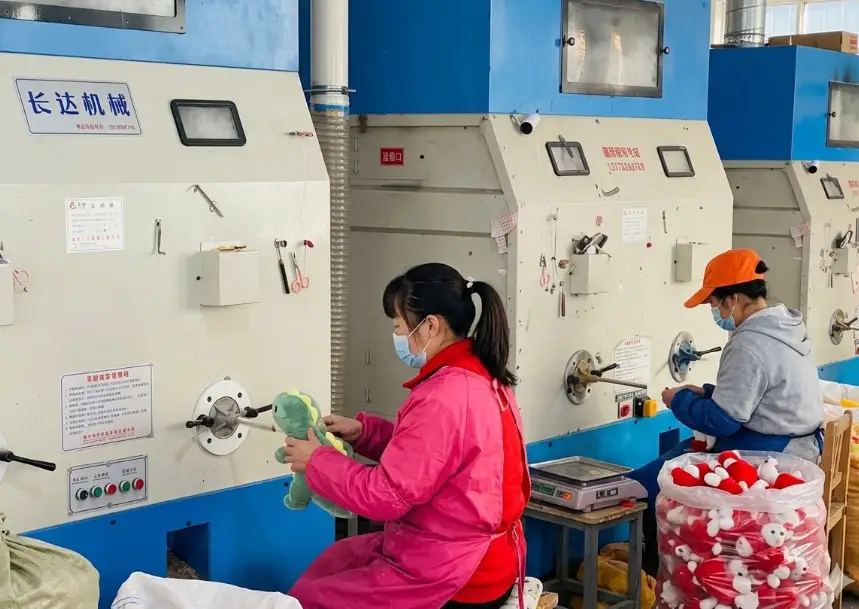
Beyond the visible surface, internal construction decisions have a direct effect on how closely the finished plush matches the pose and proportions shown in the original artwork. Stuffing density affects both the firmness of the finished toy and how well it holds a particular pose or silhouette — a lightly stuffed plush drapes and slouches, which can be desirable for a floppy, huggable character but wrong for a character drawn with a more rigid, upright stance. Internal support elements, such as a stiffened base panel or a wire armature in limbs meant to hold a specific bent pose, are sometimes added specifically to help a stuffed plush replicate a dynamic pose from the original 2D artwork that a simple fiberfill fill would not hold on its own.
Safety features add another layer of consideration that the original 2D artwork rarely addresses at all. Eyes, noses, and other small attached components must meet applicable toy safety requirements for pull-force resistance and, for products intended for younger children, avoid small parts that could pose a choking hazard — considerations that sometimes require enlarging a small facial feature or switching from a hard attached component to an embroidered equivalent, changes that need to be reconciled with staying visually faithful to the source artwork.
How Design Complexity Affects Cost and Lead Time
The level of detail carried over from the original 2D artwork has a direct and often underestimated effect on both unit cost and development timeline. Each additional fabric color, each separate appliqué piece, and each distinct embroidery element adds cutting, sewing, and assembly steps that scale across every unit produced, meaning a character with a dozen small color-blocked details will cost meaningfully more per unit to produce than one simplified to four or five core colors, even if the two look similarly detailed from a normal viewing distance.
This is why simplification decisions made early in the technical flat stage are not purely aesthetic — they are also cost and manufacturability decisions, and revisiting them after tooling, pattern grading, and initial sampling are already complete is far more expensive than addressing them before pattern work begins. A practical approach is to rank the character’s defining features by importance, preserving the one or two details that most define recognizability while being more flexible about simplifying secondary details that contribute less to how instantly the character is recognized.
Common Challenges and Mistakes When Converting Flat Art to Plush
The most frequent mistake in 2D-to-plush conversion is approving pattern work based only on a front-view photo of the prototype, without checking the sample from the back, sides, and in hand — angles the original 2D artwork never had to account for and where translation problems are most likely to surface. A second common mistake is underestimating how much a design needs simplifying; attempting to preserve every fine detail from the original artwork often results in a prototype that looks cluttered, is fragile, or costs significantly more to produce than a properly simplified version that still reads as faithful to the character.
Rushing the technical flat and turnaround stage to save time is another frequent source of downstream delay, since a pattern maker working from an incomplete or ambiguous reference will make assumptions that, if wrong, are usually not caught until the first physical prototype — at which point correcting them costs an entire additional sampling round rather than a quick sketch revision.
A third common mistake is treating fabric color approval as a simple checkbox rather than a genuine review step, approving a swatch quickly without viewing it under different lighting or checking it against the full-size sample once construction is complete. Colors can shift meaningfully once a small swatch becomes a full plush surface, particularly for characters with large solid-color panels where any color deviation is highly visible across the whole product.
Finally, skipping a genuine three-dimensional review — checking the sample only from a single photographed angle rather than physically turning it in hand — allows problems on the back or sides of the plush to go unnoticed until much later in the process, when they are far more expensive to fix.
Quality Control and the Approval Process
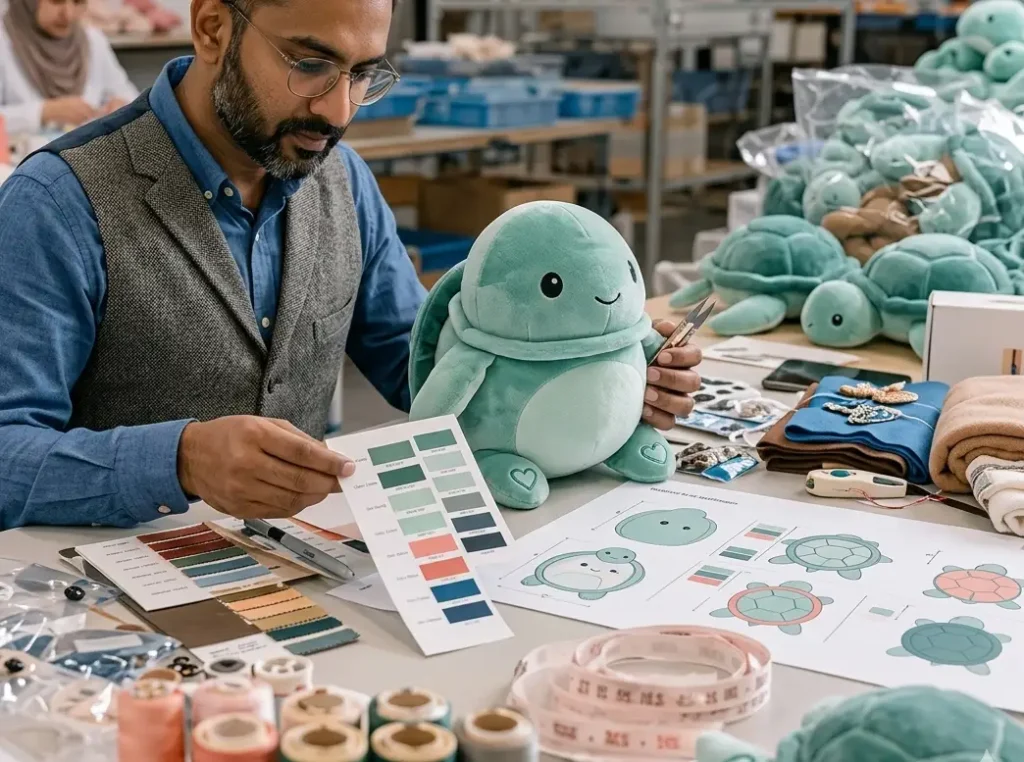
A structured, documented approval process at each sampling round prevents small deviations from compounding into a finished plush that has drifted noticeably from the original artwork by the time full production begins. Each round should be evaluated against a consistent checklist covering proportion accuracy, color match, surface detail placement, seam quality, and stuffing firmness, with any requested changes documented clearly enough that the next round can be evaluated against the same reference rather than a new, undocumented set of expectations.
Plush Sample Approval Checklist by Round
| Sample Round | Primary Focus | What to Check |
|---|---|---|
| First prototype | Overall shape and proportion | Silhouette match from all angles, balance, and stability when standing |
| Second sample (revision 1) | Color and surface detail accuracy | Fabric color match, feature placement, embroidery/print quality |
| Third sample (revision 2) | Construction and durability | Seam strength, stuffing consistency, stress points at limbs |
| Pre-production sample | Final confirmation before mass production | All prior corrections applied, full compliance, and labeling check |
Frequently Asked Questions
Do I need to provide more than one view of my artwork to develop a plush toy?
While plush development can technically begin from a single front-facing illustration, providing a back and side view — even a rough sketch — significantly reduces guesswork and the risk of needing an extra sampling round. Without additional views, the pattern maker must infer back-of-head shape, profile, and limb proportions on their own.
Why does my plush sample look different from my original 2D artwork?
Some difference is expected and necessary, since fine linework, gradients, and certain proportions that work in a flat illustration cannot be reproduced exactly in stitched fabric and must be simplified or adjusted for structural stability. A well-executed adaptation preserves the character’s recognizable silhouette and key features while adjusting the details that fabric and stitching cannot reproduce directly.
How many sampling rounds does it typically take to approve a plush design?
Most plush toy programs go through two to four sampling rounds before final approval, covering overall shape and proportion first, then color and surface detail accuracy, and finally construction and durability. Providing clear, complete reference artwork at the start tends to reduce the number of rounds needed.
Can gradient shading in my artwork be reproduced on a plush toy?
True continuous gradients are difficult to reproduce in dyed fabric or embroidery and are usually simplified into two or three flat color bands, though sublimation printing can reproduce gradients more closely on flat or low-curvature areas of the plush. Highly curved or stuffed areas are generally not well suited to printed gradients since the print can distort once the piece is filled.
What is the difference between a technical flat and the original character artwork?
The original character artwork is typically a single illustrative view created for visual appeal, while a technical flat is a simplified, multi-angle line drawing created specifically to give a pattern maker the dimensional information — front, back, side, and sometimes three-quarter views — needed to build an accurate 3D pattern.
Why do plush toy proportions sometimes need to change from the original drawing?
Proportions that look appealing in a 2D composition, such as an oversized head or very thin limbs, do not always translate into a stable, well-balanced stuffed form and may need slight adjustment to prevent the finished plush from being top-heavy, floppy, or structurally fragile. These adjustments are made carefully to preserve the character’s recognizable identity while improving how the plush actually performs as a physical object.
What information should I prepare before starting a 2D-to-plush conversion project?
The most useful starting materials are the primary character illustration, any existing reference to back or side views, a defined color palette with reference codes if available, and notes on which features are most important to preserve versus which details could be simplified if necessary. This upfront clarity reduces ambiguity during the technical flat and pattern-making stages.