Whether you are developing a new branded mascot, a collectible figure, or a mass-market stuffed animal, great plush toy character design is equal parts emotion, engineering, and storytelling. This guide covers every stage — from initial sketches to production-ready specifications.
Why Plush Toy Character Design Is More Than Just “Making It Cute”
In the global toy market, a plush toy lives or dies on the strength of its character design. A well-designed plush character communicates personality, triggers emotional attachment, and drives repeat purchase — all before a single word of marketing copy is read. Poor proportions, weak facial expressions, or ill-chosen fabrics can undercut even the most compelling brand concept.
Successful plush toy character design combines artistic sensibility with an understanding of stuffed animal construction, soft toy safety standards, and manufacturing feasibility. Designers who approach this process systematically — thinking about the end product from the very first sketch — consistently produce characters that translate from screen to sample with minimal revision cycles.
The term “cute” is often used loosely, but professional designers understand cuteness as a set of specific, replicable visual cues: exaggerated head-to-body ratios, simplified facial features, rounded contours, and soft colour palettes. Understanding why these elements work is the first step toward designing characters that resonate across age groups and cultural markets.
Key Visual Elements That Drive Emotional Appeal in Plush Characters
| Design Element | Recommended Range / Approach | Emotional Effect |
|---|---|---|
| Head-to-body ratio | 1:1 to 1:1.5 (head equal to or larger than body) | Triggers nurturing instinct; perceived as younger and more endearing |
| Eye size relative to face | Eyes occupy 25–35% of face width | Increases perceived expressiveness and empathy |
| Limb length | Short, rounded; typically 30–50% of body height | Conveys softness and approachability; reduces visual aggression |
| Colour palette | Desaturated pastels or warm mid-tones as base colours | Evokes comfort, warmth, and safety |
| Outline contour | Avoid sharp angles; prefer continuous curves and lobes | Signals softness at first glance; reinforces tactile expectation |
| Mouth expression | Subtle upward curve; avoid wide open mouths for infant-targeted SKUs | Communicates contentment without aggression |
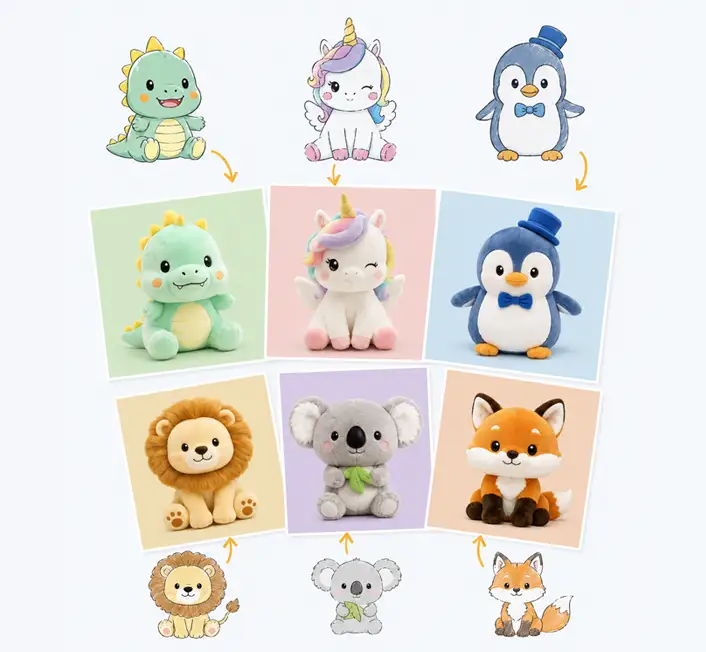
Getting Proportions and Silhouette Right From the First Draft
A plush toy’s silhouette is its identity. When a character is reduced to a single-colour shadow, it should still be instantly recognisable. This is the principle behind strong plush toy design: silhouette clarity must come before colour, texture, or detail are considered.
The Importance of the Head Shape
The head is the primary emotional anchor of any stuffed animal character. Designers working in the custom plush toy space consistently report that clients fixate on the head shape above all other features. A round head reads as friendly and young; an oval head can feel more mature or animal-like; a square or rectangular head gives a blocky, toy-like quality popular in pixel-art-inspired collectibles.
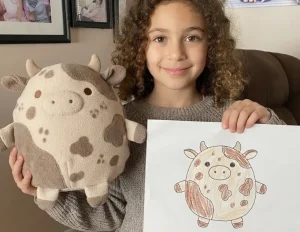
When translating a 2D character illustration into a 3D plush toy pattern, head volumes must be accounted for carefully. A design that looks proportionally balanced in a flat illustration will often appear top-heavy or disproportionate once filled with stuffing. Experienced pattern makers build in a subtle reduction of head width in the flat pattern — typically 8–12% — to compensate for the volume added by stuffing.
Body Proportions for Different Market Segments
Different product categories have distinct proportion conventions. Infant-targeted plush toys (0–2 years) typically use rounder, more compact bodies. Collector-grade character plush for adults tends toward slimmer proportions with more anatomical detail. Understanding these conventions allows designers to signal the intended audience through form alone.
Proportion Benchmarks by Plush Toy Category
| Category | Typical Total Height | Head: Body Ratio | Limb Style | Design Priority |
|---|---|---|---|---|
| Infant & Toddler | 20–35 cm | 1:0.8 (head dominant) | Stubby, no articulation | Safety, tactile softness |
| Children’s Standard | 30–60 cm | 1:1 to 1:1.3 | Medium length, simple | Playability, character recognition |
| Brand Mascot / Promotional | 25–45 cm | 1:1 to 1:1.5 | Variable, poseable optional | Brand identity fidelity |
| Collector / Limited Edition | 15–30 cm | 1:1.5 to 1:2 | Longer, more defined | Aesthetic detail, finish quality |
| Giant / Display Plush | 60 cm + | 1:1.2 to 1:1.8 | Elongated for visual balance | Visual presence, structural stability |
Designer Tip
Before sending your character illustration to a pattern maker, test the silhouette by filling it with a flat colour and viewing it at thumbnail size. If the character is still immediately recognisable at 80×80 pixels, your silhouette design is strong enough to survive the translation to 3D. If it looks like a generic blob, simplify the outline before proceeding.
Designing Facial Expressions That Create Lasting Emotional Connection
No element of a plush toy character design carries more emotional weight than the face. The eyes, in particular, are the primary driver of perceived personality. Plush toy facial design is a specialised discipline that intersects illustration, textile craftsmanship, and an understanding of how consumers project emotion onto objects.
Eyes: Embroidered vs Safety Eyes vs Printed
The three main execution methods for plush toy eyes each carry distinct aesthetic and functional trade-offs. Safety eyes — typically injection-moulded plastic with a locking washer — offer depth and gloss that embroidery cannot replicate, but introduce a hard element into an otherwise soft product, which creates safety implications for infant products.
Embroidered eyes are fully integrated into the fabric surface, making them the safest option for all age groups and giving the face a handcrafted warmth. Printed or sublimated eyes allow for the most complex colour gradients and detail, but can feel flat in person, and printed surfaces are vulnerable to crocking and UV fading over time.
Constructing Readable Expressions at Small Scale
One of the most common errors in plush character design is creating facial expressions that read well at illustration scale (typically A4 or larger) but become ambiguous or even unsettling when reduced to the actual toy dimensions. At 25 cm total height, the face area available for expression may be only 6–8 cm wide. Every feature must be designed to function legibly within that constraint.
Simple is almost always better. A slight upward curve at the outer corners of an embroidered mouth, combined with eyes set fractionally wide apart, conveys warmth and openness with minimal complexity. Asymmetrical expressions — a slightly raised eyebrow, a gentle smirk — can add personality to collector-grade designs but risk reading as confused or unfinished at production scale.
Eye Execution Method Comparison for Plush Character Design
| Method | Age Group Suitability | Visual Quality | Durability | Unit Cost Impact |
|---|---|---|---|---|
| Embroidered eyes | All ages including 0+ | Warm, handcrafted aesthetic | Excellent — integrated into fabric | Low to moderate |
| Safety eyes (plastic) | 3 years and above | High gloss, dimensional depth | Good — can loosen with heavy use | Low |
| Sublimated/printed | 5 years and above (typically) | Great detail, complex gradients | Moderate — surface vulnerable to wear | Moderate |
| Velvet appliquéd eyes | All ages | Soft texture, matte finish | Good | Moderate |
| Sequin or bead eyes | 8 years and above | Reflective, decorative | Variable — stitching critical | Moderate to high |
Pro Tip
When designing for global markets, test your facial expression design against cultural interpretation frameworks. In some East Asian markets, for example, a character with closed or half-closed eyes is read as happy and contented. In Western markets, the same expression may be perceived as tired or sad. Brief your design review team with market-specific context before finalising.
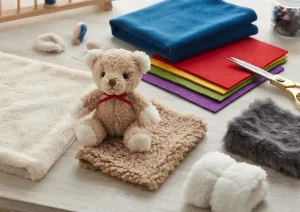
Selecting the Right Fabric and Materials for Your Plush Character
The tactile experience of a plush toy is inseparable from its emotional appeal. Consumers — and particularly children — form attachment to soft toys through touch as much as through sight. Plush toy fabric selection is therefore a design decision, not merely a procurement decision. The material you choose shapes perceived quality, target market positioning, and manufacturing cost.
Short Pile, Long Pile, and Specialty Fabrics
Short pile plush (pile height 3–6 mm) is the industry workhorse. It holds embroidery cleanly, photographs well, and offers a consistent, smooth surface ideal for characters with large areas of solid colour. It is also the most cost-efficient base fabric for medium to high production volumes.
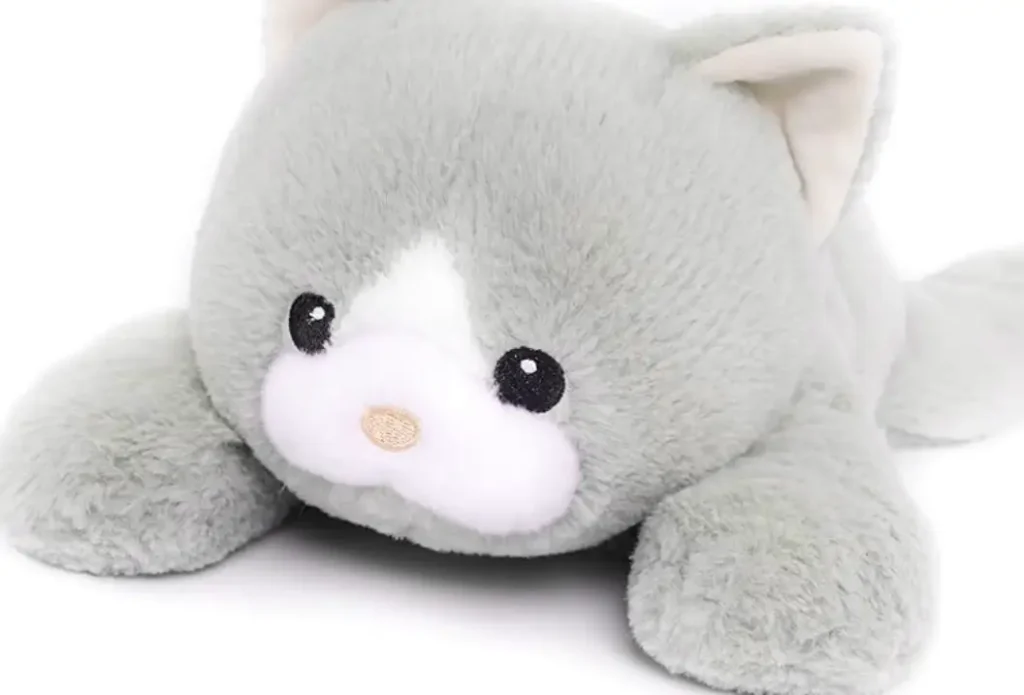
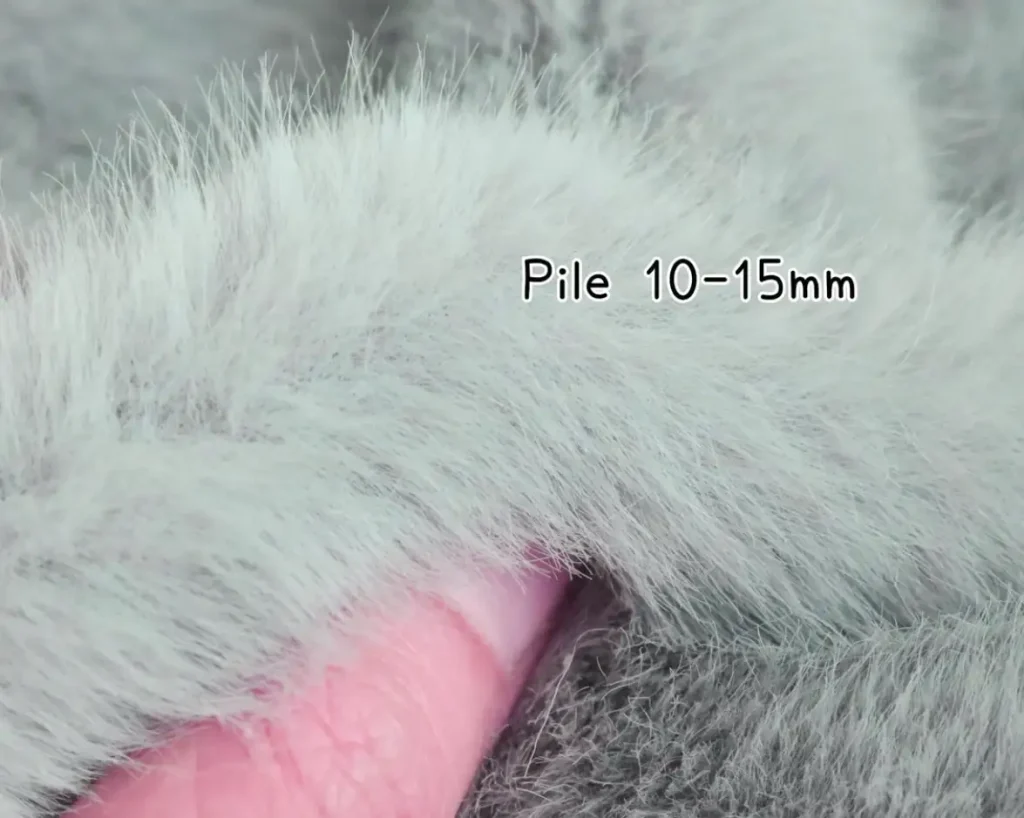
Long pile fabrics (pile height 8–25 mm) introduce texture and visual depth that can transform a simple character design into a premium tactile experience. However, long pile adds pattern-making complexity: seam placement must be carefully engineered to minimise visible join lines, and colour-to-colour registration in embroidery is more difficult to control. Long pile is best reserved for designs where the textural effect is central to the character’s visual identity — a shaggy dog, a fluffy cloud character, or an animal known for its distinctive fur.
Specialty fabrics — minky, sherpa, velboa, crystal velvet, and sequin panels — each carry aesthetic signatures that communicate different product personalities. Minky signals luxury and infant care. Sherpa reads as cosy and winter-themed. Sequin panels can create interactive reversible colour-change effects popular in novelty products.
GSM and Structural Integrity
Fabric weight (measured in grams per square metre, or GSM) directly affects how well a plush toy holds its shape. Low-GSM base fabrics (below 200 GSM) are prone to distortion under the tension of stuffing, causing seams to warp and embroidered features to pucker. For most standard plush toy constructions, a base fabric GSM of 220–280 provides a reliable balance of structure and softness.
Material Tip
Always request fabric swatches and sew test samples before committing to a full production run. The way a fabric photographs in a supplier catalogue is rarely how it reads in person under retail or domestic lighting. Evaluate swatches under both warm (incandescent) and cool (fluorescent/LED) light sources, as pile fabrics can shift considerably in perceived colour temperature between the two.
Building Brand Storytelling Into Your Plush Character Concept
The most commercially resilient plush characters are not just visually appealing — they carry embedded narrative. A character with a defined backstory, personality traits, and world context gives consumers a reason to invest emotionally beyond the initial purchase. This is the foundation of collectible plush design, character licensing, and long-running toy brand development.
Defining Your Character’s Personality Before Drawing a Single Line
Before any visual design begins, articulate your character’s personality in writing. At minimum, define three to five core personality traits, one defining quirk or contradiction (the element that makes the character feel three-dimensional), and a simple origin story of no more than two sentences. These parameters become the creative brief against which every subsequent design decision is evaluated.
A character defined only by its visual appearance is easy to copy and difficult to extend into new product formats, media, or collaborations. A character with documented personality traits and backstory has a defensible creative identity that can be protected, licensed, and grown across years of development.
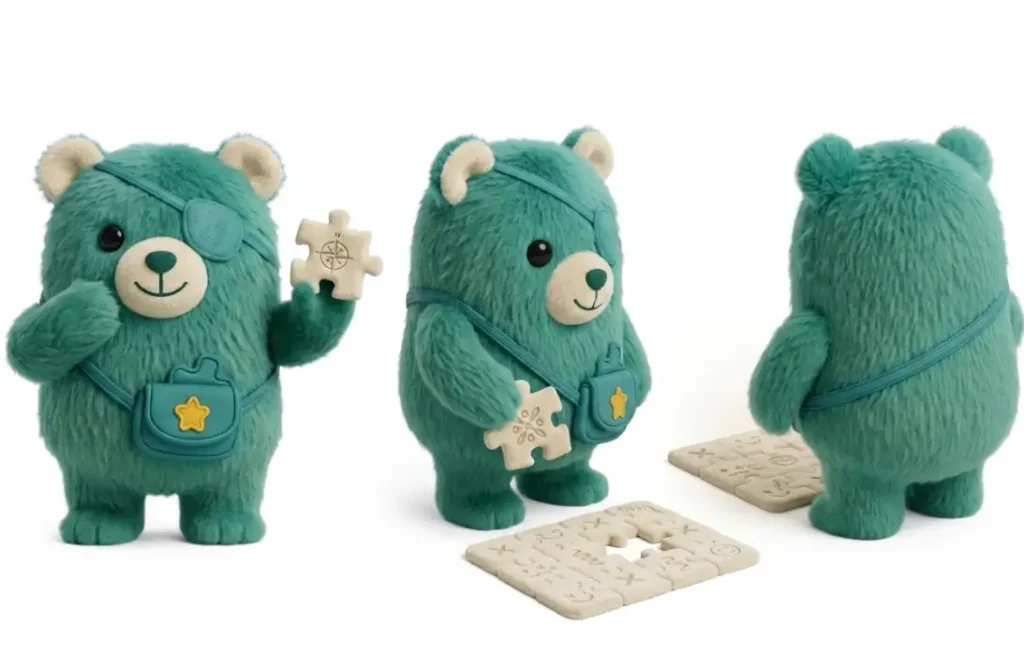
Visual Storytelling Through Accessories and Details
Small accessories — a stitched-on bow, a miniature backpack, a tonal pattern on a belly panel — tell stories without words. These details also create character variant opportunities: seasonal editions, regional exclusives, and limited releases that maintain the core character design while introducing new narrative touchpoints. Every accessory or decorative detail should serve the character’s story, not merely decorate the surface.
Character Development Framework for Plush Toy Brands
| Development Stage | Key Deliverable | Common Pitfall | Best Practice |
|---|---|---|---|
| Concept brief | Personality doc (traits, quirks, backstory) | Skipping straight to visual design | Lock the narrative before opening a sketchbook |
| Silhouette exploration | 6–12 rough thumbnail silhouettes | Refining the first idea | Explore radically different shapes before narrowing |
| Feature design | 3–5 face and detail variations | Over-detailing at this stage | Test legibility at actual production size |
| Colour development | 3-colour palette max + optional accent | Too many colours inflating unit cost | Each colour requires a separate fabric; audit ruthlessly |
| Storytelling integration | Defined accessories, markings, or motifs | Decorating without narrative purpose | Every detail should be explainable within the character’s story |
| Manufacturing handoff | Technical pack with patterns, specs, Pantone refs | Relying on verbal instructions | Annotate all dimensions, construction notes, and tolerance ranges |
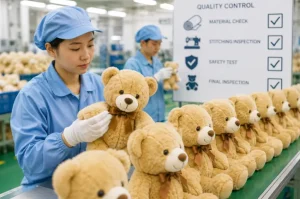
Designing for Manufacturing: How to Avoid Costly Revision Cycles
A plush character design that cannot be efficiently manufactured is not a finished design. Manufacturing-ready plush design requires an understanding of sewing tolerances, embroidery limitations, stuffing behaviour, and quality control checkpoints. Designers who build this knowledge into their practice consistently achieve closer pre-production sample results and fewer costly revision cycles.
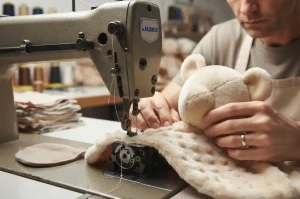
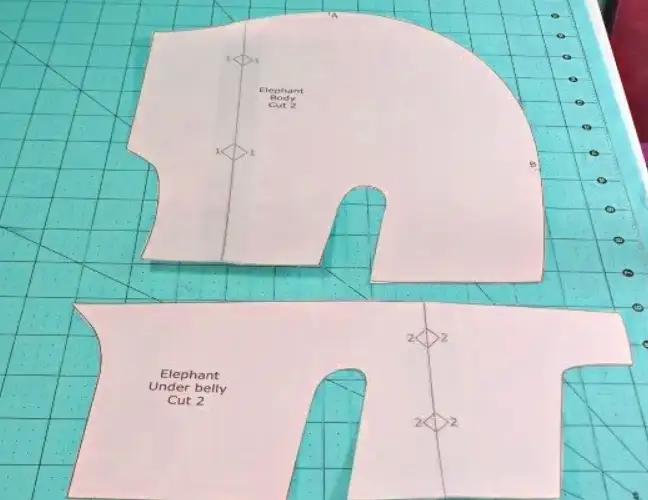
Seam Placement and Pattern Engineering
In plush toy construction, seams are both structural and aesthetic. Poorly placed seams create visible ridges across character surfaces, distort printed or woven patterns, and compromise the character’s silhouette. Skilled plush toy pattern makers place seams at the logical boundaries of colour or texture changes wherever possible, hiding joins within design transitions rather than across flat character surfaces.
Seam allowances for plush toy construction typically range from 8–12 mm depending on the fabric pile height and the complexity of the pattern piece. Tighter seam allowances introduce puckering risk; wider allowances add bulk to seam junctions and can affect the smoothness of curves on limbs and ear edges.
Stuffing Density and Shape Retention
The type and density of stuffing profoundly affects a character’s final shape and how it ages in use. Premium hollow-fibre polyester fill distributes evenly and resists clumping, but requires a higher initial stuffing density to prevent the toy from becoming floppy after handling. Bean pellets added to the base or lower body can improve posture and the toy’s ability to sit independently — a functional attribute that significantly affects retail display and consumer satisfaction.
Embroidery File Specifications
Embroidered facial features must be supplied to the factory as digitised embroidery files (typically .DST or .PES format) rather than as vector or raster artwork. The embroidery digitisation process — converting a visual design into a stitch sequence — has a profound impact on the final result. Request a physical sew-out sample of all embroidered features before approving the embroidery file for production, and evaluate it on the actual production fabric, not on backing paper.
Common Design-to-Production Errors and How to Prevent Them
| Error Type | Cause | Impact | Prevention Strategy |
|---|---|---|---|
| Head distortion after stuffing | Flat pattern not adjusted for volume compensation | Character looks top-heavy or misshapen | Apply 8–12% width reduction to head pattern pieces |
| Embroidery puckering | High-density stitch count on low-GSM fabric | Facial features wrinkle and distort | Use stabiliser backing; limit fill stitch density |
| Colour mismatch between fabric and reference | Pantone-to-dyelot variation; pile direction affecting colour perception | Product fails visual approval | Approve physical dyed swatch against Pantone under defined lighting |
| Seam visibility on smooth surfaces | Seam placed across large flat areas | Character looks “segmented” rather than organic | Route seams along design boundaries; use colour-matched thread |
| Features not centred | Placement tolerance too wide in QC spec | Inconsistent character expression across batch | Define placement tolerance (±2 mm) explicitly in technical pack |
| Accessory detachment | Decorative elements secured only by surface stitching | Safety hazard; product recall risk | Bar-tack or bartack all decorative attachments; test to EN 71 / ASTM F963 pull force |
Production Tip
Build a physical “golden sample” — a pre-production prototype signed off by all stakeholders — and keep it at the factory throughout the production run as the reference standard. All QC inspections should be conducted against the golden sample, not against the original digital design files. Discrepancies that are acceptable between digital and physical are often not acceptable between individual production units.
Plush Toy Character Design: Your Questions Answered
What is the ideal head-to-body ratio for a plush toy character?
For most consumer plush toys, a head-to-body ratio of 1:1 to 1:1.3 (head equal to or slightly larger than the body) reliably triggers the “kawaii” response — the perception of youth and vulnerability that drives nurturing attachment. For infant-targeted products, even more exaggerated ratios (head visually dominant over body) are common. Collector and adult-targeted character plush can push toward 1:1.5 to 1:2 for a more mature, proportionally refined look. There is no single universal ideal; the correct ratio depends entirely on the target audience and the character’s intended personality.
Should I use embroidered eyes or safety eyes for my plush toy design?
The choice depends on two primary factors: the target age group and the desired aesthetic. For any product intended for children under 3 years of age, embroidered eyes are the only compliant option in most major markets, as hard plastic components present a choking hazard. For toys targeted at children aged 3 and above, safety eyes are widely used and provide a glossy, dimensional quality that embroidery cannot replicate. For premium or collector-grade products, embroidered eyes — particularly when combined with skilled digitisation — can achieve a warmth and character that safety eyes lack. Always confirm compliance requirements for your target sales market before finalising this decision.
How many colours should a plush toy character design use?
As a general guideline, three to five distinct colours (including the base body colour) strike the best balance between visual impact and production cost. Each unique fabric colour in a plush toy typically represents a separate pattern piece, a separate fabric procurement item, and an additional colour-matching and quality control process. Designs with more than six fabric colours escalate unit cost significantly and introduce greater risk of colour inconsistency across production batches. Embroidered details and printed elements can add visual complexity without adding fabric colour count, making them efficient tools for enriching a restrained colour palette.
What fabric is best for plush toy character production?
Short-pile polyester plush (pile height 3–6 mm, GSM 220–280) is the industry standard for good reason: it is cost-efficient, widely available in a consistent colour range, holds embroidery cleanly, and performs reliably across washing and use tests. For products where tactile premium is central to the proposition — infant comforters, high-end collectibles, branded lifestyle products — minky fabric (ultra-soft microfibre) offers a markedly superior feel at a higher material cost. Long-pile fabrics introduce construction complexity but can be transformative for characters whose identity depends on a distinctive textural quality. The “best” fabric is ultimately the one that serves the character design’s emotional and functional brief most precisely.
How do I ensure my plush toy character design is manufacturable?
The most effective strategy is to involve an experienced plush toy pattern maker or technical design consultant during the concept development phase — not after the design is finalised. Early consultation identifies features that are difficult or impossible to replicate at production cost and scale, allowing the design to be adapted before investment in pre-production samples. Additionally, preparing a thorough technical pack — including dimensioned sketches, Pantone fabric and thread references, defined placement tolerances for all embroidered features, and explicit construction notes — dramatically reduces the iteration required during the sampling phase. A well-prepared technical pack is the single highest-return investment a plush toy design project can make.
How long does the plush toy character design and sampling process take?
The timeline varies significantly depending on design complexity, the number of revision rounds, and factory capacity. For a moderately complex character design (3–5 fabric components, embroidered face, simple accessories), the journey from approved technical pack to approved pre-production sample typically runs 45–75 days. Complex designs with multiple fabric types, long-pile elements, or intricate accessories may require 90–120 days through the sampling stage. Designs requiring significant revisions between sample rounds will extend the timeline further. Building realistic buffer time into project plans — particularly for designs involving character licensing approvals or multi-stakeholder sign-off — prevents schedule pressure from compromising the quality of the final approved sample.
What safety standards apply to plush toy character design?
The applicable safety standards depend on the target sales market. For the European Union, EN 71 (Toy Safety) is the primary standard, covering mechanical and physical properties, flammability, and chemical content. For the United States, ASTM F963 (Consumer Safety Specification for Toy Safety) applies. For the UK post-Brexit, the UK Toy Safety Regulations (closely aligned with EN 71) are in force. Key design considerations with safety implications include: the attachment strength of all sewn-on components (eyes, noses, accessories), the flammability rating of all fabrics and fill materials, the use of any drawstrings or cords, and the chemical safety of all dyes and surface treatments. Safety testing should be conducted by an accredited third-party laboratory, and compliance documentation must be maintained for all markets in which the product is sold.