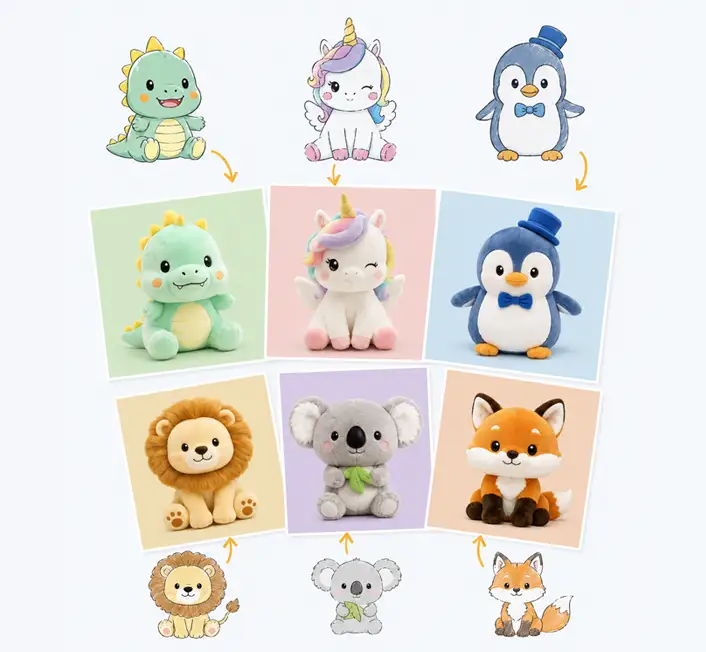
Plush Toy Sewing Process is a key step in plush manufacturing that ensures every toy is carefully stitched, durable, and finished with consistent quality and detail. A step-by-step look at how a plush toy moves from cut fabric panels to a finished, stuffed product — stitching methods, seam construction, and the quality checkpoints along the way.
The sewing process is where a plush toy design stops being a flat pattern and becomes a physical, three-dimensional object, and it is also where the majority of quality issues either get built in or get caught before a product ever reaches production volume. Every stitch type, seam allowance, and assembly sequence decision made during sewing directly affects the toy’s final shape, durability, and safety — factors that are far more difficult and expensive to correct once bulk production is underway than while a sewing process is still being developed and refined on early samples.
Because plush sewing still relies heavily on skilled manual labor at nearly every stage — cutting, seaming, turning, stuffing, and closing — the consistency of a finished production run depends as much on the discipline of documented process standards as it does on the underlying pattern and material quality. A well-designed pattern sewn without clear stitch density, seam allowance, and sequence documentation can still produce inconsistent results across a large order, which is why understanding the mechanics of each sewing stage matters for buyers evaluating a manufacturing partner, not just for the factory floor team executing it.
This guide walks through how plush toys are actually sewn from start to finish, covering fabric cutting, stitch and seam selection, the turning and stuffing sequence, closing methods, and the quality checkpoints that separate a well-constructed plush toy from one prone to seam failure or shape distortion.
How Plush Toy Fabric Is Cut Before Sewing Begins
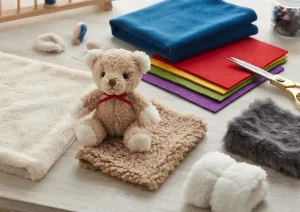
Sewing begins with cutting, and the precision of this step has a direct downstream effect on how cleanly the final seams align and how consistently each unit in a production run matches the approved sample. Fabric panels are cut from a pre-approved pattern, typically using either die-cutting for high-volume runs or careful hand-cutting with cutting templates for lower-volume or highly detailed designs. Plush and faux fur fabrics require particular cutting care compared to standard woven fabric, since the pile direction must be consistently oriented across all panels of a given piece or the finished toy will show visible directional shading where panels meet.
Laser cutting has become increasingly common for complex or small-detail pattern pieces, since it produces clean, precise edges and can simultaneously seal synthetic fabric edges to prevent fraying, reducing the risk of loose threads working free after repeated handling. Laser cutting is generally reserved for synthetic fabrics that respond well to heat sealing; natural fiber fabrics such as cotton generally still rely on die-cutting or hand-cutting followed by a separate edge-finishing step.
Common Cutting Methods Compared
Fabric Cutting Methods Used in Plush Toy Production
| Cutting Method | Best Suited For | Key Advantage |
|---|---|---|
| Die-cutting | High-volume production with standardized pattern pieces | Fast, consistent panel dimensions across large runs |
| Hand-cutting with templates | Low-volume runs, prototypes, and highly detailed designs | Flexible for design changes without new die tooling |
| Laser cutting | Synthetic fabrics with fine detail or small pattern pieces | Precise edges with simultaneous heat-sealing of raw edges |
Tip: When working with long-pile plush or faux fur fabric, always confirm that every cut panel is marked with pile direction before cutting begins, and verify this marking is still visible after the panels are separated from the fabric roll. A single reversed panel is one of the most common causes of visible shading mismatch on finished plush toys, and it is far easier to catch at the cutting stage than after the panels have already been sewn together.
Stitch Types and Seam Construction in Plush Toy Sewing
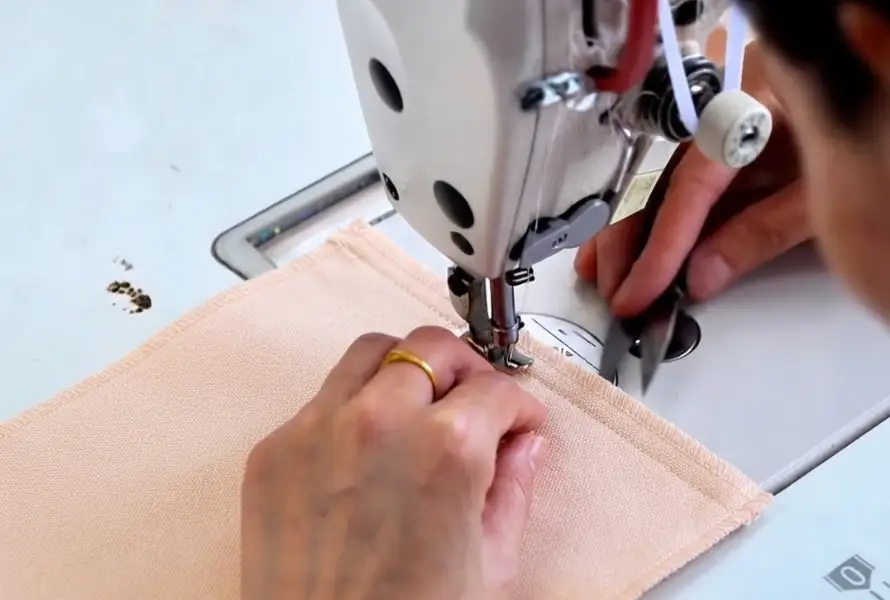
Seam construction is the structural core of plush toy sewing, and the specific stitch type and seam allowance used directly determine how much stress the finished seam can withstand once the toy is stuffed, handled, and washed over its lifespan. Most plush toy body seams use a straight lockstitch for strength and consistency, while some soft, stretch-prone fabrics benefit from an overlock or serged seam that both joins the panels and finishes the raw edge simultaneously, reducing fraying risk inside the finished toy where the seam will never be visible again once turned right-side out.
Seam allowance — the distance between the stitch line and the raw fabric edge — is typically specified between 5 mm and 8 mm for standard plush construction, balanced against the need for enough fabric to prevent the seam from pulling apart under stuffing pressure while not adding so much bulk that it distorts the finished shape once turned. Tight curves and small detail areas, such as around ears, paws, or facial features, often require a reduced seam allowance combined with small clip notches along the curve to allow the fabric to lie flat once turned, since an unmodified standard seam allowance will pucker or bunch in these tighter radius areas.
Stitch Density and Its Effect on Seam Durability
Stitch density, measured in stitches per inch, directly affects how much load a seam can bear before failing. A higher stitch density generally produces a stronger, more durable seam, which matters most in high-stress areas such as limb attachment points, tail bases, and any location where a child is likely to pull or swing the toy repeatedly. However, excessively high stitch density on lightweight or loosely woven fabric can perforate the material with too many needle holes in a small area, weakening the fabric itself rather than strengthening the seam — meaning stitch density should be matched to fabric weight and construction rather than maximized universally.
Recommended Stitch Density by Fabric Type and Stress Area
| Fabric/Area Type | Recommended Stitch Density | Reasoning |
|---|---|---|
| Standard body seams, medium-weight plush | 8–10 stitches per inch | Balances strength with fabric integrity |
| High-stress joints (limbs, tail base) | 10–12 stitches per inch | Added durability where repeated pulling stress occurs |
| Lightweight or loosely woven fabric | 6–8 stitches per inch | Prevents excessive perforation, weakening the fabric |
| Decorative topstitching (non-structural) | 8 stitches per inch | Standard visual consistency, not load-bearing |
Sewing Machine Types Used in Plush Production
Different stages of plush toy assembly typically rely on different sewing machine types, each suited to a specific part of the construction sequence. Flatbed lockstitch machines handle the majority of straight body seams, while cylinder-bed machines, which allow fabric to wrap around a narrow arm rather than lying flat, are used for sewing tubular sections such as limbs, tails, or narrow appendages that would be difficult to maneuver under a standard flatbed.
Overlock or serger machines are used where raw edges need to be finished simultaneously with joining, particularly on fabrics prone to fraying. Understanding which machine type a given seam requires helps explain why certain design features — such as very narrow tubular limbs — naturally increase both sewing time and skill requirements compared to a simpler, flat-panel body design.
Turning, Stuffing, and Shaping the Plush Toy
Once the body panels are sewn together, the piece is turned right-side out through a gap deliberately left unstitched during the sewing stage, most commonly positioned along the bottom seam, back seam, or another location that will be concealed or reinforced during final closing. Turning small or detailed pieces — fingers, ears, or thin limbs — often requires a turning tool to push the fabric through narrow channels without tearing the seam, and this step is a common bottleneck in production for designs with intricate extremities.
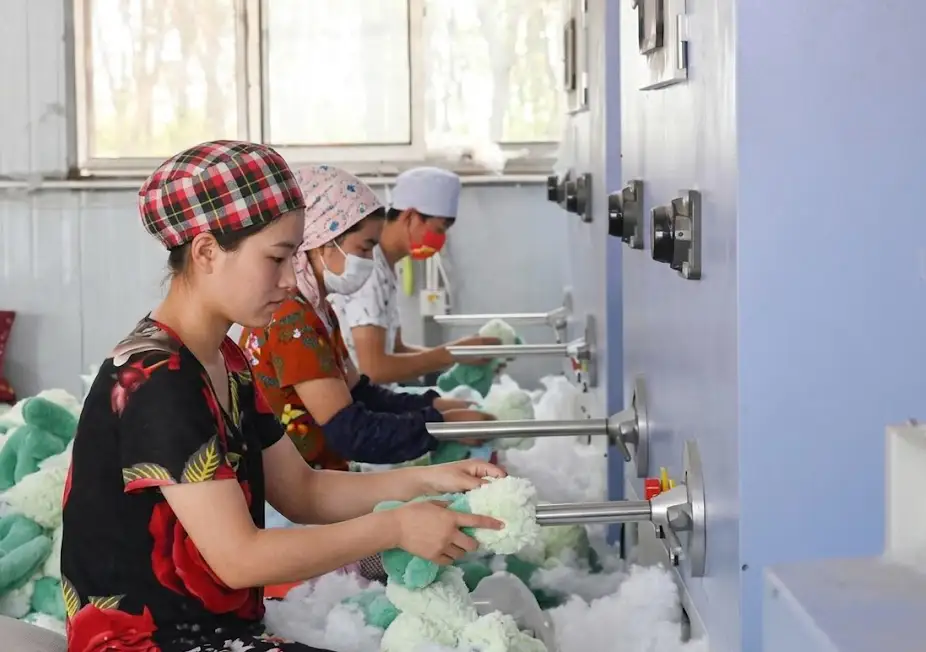
Stuffing is applied by hand or with a stuffing machine, working from the extremities inward to ensure even fill distribution and prevent lumping or under-filled sections that can appear once the toy is fully closed. Achieving a smooth, evenly filled shape without over-stuffing — which strains seams and can cause premature failure — or under-stuffing — which produces a limp, unappealing result — requires skilled, consistent technique, particularly on designs with complex silhouettes or multiple separately stuffed sections that must maintain proportional fill relative to one another.
Tip: For plush designs with thin limbs, tails, or other narrow extremities, specify a slightly reduced seam allowance and request that the factory use a turning tool rather than manual turning for these sections during sampling. This small process detail meaningfully reduces the risk of seam strain or small tears at narrow turning points that might not appear on a single prototype but can surface as a recurring defect once the same process is repeated at production volume.
Fill Type and Its Effect on Final Shape
The type of filling material used also interacts directly with the sewing and stuffing process. Polyester fiberfill is the most common filling for standard plush toys, offering a soft, evenly distributable fill that holds shape reasonably well without adding significant weight. Plastic or glass pellets are frequently blended into feet, bases, or specific body sections to add weight for stability or a more realistic weighted feel, but pellet-filled sections require reinforced, tightly stitched inner seams or a separate pellet pouch to prevent the pellets from working through the outer seam over time or shifting unevenly within the toy.
Some designs combine multiple fill types within a single toy — soft fiberfill in huggable body sections alongside a weighted pellet base for stability, or a firmer, higher-density fill in structural areas that need to hold a specific pose or shape. Coordinating fill type across sections requires clear specification at the design and sampling stage, since a sewing team working without explicit fill-zone documentation may default to a single uniform fill throughout, producing a finished toy that does not achieve the intended weight distribution or shape retention.
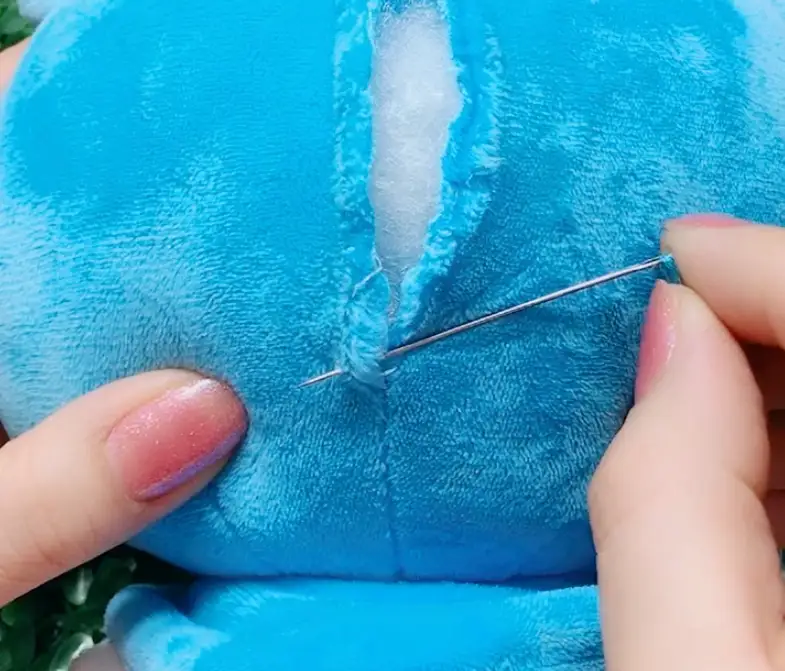
Closing the Toy: Final Seam Methods
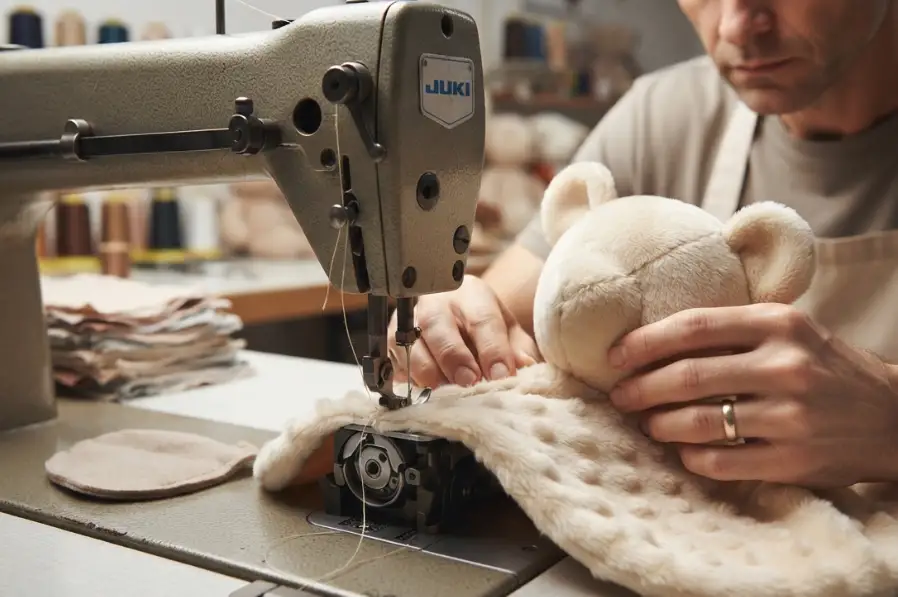
Once stuffing is complete, the remaining opening must be closed securely, and the method chosen affects both the toy’s finished appearance and the strength of what is often the single most stress-tested seam on the entire product, since it must hold the full weight and pressure of the stuffed toy against repeated handling. Ladder stitching, a hand-sewing technique that creates a nearly invisible closure by weaving thread back and forth just beneath the fabric surface on both sides of the gap, is the most common method for closing plush toys because it produces a clean, strong seam without a visible line across the finished surface.
Machine closing is sometimes used for cost efficiency on lower-cost or less detail-sensitive products, but it typically leaves a visible seam line and generally cannot match the strength-to-invisibility ratio that skilled hand ladder stitching achieves. For premium or cosmetically sensitive plush designs, hand closing remains the standard expectation despite requiring more skilled labor time than a machine-closed alternative.
Closing Method Comparison
Plush Toy Closing Method Comparison
| Closing Method | Visual Result | Typical Use Case |
|---|---|---|
| Hand ladder stitching | Nearly invisible, clean finish | Standard for most retail and premium plush toys |
| Machine closing | Visible seam line along the closure | Lower-cost products where the cosmetic finish is less critical |
| Reinforced double-stitch closing | Slightly more visible but maximum seam strength | Heavy-duty or pet-market plush requiring extra durability |
Attaching Accessories and Secondary Components
Many plush designs require attaching accessories — safety eyes, embroidered patches, ribbons, clothing, or removable props — as a distinct sewing operation after the main body is assembled and closed, or in some cases before the body panels are joined, depending on where the accessory sits relative to the seam lines. Attachment security for any component within a child’s reach is subject to pull-testing requirements under applicable toy safety standards, meaning the stitch count, thread strength, and attachment method for accessories must be validated against the same mechanical safety requirements as the toy’s structural seams, not treated as a purely cosmetic afterthought.
Sewing sequence planning matters significantly for designs with multiple accessories, since attaching certain components too early can make later stages of the main body sewing physically difficult, while attaching them too late can make precise placement harder to achieve consistently. Establishing and documenting the correct sewing sequence during the sampling phase — rather than leaving sequence decisions to individual line workers’ judgment — is one of the most effective ways to maintain consistency once a design moves into full production volume.
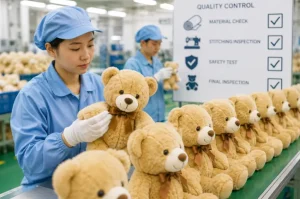
Quality Checkpoints Throughout the Sewing Process
Quality control in plush toy sewing is most effective when checkpoints are distributed throughout the process rather than concentrated only at final inspection, since catching a cutting or seam issue early prevents it from being built into dozens or hundreds of units before detection. In-process inspection typically checks panel accuracy immediately after cutting, seam strength and stitch density spot-checks during sewing, fill consistency and weight checks after stuffing, and a final closure and overall appearance check before the finished toy moves to packaging.
Pull testing on eyes, noses, and any attached accessories is a standard and non-negotiable checkpoint for products intended for children, typically performed on a sampling basis throughout a production run rather than only on the very first units. Seam strength testing, sometimes performed through a simple manual stress test on sample units pulled at intervals throughout the run, helps confirm that stitch density and seam allowance specifications are being consistently maintained as the production line continues rather than drifting gradually as the run progresses.

Maintaining a simple defect log across a production run — recording the type and frequency of any seam, stuffing, or accessory issues found during in-process checks — provides valuable feedback for identifying whether a defect is an isolated incident or an emerging pattern tied to a specific machine, workstation, or fabric batch. This kind of structured tracking allows corrective action to be taken early in a run, before a systemic issue affects a large proportion of the order, and also provides useful documentation for buyers who want visibility into how consistently a given quality standard was actually maintained across the full production quantity rather than just on the approved pre-production sample.
Frequently Asked Questions
1. What is the standard seam allowance used in plush toy sewing?
Standard plush toy seam allowance typically falls between 5 mm and 8 mm, chosen to provide enough fabric strength to withstand stuffing pressure without adding excessive bulk that distorts the finished shape once turned right-side out. Tight curves and small detail areas such as ears or paws often use a reduced seam allowance combined with clip notches to allow the fabric to lie flat without puckering.
2. Why is hand ladder stitching preferred over machine closing for plush toys?
Hand ladder stitching creates a nearly invisible closure by weaving thread just beneath the fabric surface on both sides of the remaining gap, producing a clean finish without a visible seam line across the toy’s surface. Machine closing is faster and lower cost but typically leaves a visible seam, making hand ladder stitching the standard choice for most retail and premium plush products where a clean cosmetic finish matters.
3. How does stitch density affect the durability of a plush toy?
Higher stitch density generally increases seam strength, which is particularly important at high-stress attachment points such as limb joints and tail bases where repeated pulling or handling occurs. However, stitch density that is too high for a given fabric weight can weaken the fabric itself through excessive needle perforation, so stitch density should be matched to both the fabric type and the specific stress level expected at each seam location rather than maximized uniformly across the entire toy.
4. What causes uneven or lumpy stuffing in a finished plush toy?
Uneven stuffing typically results from inconsistent fill technique, working from the wrong direction relative to the toy’s extremities, or applying too much or too little fill relative to the cavity size of a given section. Skilled hand-stuffing that works methodically from the extremities inward, combined with clear fill weight specifications for each section of a multi-part design, produces a more consistent, evenly filled result across a full production run than an unstructured stuffing process.
5. Why do plush toys sometimes fail at the seams after normal use?
Seam failure after normal use is most commonly caused by insufficient stitch density or seam allowance relative to the actual stress the toy experiences, particularly at high-load points like limb attachments, tails, or wherever a child regularly grips and pulls the toy. Over-stuffing beyond the seam’s designed capacity, inadequate reinforcement at accessory attachment points, and using a stitch type unsuited to the fabric’s stretch characteristics can all contribute to premature seam failure even when the toy initially appears well constructed.
6. What quality checks should happen during the sewing process, not just at final inspection?
Effective quality control includes checkpoints at multiple stages: panel accuracy immediately after cutting, seam strength and stitch density spot-checks during sewing, fill weight and consistency checks after stuffing, and a final closure and appearance review before packaging. Distributing checkpoints throughout the process, rather than relying solely on final inspection, allows issues to be caught and corrected before they are built into a large number of units, reducing overall scrap rate and rework.