A complete guide for buyers, brand owners, and sourcing managers navigating the prototype stage of soft toy manufacturing.
What Is Plush Toy Prototype Development?
Plush toy prototype development is the structured process of translating a concept — whether a rough sketch, a reference image, or a brand character sheet — into a tangible, physical sample that can be evaluated for design accuracy, material quality, safety compliance, and manufacturing feasibility before committing to full production.
In the soft toy industry, prototyping occupies a critical position within the product lifecycle. It bridges the gap between creative ideation and mass production, functioning as a quality control checkpoint, a sourcing validation tool, and a buyer approval mechanism all at once. A well-executed prototype reduces downstream revision costs, shortens the production timeline, and establishes a shared reference standard between the buyer and the factory.
Understanding prototype development from an engineering and sourcing perspective means recognizing that each prototype stage is iterative by design. The first sample is rarely the final one — instead, it opens a structured feedback loop between buyer requirements and factory capabilities.

The Core Stages of Plush Prototype Development
The prototype development process in plush toy manufacturing typically unfolds across four to five distinct stages, each serving a defined purpose in narrowing the gap between concept and production-ready specification.
Concept sketch and technical package preparation
Before any physical work begins, the buyer or designer prepares a technical package that typically includes front, side, and back views of the character, a material callout list specifying fabric type and color codes, and dimensional specifications for overall size. Some buyers also provide Pantone references or custom color swatches to minimize color deviation during execution. This package serves as the primary source of truth for the factory’s pattern-making team.
TIP: Include a physical reference color chip or Pantone C-series number in your tech pack. Digital color representations on screens vary by monitor calibration, and factories use physical swatches — not hex codes — to mix dye lots and select base fabrics.
Pattern making and materials sourcing
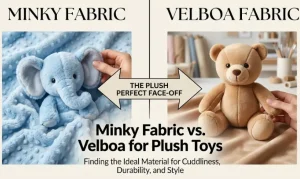
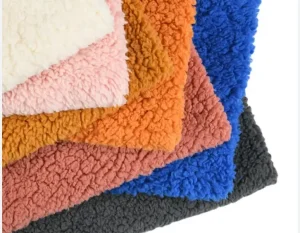
The factory’s pattern-making team decomposes the character illustration into individual fabric panels — a process that requires both artistic interpretation and technical sewing knowledge. Each panel is sized and shaped to account for seam allowances, fabric stretch behavior, and stuffing volume. In parallel, the factory sources the raw materials: pile fabric (faux fur, sherpa, minky, or velboa are the most common categories), fill material (typically PP cotton or memory foam), and components such as safety eyes, noses, and any embellishments.
Prototype material selection overview
| Material Category | Common Types | Key Considerations | Typical Use |
|---|---|---|---|
| Pile fabric | Faux fur, minky, sherpa, velboa | Pile height, direction, color fastness | Main body surfaces |
| Fill material | PP cotton, memory foam, pellets | Loft, recovery, REACH compliance | Internal stuffing |
| Eye components | Safety eyes, embroidered eyes, printed | EN 71-1 pull-force rating, age group | Face assembly |
| Accessory fabric | Felt, woven poly, cotton twill | Color bleed risk, hand-feel match | Clothing, patches |
| Thread | Polyester spun, nylon filament | Seam strength, color match, shrinkage | All sewn seams |
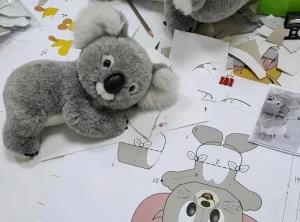
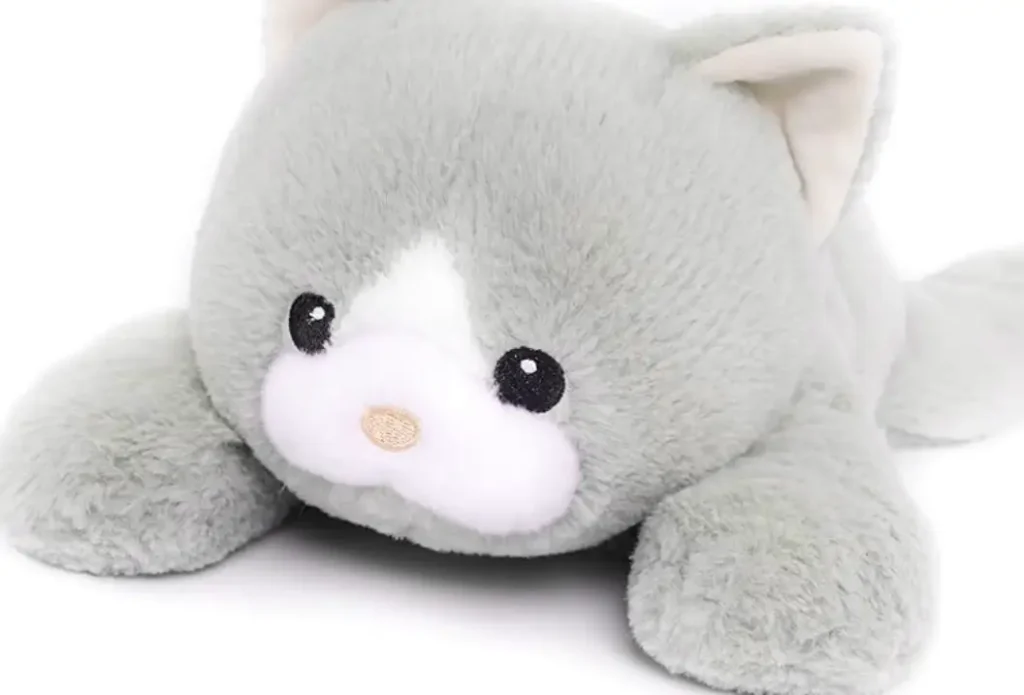
Initial sample construction (PP Sample)
The Pre-Production (PP) sample is the first three-dimensional realization of the design. It is hand-sewn or constructed under close supervision by a skilled sample room technician rather than on a production line. At this stage, the goal is visual and dimensional accuracy — does the character look correct from all angles? Does the proportionality of limbs, head, and body match the design brief? Minor material deviations are acceptable here because the PP sample is primarily a shape validation tool.
Revision cycles and counter samples
Once the buyer receives the PP sample, a formal review against the technical package takes place. Feedback typically covers proportion corrections, surface texture matching, color accuracy, embroidery or print placement, and overall aesthetic fidelity. The factory produces a counter sample incorporating these comments, and this cycle repeats until both parties reach agreement. Industry standard for complex character designs typically involves two to three revision rounds before a sample is approved.
Production-approved (TOP) sample
The Top-of-Production (TOP) sample is pulled from the first batch of mass production and serves as the final binding reference. Unlike the PP sample — which is hand-crafted — the TOP sample is sewn on production-line equipment with actual production materials, so any manufacturing variability becomes immediately visible. Buyers use the TOP sample to sign off on production quality and retain it as a benchmark for incoming quality inspection (IQI) during shipment.
Factors That Drive Prototype Complexity and Cost
Not all plush toy prototypes cost the same amount or take the same time to develop. Several structural and design variables directly influence prototype complexity, and understanding them helps buyers set realistic budgets and timelines.
Prototype complexity drivers
| Variable | Lower Complexity | Higher Complexity |
|---|---|---|
| Character form | Simple round shapes, minimal appendages | Realistic animal anatomy, multiple jointed limbs |
| Fabric type | Solid-color minky or velboa | Multi-color faux fur with directional pile |
| Surface decoration | Embroidered face only | Heat transfer prints, appliqués, mixed media |
| Accessory components | None | Removable clothing, sewn accessories, sounds |
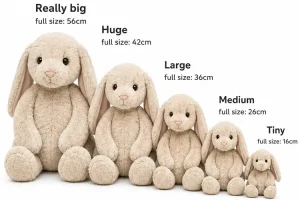
| Size | Under 25 cm | Oversized (60 cm+) with internal wire armature |
A standard prototype for a simple character — approximately 20–25 cm in height, single fabric, embroidered face — typically requires 10–15 business days from tech pack receipt to sample dispatch. More elaborate designs involving multi-fabric panels, clothing components, and licensed IP artwork can extend the sample development window to 25–35 business days.
TIP: When budgeting for prototype development, factor in international courier costs in both directions. Sample shipping (express air freight) between Asia and major markets can add $40–$120 per revision round per sample, which accumulates quickly across multiple revision cycles.
Safety Standards That Apply During Prototyping
Prototype development is also the appropriate stage to validate regulatory compliance before production lock-in. Correcting a safety issue identified in a prototype costs a fraction of the remediation cost at the production stage or — far worse — at the recall stage.
Applicable safety standards by target market
| Market | Standard | Key Prototype Checkpoints |
|---|---|---|
| United States | ASTM F963, CPSIA | Mechanical hazard assessment, phthalate limits, flammability, small-part pull test |
| European Union | EN 71-1, EN 71-2, EN 71-3 | Physical/mechanical safety, flammability, chemical migration limits |
| United Kingdom | BS EN 71 | Same as EU EN 71 series post-Brexit |
| Australia | AS/NZS 8124 | Mechanical safety, age grading, labeling requirements |
| China domestic | GB 6675 | Chemical safety, mechanical testing, warning labeling |
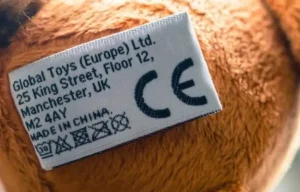
The most common safety-related prototype modifications involve surface component pull-force testing (particularly for safety eyes and noses on toys intended for children under 36 months), seam strength verification, and flammability behavior of pile fabric under open-flame proximity tests. These evaluations can be initiated with a prototype sample at third-party labs such as SGS, Bureau Veritas, or Intertek before production begins.
Communicating Effectively With Your Factory During Prototyping
One of the most underestimated factors in prototype development efficiency is the quality of buyer-to-factory communication. Ambiguous feedback, verbal-only instructions, and incomplete technical documentation are the primary causes of unnecessary revision cycles and extended lead times.
Structured feedback practices that reduce revision rounds
Effective prototype feedback should be annotated directly on photographs of the received sample, with dimension callouts, color deviation notes, and proportion correction arrows clearly marked. Referencing specific panel names or body sections (e.g., “left ear” rather than “the ear on the right side when looking at it”) eliminates interpretational errors. Written feedback should accompany all visual annotations and be confirmed via email or a documented platform to create a traceable revision history.
Feedback documentation checklist
At minimum, prototype feedback should address: dimensional compliance against the tech pack, color accuracy versus reference swatches, surface texture and pile direction match, seam quality and thread color, embroidery or print placement, component security (eyes, nose, accessories), and overall silhouette fidelity to the character design brief.
Prototype revision communication reference
| Feedback Category | What to Specify | Common Mistake to Avoid |
|---|---|---|
| Proportion | Exact dimension change in mm or % with reference | “Make it rounder” without a measurement |
| Color | Pantone C number or physical swatch reference | Describing color in subjective terms (e.g., “warmer”) |
| Texture | Pile height in mm, direction, and density descriptor | Using generic descriptors like “softer” or “fluffier” |
| Embroidery | Exact stitch count, thread type, and design file | Approving placement without a fixed reference point |
| Seams | Stitch density (SPI), thread weight, seam type | Not specifying whether raw seams are acceptable inside |
TIP: Request a pre-production sample approval (PPSA) form from your factory at the start of any new character development. A standardized form that both parties sign off on creates an auditable record and reduces the risk of “we made it the way you described” disputes later in production.
Prototype Costs: What to Expect
Prototype pricing in the plush industry is rarely a single fixed charge. It typically comprises a sample-making labor fee, a material cost component, and occasionally a pattern development surcharge for highly complex characters. For standard B2B sampling programs, prototype fees are commonly deducted from the first production order above a minimum quantity threshold.
Indicative prototype cost ranges by complexity tier
| Complexity Tier | Description | Typical Sample Cost (USD) | Lead Time |
|---|---|---|---|
| Basic | Simple shape, single fabric, embroidered face | $60 – $120 | 10–14 days |
| Standard | Multi-panel design, 2–3 fabric types, accessories | $120 – $280 | 15–22 days |
| Complex | Realistic character, mixed textures, removable clothing | $280 – $500 | 22–35 days |
| Licensed/IP | Strict character accuracy, multi-revision standard | $400 – $800+ | 30–50 days |
Frequently Asked Questions
How many prototype revisions are typically needed before production approval?
The number of revision rounds varies based on design complexity and the quality of the initial technical package. For straightforward designs with a clear reference — such as an existing toy being re-sourced or a simple mascot character — one to two rounds are usually sufficient. For original character designs, especially those involving licensed IP or complex anatomy, two to four revision rounds are more common.
The most effective way to minimize revisions is to submit a complete, unambiguous technical package at the start of the process, including Pantone references, dimension sheets with tolerances, and annotated multi-angle reference illustrations. Buyers who provide vague or incomplete design briefs tend to experience significantly more revision cycles, which increases both cost and timeline. Some experienced manufacturers also offer a pre-sampling consultation call to review the tech pack for completeness before work begins — this is worth requesting.
What is the difference between a PP sample and a TOP sample in plush manufacturing?
A Pre-Production (PP) sample is a hand-crafted prototype produced in the factory’s sample room, typically by a senior technician rather than production-line workers. Its primary purpose is design validation — confirming that the character, proportions, materials, and aesthetic match the buyer’s brief before production tooling is finalized. A Top-of-Production (TOP) sample, by contrast, is pulled directly from the first run of mass production using actual production-line equipment, workers, and materials.
The TOP sample reveals manufacturing-induced variations that don’t appear in hand-crafted samples: slight proportion shifts due to machine sewing tolerances, minor color deviations between fabric dye lots, and the visible difference between sample-room craftsmanship and line-speed production. Buyers should retain the approved TOP sample as the benchmark for incoming quality inspection of the full production batch.
Can safety compliance testing be done on a prototype, or does it require production samples?
Most safety compliance testing relevant to plush toys can — and should — be initiated on prototype or pre-production samples rather than waiting for mass production to begin. Third-party laboratories such as SGS, Intertek, and Bureau Veritas accept sample-quantity submissions for standard tests including EN 71-1 (physical and mechanical safety), EN 71-3 (chemical migration), ASTM F963 flammability, and CPSIA phthalate panel testing.
Testing at the prototype stage serves a critical risk-management function: if a material fails — for example, if a fabric fails a flammability threshold or a surface coating tests above limits for heavy metals — the corrective action can be implemented before production materials are purchased at scale. Note that some regulatory certifications (e.g., children’s product certificates in the US under CPSIA) ultimately require testing of production samples, but prototype testing provides a valuable pre-screening layer.
What information should a plush toy technical package include?
A comprehensive technical package for plush toy prototype development should include multi-view character illustrations (front, back, both sides, and a three-quarter view if the design has significant depth), a complete material callout with fabric category, pile height specification, and color reference (Pantone C-series or physical swatch), overall finished size dimensions with acceptable tolerance ranges, embroidery or print artwork files in vector format (.ai or .eps) at the correct scale, component specifications for eyes, noses, and accessories (type, size, color, placement coordinates), labeling requirements (hangtag, sewn-in label, barcode), target retail market (which determines the applicable safety standards), and age grading.
Optional but valuable additions include reference photographs of existing toys in a similar style, a seam allowance callout, and a stuffing firmness descriptor. The more complete the package, the fewer interpretational decisions the factory must make independently.
How do plush toy manufacturers handle color matching during prototype development?
Color matching in plush prototype development involves multiple layers of tolerance management because pile fabrics do not accept color as uniformly as flat woven textiles. Most manufacturers begin with fabric selection from existing stock that is closest to the specified color, then request custom dyeing if no standard option falls within the acceptable range.
Pantone C-series references are the industry standard for specifying target hues, but the final color perception of a pile fabric is influenced by pile height, fiber type, and pile direction — a longer pile will appear lighter than a shorter pile in the same dye lot due to light diffraction. Professional manufacturers produce lab dip samples (small swatch sets of dyed fabric) for buyer approval before the full fabric is produced. For buyers sourcing multiple color variants of the same character, approving all color lab dips simultaneously before sample construction begins is the most time-efficient workflow.