Skip to content
Everything a first-time designer needs to understand before sketching a character, choosing a fabric, or sending a design brief to a factory — proportion, materials, safety compliance, construction, and sampling, explained from the ground up.
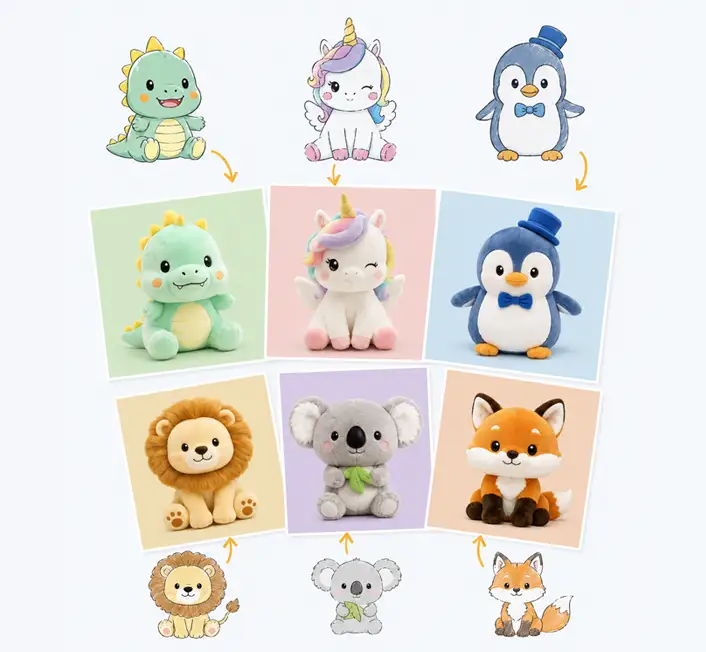
Designing a plush toy looks, from the outside, like a purely creative exercise — sketch a character, pick a color palette, decide how big it should be. Beginners who approach it this way almost always discover, somewhere between the first sketch and the first sample, that plush design is really an engineering discipline wearing a friendly face. A silhouette that looks charming on paper can be structurally impossible to stuff evenly. A fabric that photographs beautifully can fail a basic flammability test. A character with six small appendages can trigger a small-parts violation before it ever reaches a store shelf.
None of this means beginners need years of manufacturing experience before they can design a plush toy worth producing. It means they need a working framework — a set of guidelines that translate abstract creative intent into decisions a factory can actually build around. This guide lays out that framework in the order a beginner actually needs it: why guidelines matter in the first place, how to structure a design brief, how proportion and silhouette work in three-dimensional soft goods, what fabric and material choices really mean, how safety and compliance shape design before manufacturing ever begins, which construction details separate a toy that survives years of play from one that fails in weeks, how sampling fits into the design process, which mistakes beginners repeat most often, and how to package all of it into a guideline document a manufacturer can actually work from.

Why Do Plush Toy Design Guidelines Matter More Than Inspiration Alone?
Plush toy design guidelines matter more than inspiration alone because inspiration produces an idea of what a toy should look like, while guidelines produce a specification of what a toy can actually become once fabric, filling, thread, and safety components are involved. A sketch is a two-dimensional promise. A plush toy is a three-dimensional object that has to be sewn from flat fabric panels, filled by hand or machine, and survive years of handling, washing, and — in the case of children’s products — chewing, pulling, and dropping. The distance between the promise and the object is where most beginner designs run into trouble.
A beginner working purely from inspiration typically discovers problems late — at the sampling stage, when a factory reports that a design cannot be constructed as drawn, or worse, after production, when a batch of finished toys does not match what was imagined. A beginner working from a guideline framework discovers the same problems early, on paper, where they cost nothing to fix. The guidelines are not a constraint on creativity. They are the mechanism that lets creative intent survive contact with fabric, thread, and stuffing.
There is also a compliance dimension that inspiration alone cannot account for. Plush toys sold in regulated markets are subject to specific safety standards — small parts rules, flammability limits, chemical restrictions, labeling requirements — that apply regardless of how appealing the design looks. A guideline framework builds these requirements into the design process from the first sketch, rather than treating them as a hurdle to clear after the creative work is finished. Designers who internalize this sequence — guidelines first, then creative expression within them — consistently produce designs that move from concept to finished product with fewer revision rounds and fewer surprises.
It is also worth separating two things beginners often conflate: design guidelines and design restrictions. A restriction tells a designer what they cannot do. A guideline tells a designer what has to be true for an idea to survive the transition from sketch to physical object — and within that space, there is still enormous creative latitude. Two designers working from the same guideline framework, the same age-group requirement, and the same general fabric direction can still produce two completely different characters, because the guidelines constrain the engineering, not the imagination. Understanding this distinction early tends to reduce the frustration beginners feel when they first encounter formal design requirements, since the requirements are better understood as scaffolding than as a ceiling.
What Are the Foundational Elements of a Plush Toy Design Brief?
A plush toy design brief is the document that translates a creative concept into information a pattern maker and a factory can act on. A complete design brief should include the character concept and reference imagery, target size and proportions, intended age group, fabric and color direction, filling type and firmness preference, any accessories or add-on features, target price point, target market and applicable safety standards, and production quantity expectations. A brief that omits any of these elements forces the factory to guess — and guesses made on a factory floor rarely match what the designer imagined.
Beginners frequently treat the design brief as an afterthought, assuming that a good sketch or reference image communicates everything necessary. In practice, a sketch communicates shape and color but says almost nothing about size, material feel, internal construction, or compliance requirements — all of which materially affect what the finished toy looks and feels like. The brief is where those gaps get closed before any fabric is cut.
Core Elements of a Complete Plush Toy Design Brief
| Brief Element | What It Should Specify | Why Beginners Often Skip It |
|---|---|---|
| Character concept | Reference sketches, mood boards, or existing artwork with proportions noted | Assumed to be self-explanatory from imagery alone |
| Target size | Exact height/width in centimeters or inches, not a vague size category | “Medium size” feels sufficient until sampling reveals ambiguity |
| Age group | Specific age range, since this determines which safety standards apply | Assumed to be obvious from the design style |
| Fabric direction | Texture, pile height, and finish (e.g., short minky vs. long shag fur) | Left to the factory’s default material assumption |
| Filling type | PP cotton, weighted beads, or a hybrid, with firmness preference | Rarely considered until the sample feels wrong |
| Accessories | Embroidered vs. attached eyes, ribbons, clothing, sound modules | Treated as decoration rather than a compliance and cost variable |
| Target market | Country or region of sale, which determines applicable safety standards | Assumed to be irrelevant to the design phase |
| Production volume | Estimated order quantity and reorder expectations | Considered a sourcing question, not a design question |
A brief missing three or more of these elements typically requires at least one additional sampling round to resolve ambiguity that could have been settled on paper.
Tip: Write the design brief before finalizing the sketch, not after. Locking size, fabric direction, and age group first gives the sketch real constraints to design within — which almost always produces a more buildable silhouette than sketching freely and retrofitting specifications afterward.
How Should Beginners Approach Character Proportions and Silhouette?
Character proportions and silhouette should be approached as a three-dimensional construction problem from the first sketch, not as a two-dimensional drawing exercise that gets converted to fabric later. A silhouette that reads clearly in a flat illustration — oversized head, thin limbs, exaggerated features — does not automatically translate into a shape that can be stuffed evenly and stand or sit the way the illustration implies. Beginners should sketch from at least three angles — front, side, and three-quarter — before considering a design finished, because a silhouette that only works from one angle is a strong signal that the underlying proportions have not been fully resolved.

Head-to-body ratio is the single proportion decision with the largest downstream effect on both perceived appeal and construction difficulty. Most successful plush characters use a head-to-body ratio between 1:1.5 and 1:2.5 — a range that reads as approachable and “cute” to the widest audience while remaining structurally manageable to stuff and sew. Ratios outside this range are not impossible, but they require more sophisticated internal construction — armatures, weighted bases, reinforced seams — to prevent the toy from looking collapsed or unstable once filled.
Limb and Appendage Proportions
Limbs, ears, tails, and other appendages introduce two constraints beginners frequently underestimate: stuffing access and small-parts risk. An appendage narrower than roughly 2 to 2.5 centimeters in diameter becomes very difficult to fill evenly by hand, often resulting in a limp, under-stuffed appearance regardless of how carefully the pattern was cut. Appendages that are both thin and detachable, or that could plausibly separate from the body under stress, raise small-parts compliance concerns for products intended for children under three — a consideration that belongs in the design phase, not the compliance review that happens after the design is finished.
How Proportion Choices Affect Perceived Appeal
Proportion is not only a construction variable — it is also the primary lever a designer has over how a character is emotionally read by its intended audience. Larger heads relative to body size, larger eyes relative to face size, and shorter limbs relative to torso length are proportion patterns strongly associated with a “young,” approachable, nurturing read across a wide range of audiences — a pattern that explains why so many commercially successful plush characters converge on similar head-to-body ratios even across very different species and art styles. A beginner does not need to follow this pattern exactly, but understanding why it recurs so often makes it easier to make an intentional choice about whether to follow it or deliberately depart from it for a specific character concept, such as a more mature, collector-oriented design where standard “cute” proportions would undercut the intended tone.
Weight Distribution and Sitting Stability
For characters intended to sit upright — a common expectation for retail plush — weight distribution has to be considered at the design stage, not left to the factory to solve during sampling. A character with a large head and a narrow base will not sit stably regardless of stuffing density, and no amount of post-sampling adjustment fully compensates for a base that is proportionally too narrow. Widening the base silhouette by even 10 to 15 percent at the design stage, or building in a flattened seating panel, resolves stability issues that are far more expensive to fix after tooling and sampling have already begun.
Tip: Test proportion decisions with a simple paper or fabric mockup before finalizing the pattern. A rough stuffed prototype — even one made from scrap fabric and household filling — reveals stability and stuffing-access problems that are almost invisible in a flat sketch.
What Fabric and Material Choices Should Beginners Understand Before Designing?
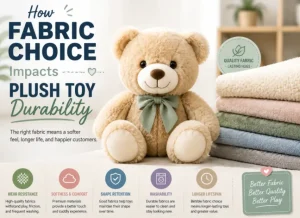
Fabric and material choices should be understood as design decisions with direct consequences for appearance, feel, durability, cost, and compliance — not as a late-stage sourcing detail to resolve after the design is finished. The outer fabric alone typically represents a significant share of total plush toy production cost, and different fabric families produce meaningfully different results even when the underlying pattern and silhouette are identical. A beginner who designs a character without a clear fabric direction is effectively designing an incomplete product, because the same silhouette in short minky plush, long shag fur, and smooth velboa fabric will look and feel like three different toys.
Pile height — the length of the fabric’s fiber — is one of the most consequential and least understood variables for beginners. Short-pile fabrics (under 3mm) produce a cleaner, more defined silhouette that shows facial features and construction seams clearly, which suits characters with detailed faces or precise shapes. Long-pile fabrics (10mm and above) soften the silhouette considerably, hiding seams and small construction imperfections but also obscuring fine facial detail — which makes them a poor choice for characters whose appeal depends on a specific expression or detailed feature work.
Common Plush Fabric Families and Their Design Implications
| Fabric Type | Typical Pile Height | Best Suited For | Design Trade-Off |
|---|---|---|---|
| Short minky plush | 1–3mm | Detailed faces, defined seams, clean silhouettes | Shows construction imperfections more readily |
| Medium plush | 3–8mm | General-purpose stuffed animals, balanced softness | Middle-ground compromise on both detail and softness |
| Long shag fur | 10mm+ | Soft, huggable characters where texture is the appeal | Hides fine facial and seam detail |
| Velboa / smooth pile | Under 1mm | Sleek, realistic animal representations | Less forgiving of stuffing irregularities |
| Sherpa/boa fleece | Textured, non-directional | Cozy, blanket-adjacent plush items | Limited color and print customization options |
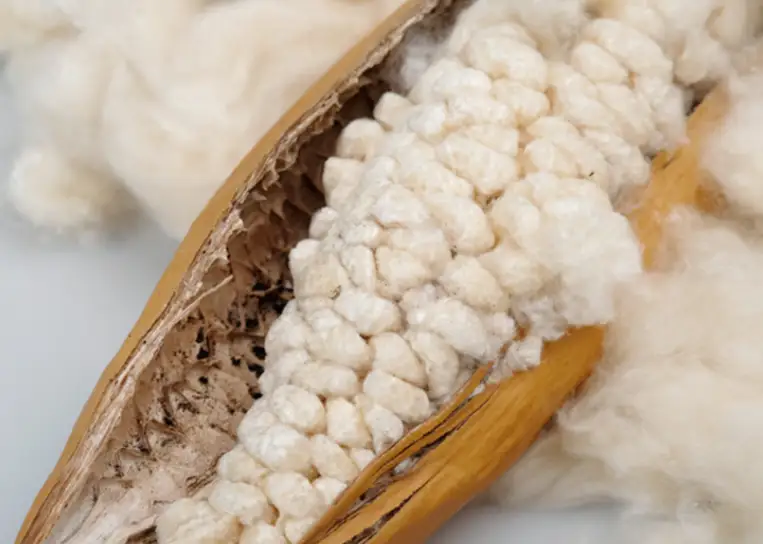
Filling material is the second major choice beginners need to understand before finalizing a design. Standard polyester (PP) cotton filling is lightweight, washable, and the default choice for the large majority of plush toys, producing a soft, slightly springy feel. Weighted filling — plastic pellets or glass beads combined with PP cotton — adds heft that some product categories specifically require, such as weighted comfort plush or characters designed to sit without additional support, but weighted filling introduces its own compliance considerations around containment and choking-hazard risk if the inner liner fails. A design that specifies weighted filling without also specifying a reinforced double-layer inner lining is an incomplete specification, not a simplified one.
Fabric Weight and Long-Term Durability
Fabric weight, usually expressed in grams per square meter (GSM), is a related but distinct variable from pile height, and beginners frequently overlook it entirely because it does not show up clearly in a swatch photograph the way color or texture does. A lower-GSM fabric can look identical to a higher-GSM fabric in a small sample but behave very differently under the stress of repeated handling, washing, and the tension of being stuffed — thinner backing fabric is more prone to seam stress, pile shedding, and eventual thinning at high-friction points such as the base of the feet or the underside of the arms. Specifying a minimum GSM range in the design brief, rather than leaving fabric weight as an unstated assumption, is a low-effort way to protect the durability of the finished toy without affecting how it looks on day one.
Color and Print Considerations
Color matching between reference artwork and physical fabric is a persistent source of disappointment for beginners, because screen colors (RGB) and physical dye colors (Pantone or fabric swatch systems) do not translate directly. A design brief that specifies a color only by a screen hex code, without a Pantone reference or physical swatch approval step, is likely to produce a finished sample that looks noticeably different from what the designer expected — not because of an error, but because the two color systems are fundamentally different and require an explicit translation step.
Tip: Request physical fabric swatches before finalizing any design brief, and approve colors against the physical swatch rather than a screen rendering. This single step prevents the majority of “the sample doesn’t match my design” disappointments beginners experience.
How Do Safety and Compliance Requirements Shape Design Decisions?
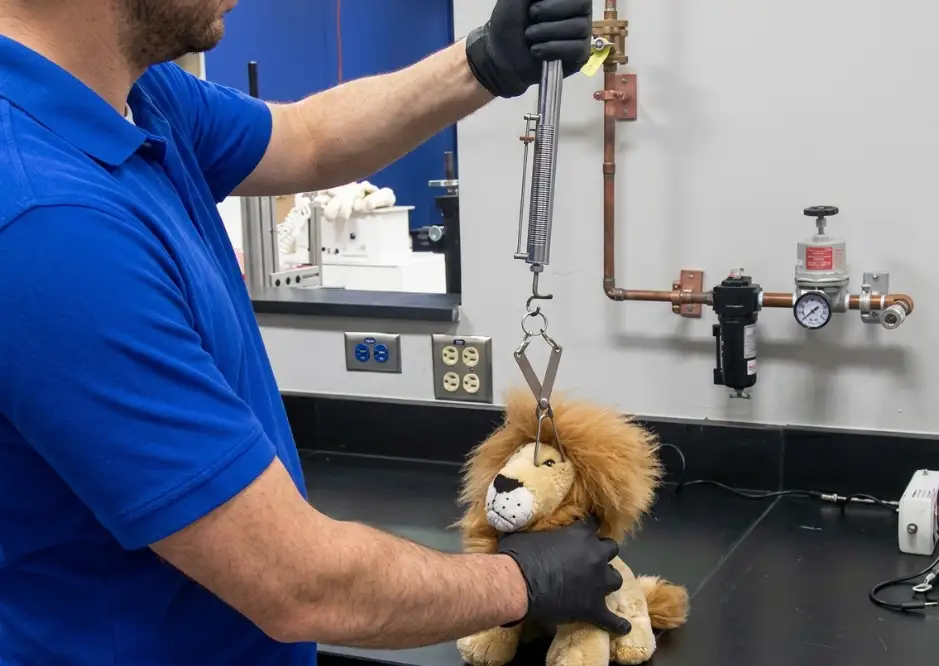
Safety and compliance requirements shape design decisions from the very first sketch because they determine what is structurally and materially permissible for the toy’s intended age group — not because they are a final inspection step applied after the design is complete. Products intended for children, particularly children under three, are subject to specific and non-negotiable rules: no small detachable parts, no long cords or ribbons that pose a strangulation risk, no sharp components, and compliant filling and fabric materials that pass chemical and flammability testing. A design that violates these rules cannot simply be “fixed” at the compliance stage — in most cases, it has to be redesigned, which is a far more expensive and time-consuming process than designing within the constraints from the beginning.
The relevant standards differ by target market, and a beginner designing for global distribution needs to design to the strictest applicable standard rather than the most lenient one. In the United States, plush toys are governed primarily by ASTM F963 and CPSIA requirements covering small parts, flammability, and lead content. In the European Union, EN71 covers mechanical and physical properties, flammability, and chemical migration limits. Designs intended for both markets should be built to satisfy the more conservative requirement in each category from the outset, rather than creating market-specific variants after the fact.
Safety Considerations to Build Into the Design Stage, by Category
| Design Element | Compliance Consideration | Design-Stage Adjustment |
|---|---|---|
| Eyes and nose | Attached components must pass pull-force testing for age 0–3 products | Specify embroidered features instead of attached plastic components |
| Small appendages | Thin, detachable-risk parts raise small-parts violations | Widen minimum appendage width; reinforce attachment points |
| Ribbons and cords | Cords longer than regulatory limits pose strangulation risk | Shorten or eliminate loose ribbons for infant-targeted designs |
| Fabric and filling | Must pass flammability and chemical migration testing | Specify certified materials (OEKO-TEX, REACH-compliant) in the brief |
| Weighted fill | Loose pellets or beads are a choking hazard if the liner fails | Require double-layer inner lining with reinforced seams |
| Electronics (if any) | Battery compartments must meet child-resistant closure standards | Design compartment location and closure mechanism at the outset |
Designing to the age-0–3 standard by default, even for products aimed at older children, is a common risk-reduction practice — it produces a design that clears the strictest applicable bar without requiring a separate, less conservative variant.
Tip: Decide the target age group before finalizing facial features and accessories, not after. Attached plastic eyes, loose ribbons, and small dangling parts are easy to design around from the start but expensive to redesign once a sample has already been produced and tested.
What Construction and Engineering Factors Do Beginner Designers Overlook?
Construction and engineering factors are the elements of plush toy design that are least visible in a flat sketch and most responsible for whether a finished toy holds its shape, survives repeated handling, and matches the designer’s original vision. Beginners consistently underestimate how much of a plush toy’s final appearance is determined not by the pattern shape itself but by seam placement, stuffing technique, and internal reinforcement — details that a sketch does not communicate but that a pattern maker has to resolve regardless.
Seam placement determines where a character’s silhouette breaks and how cleanly its shape reads once stuffed. A design with seams placed along natural contour lines — the underside of a limb, the back of a head — produces a cleaner finished silhouette than one with seams cutting across a prominent visual feature, because visible seam lines interrupt fabric pile and create a subtle but noticeable break in the character’s surface. Beginners sketching in two dimensions rarely think about where seams will fall in three dimensions, which is one of the most common gaps between a design sketch and a finished sample.
Stuffing Access and Internal Structure
Every plush toy needs a stuffing opening, and its placement is a design decision, not just a manufacturing detail. An opening placed on a visually prominent panel is harder to close invisibly than one placed along a natural seam or on the underside of the toy. Complex characters — those with multiple limbs, a separate head, or internal joints — often need more than one stuffing access point, which should be planned into the pattern rather than improvised during sampling.
Internal structure — wire armatures, plastic joint discs, weighted bases — extends what a plush toy’s silhouette can achieve beyond what soft filling alone can support, but each addition introduces its own safety and durability considerations. Wire armatures that allow a character’s limbs to be posed are popular in collectible plush but require the wire to be fully encased and tested against breakage under repeated bending, since exposed or broken wire is a sharp-point safety hazard. Joint discs that allow a head or limb to rotate add articulation appeal but introduce a mechanical failure point that has to be engineered for the toy’s expected lifespan, not just its first sample.
Construction Decisions and Their Effect on Finished Toy Quality
| Construction Factor | What Beginners Often Miss | Effect If Overlooked |
|---|---|---|
| Seam placement | Seams should follow natural contour lines, not cut across features | Visible breaks in silhouette and pile direction |
| Stuffing opening location | Should sit on a low-visibility panel or natural seam | Closure line is visible on a prominent part of the toy |
| Multiple access points | Complex shapes need more than one stuffing point | Uneven filling density in limbs and extremities |
| Internal armatures | Wire must be fully encased and fatigue-tested | Risk of wire breakage and fabric puncture over time |
| Seam allowance | Standard allowance (6–10mm) affects final proportions | Finished toy measures smaller than the flat pattern implied |
Tip: Ask for a flat pattern layout before sampling begins, not just a finished-toy sketch. Reviewing where seams and the stuffing opening will actually fall lets a beginner catch silhouette-breaking seam placement before it appears in a physical sample.
How Should Beginners Plan for Sampling and Prototyping in the Design Process?
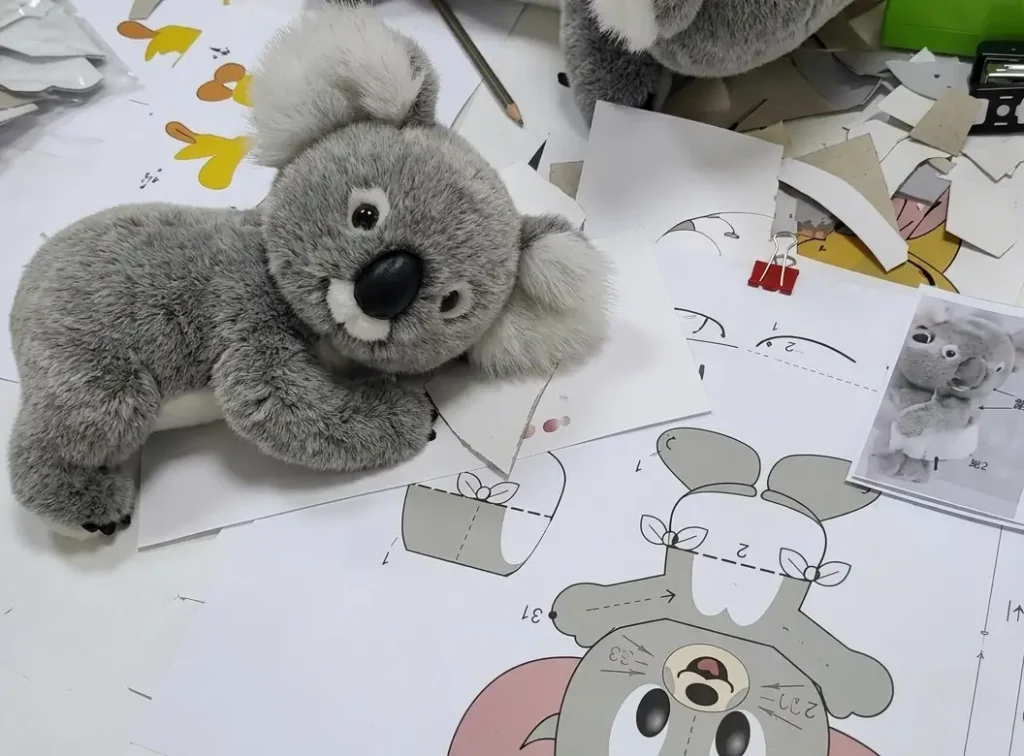
Sampling and prototyping should be planned as an integral part of the design process, not as a final verification step that happens after design work is complete. A design brief, however detailed, is still a set of instructions rather than a finished object — and the sampling stage is where those instructions get tested against the physical reality of fabric, filling, and stitching for the first time. Beginners who treat the first sample as a formality to approve, rather than a working prototype to evaluate critically, consistently miss opportunities to catch problems while they are still cheap to fix.
A realistic sampling plan for a new plush character typically involves two to three revision rounds even for a well-prepared design brief, and beginners should budget time and, where applicable, sampling fees accordingly rather than expecting first-sample perfection. The first sample is best evaluated against a specific checklist rather than a general impression: does the silhouette match the approved sketch from multiple angles, does the toy sit or stand as intended, is the fabric pile and color consistent with the approved swatch, are seams positioned where the pattern review indicated, and does the stuffing feel and density match the firmness preference specified in the brief.
What to Evaluate at Each Sampling Round
The first sampling round should focus on silhouette, proportion, and overall character read — the elements that are most expensive to change later and least expensive to change now. The second round, once silhouette issues are resolved, should focus on finer details — facial feature placement, embroidery quality, fabric matching, and construction cleanliness. A third round, when needed, typically addresses remaining fine-tuning rather than structural changes, and a design that still requires major structural revision at the third sample stage usually indicates that the original brief was incomplete rather than that the factory has made repeated errors.
Beginners should also treat the approved sample as the permanent reference standard for the entire production run, not simply as a milestone to clear. Retaining a physical approved sample — not just photographs — gives both the designer and the factory an unambiguous physical benchmark to compare bulk production against, which prevents the gradual quality drift that can occur across a large production run when only photographic references are available.
Clear written feedback between sampling rounds also has a disproportionate effect on how quickly a design converges on its final form. Feedback framed as specific, measurable adjustments — “widen the head by roughly 10 percent” or “shift the eye position 3mm lower” — produces far more accurate second-round samples than feedback framed as general impressions, such as “make it cuter” or “it doesn’t feel right yet.” Beginners who are not used to communicating construction feedback often default to the latter, which forces the factory to guess at intent in much the same way an incomplete design brief does. Annotating photographs of the sample directly — marking exactly where a proportion should shift or a seam should move — closes this gap more effectively than descriptive language alone, regardless of how precisely that language is chosen.
Tip: Evaluate each sample under natural daylight and against the physical fabric swatch, not under indoor lighting or against a screen image. Color and texture judgments made under artificial lighting are one of the most common sources of sampling round disagreements between designers and factories.
What Common Design Mistakes Should Beginners Avoid?
Most design mistakes beginners make in plush toy development are not creative failures — they are gaps between what a two-dimensional design communicates and what a three-dimensional, hand-assembled, mass-manufactured object requires. Recognizing the most common of these mistakes in advance is one of the fastest ways for a beginner to shorten the distance between a first sketch and a production-ready design.
What makes these mistakes persistent rather than one-off is that most of them are invisible at the point they are made. A designer who skips a side-view sketch does not experience that omission as a mistake — the front view looks complete, and the gap only becomes visible once a three-dimensional sample reveals a silhouette problem from an angle nobody had considered. This is precisely why a checklist-based approach, rather than relying on general design instinct, produces more consistent results for beginners: it surfaces the invisible gaps before a sample has to reveal them.
Frequent Beginner Design Mistakes and How to Correct Them
| Common Mistake | Why It Happens | Correction |
|---|---|---|
| Designing only from a single front-facing sketch | Front view feels sufficient to communicate the character | Sketch front, side, and three-quarter views before finalizing |
| Specifying color only in screen hex codes | Digital design tools default to RGB color values | Convert to Pantone or approve against a physical swatch |
| Ignoring age group until the compliance review | Compliance feels like a separate, later-stage process | Set target age group in the design brief from the start |
| Overloading a design with thin appendages | Thin limbs and ears often look more elegant in a sketch | Widen minimum appendage width to at least 2–2.5cm |
| Assuming the first sample will be final | Underestimating how much sampling clarifies real construction | Budget for two to three revision rounds as standard practice |
| Leaving fabric pile height unspecified | Treating “plush fabric” as a single, undifferentiated material | Specify pile height and finish explicitly in the brief |
| Omitting production volume from the brief | Treating volume as a sourcing question, not a design input | Include target volume, since it affects tooling and cost decisions |
Tip: Keep a running list of every question a factory asks during the quoting and sampling process. Each question usually reveals a gap in the original design brief — and a beginner who updates the brief template after every project accumulates a genuinely reliable framework within just a few designs.
How to Build a Design Guideline Document Before Approaching a Manufacturer?
A design guideline document is the assembled output of everything covered above — brief elements, proportions, fabric direction, safety requirements, construction notes, and sampling expectations — organized into a single reference that a manufacturer can quote and build from without needing to guess at unstated assumptions. Beginners who approach a factory with only a sketch and a verbal description routinely receive quotes and samples that reflect the factory’s default assumptions rather than the designer’s actual intent, simply because nothing more specific was provided.
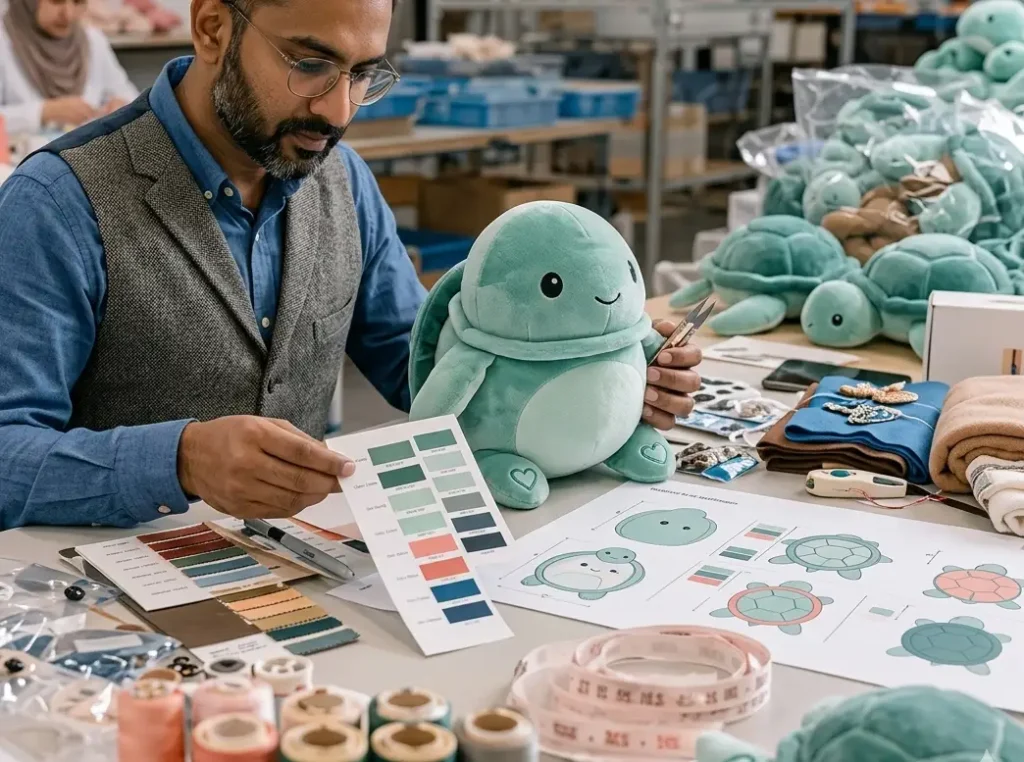
Building this document does not require specialized software or technical drafting skill. It requires organizing the decisions already made throughout the design process — silhouette references from multiple angles, a specified fabric direction with swatch reference, a filling type and firmness note, safety and age-group requirements, seam and stuffing-access notes from the pattern review, and a color reference tied to a physical or Pantone standard — into a single document a factory can review in one sitting.
What Belongs in a Complete Plush Toy Design Guideline Document
| Section | Content to Include |
|---|---|
| Visual reference | Multi-angle sketches or renders, approved color palette |
| Dimensions | Exact height, width, and proportion notes for each variant |
| Materials | Fabric type and pile height, filling type and firmness, accessory materials |
| Safety parameters | Target age group, applicable standards, feature restrictions |
| Construction notes | Seam placement preferences, stuffing access location, internal structure |
| Color reference | Pantone codes or physical swatch reference for each color used |
| Sampling expectations | Number of anticipated revision rounds, evaluation checklist |
| Production context | Target volume, target market, expected timeline |
A guideline document built this way accomplishes two things simultaneously: it gives the manufacturer enough information to produce an accurate first quote and sample, and it gives the designer a durable reference framework that carries forward into every future design, rather than a one-off effort that has to be rebuilt from scratch each time. This is the point at which a beginner’s design process starts to resemble a repeatable system rather than a series of individually improvised projects.
Conclusion
Plush toy design for beginners is not primarily a question of artistic ability — it is a question of understanding the specific constraints that turn a two-dimensional idea into a three-dimensional, manufacturable, compliant product. Proportion and silhouette decisions have to account for stuffing and stability, not just visual appeal. Fabric and filling choices affect feel, cost, and compliance simultaneously. Safety requirements have to be designed in from the first sketch, not resolved after the fact. Construction details that never appear in a sketch — seam placement, stuffing access, internal reinforcement — determine whether the finished toy matches the original vision. And sampling is where all of these decisions are tested against physical reality, which makes it a core part of the design process rather than a formality at the end of it.
Beginners who internalize this framework — guidelines first, creative expression within them — consistently move from concept to production-ready design with fewer revision rounds, fewer compliance surprises, and finished toys that more closely match what they originally imagined. The guidelines in this piece are the starting framework; refining them project by project, based on what each new design and each sampling round reveals, is what turns a first attempt into a reliable design practice.
FAQ
Q1: Do beginners need pattern-making or sewing skills to design a plush toy, or is conceptual design enough?
Conceptual design skill is enough to originate a character and its overall look, but a beginner does not need to personally know how to draft a sewing pattern to design a manufacturable plush toy — that translation step is typically handled by a pattern maker working from the designer’s brief and reference sketches. What a beginner does need is a working understanding of how three-dimensional construction constraints affect a two-dimensional design, which is precisely what a guideline framework provides. Designers who understand proportion, seam placement, and stuffing access well enough to communicate clear intent produce far better outcomes than those who hand over a sketch with no supporting specification, even without any hands-on sewing experience themselves.
Q2: How much should a beginner expect to revise a design between the first sketch and the first approved sample?
Some revision is normal and expected, even with a well-prepared design brief. A beginner should generally anticipate one round of proportion or silhouette adjustment after seeing the first three-dimensional sample, since flat sketches consistently translate imperfectly into stuffed form on the first attempt, followed by one or two rounds of finer adjustment covering color matching, facial feature placement, and construction details. Designs that require three or more rounds of major structural revision usually indicate that the original brief was missing key specifications — size, proportion references, or construction notes — rather than that revision itself is unusual. Budgeting for two to three total rounds as a standard expectation, rather than a sign of a design gone wrong, keeps the process realistic.
Q3: What is the most important design decision to lock in before starting a detailed sketch?
Target age group is arguably the single most consequential decision to lock in first, because it determines which safety standards apply and therefore which design choices — attached versus embroidered features, appendage width, presence of loose ribbons or cords, weighted filling options — are available at all. Locking this decision before detailed sketching begins prevents the common scenario where a beginner designs an appealing character with small attached components, only to discover during compliance review that the design needs to be substantially reworked for its intended age group. Fabric and size direction are also important early decisions, but age group is the one that most directly constrains what is structurally permissible.
Q4: How does designing for a licensed character differ from designing an original plush character?
The core design guidelines — proportion, fabric selection, safety compliance, construction planning — apply identically to licensed and original characters, since the manufacturing and compliance realities do not change based on whether the intellectual property is owned by the designer. What differs is the reference material and approval process: licensed character design typically starts from an existing 2D or 3D style guide provided by the rights holder, and the plush interpretation has to balance faithful translation of that established look against the practical constraints of soft-goods construction, since not every detail that works in a flat illustration or animated model translates cleanly into stitched fabric and filling. Licensed projects also typically require additional design-stage approval checkpoints from the rights holder, which should be planned into the sampling timeline from the outset.
Q5: Is it possible to design a plush toy without specifying manufacturing details, and let the factory make those decisions?
It is possible, but it consistently produces less predictable results than a beginner is likely to want. When a design brief omits fabric direction, filling type, construction notes, or safety parameters, a factory does not leave those fields blank — it fills them with its own default assumptions, which may not match what the designer had in mind. The resulting sample may be a perfectly reasonable plush toy, but it may not be the specific plush toy the designer imagined. Beginners who are genuinely uncertain about a technical specification are generally better served by asking the factory for guidance on that specific point during the brief-development stage, rather than omitting it entirely and hoping the resulting default assumption happens to align with their intent.
Q6: How detailed does a beginner’s first design guideline document need to be before it is useful?
It does not need to be exhaustive to be useful — it needs to cover the categories that most directly affect quoting accuracy and sample fidelity: multi-angle visual reference, target dimensions, fabric and filling direction, target age group and market, and basic construction notes if any specific preferences exist. A document covering these core categories, even briefly, produces a meaningfully more accurate first quote and sample than a sketch alone. The document can and should become more detailed over time, incorporating lessons from each sampling round, but beginners should not delay starting the design process while waiting to produce a perfect, fully comprehensive guideline document on the first attempt — a solid working version is more valuable than a delayed perfect one.