Skip to content
A complete process guide covering 3D modeling, prototyping, mold making, material selection, painting, quality control, cost drivers, and production timelines for custom vinyl toy manufacturing.
Turning a character sketch into a shelf-ready vinyl figure looks simple from the outside — a design goes in, a finished toy comes out. In practice, vinyl toy manufacturing is one of the more technically layered categories in the toy industry, involving sculpting, mold engineering, material chemistry, multi-stage painting, and quality verification steps that have no direct equivalent in plush or standard plastic injection production.
Buyers commissioning their first vinyl toy run — whether a single designer figure, a blind-box character series, or a licensed collectible line — routinely underestimate how many decisions sit between a finished design file and a finished production unit. Material choice alone determines whether a figure feels soft and squeezable or rigid and display-ready. Mold method determines whether fine detail survives into the final part. Paint application method determines whether a run of a thousand units looks consistent or shows visible color drift piece to piece.
This guide walks through the complete vinyl toy manufacturing process in the order decisions actually need to be made — from initial 3D modeling through prototyping, material and mold selection, painting, quality control, cost structure, and the realistic timeline from confirmed design to shipped mass production. Along the way, it flags the specific points where buyers most often lose money, time, or product quality by not knowing what question to ask.
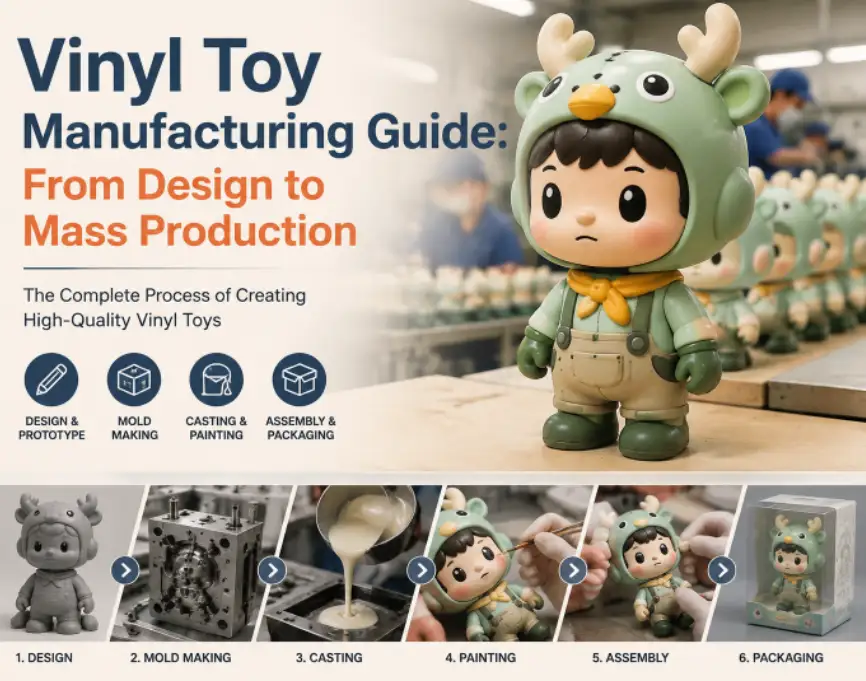
Why Does Vinyl Toy Manufacturing Require Different Planning Than Other Toy Categories?
Vinyl toy manufacturing requires different planning than plush or standard injection-molded plastic toys because it combines sculptural design work, specialized mold tooling, and a multi-layer finishing process into a single production chain — and a weak link at any stage compromises the final product in ways that are difficult to correct downstream. A plush toy’s quality is largely set by fabric and stitching; a standard injection part’s quality is largely set by mold precision and material flow. A vinyl toy’s quality depends on all of that plus sculptural fidelity, paint registration, and surface finish consistency across every unit in the run.
The category also carries a different cost and timeline structure. Tooling investment is higher than most plastic toy categories because vinyl molds — particularly rotocast molds — are precision-machined and built to hold fine sculptural detail through repeated heat cycles. Development timelines run longer because sculptural approval, prototype iteration, and paint sampling each require their own review cycle before mass production can begin.
How Vinyl Toy Manufacturing Compares to Other Toy Categories
| Factor | Vinyl Toys | Plush Toys | Standard Injection Plastic |
|---|---|---|---|
| Primary quality driver | Sculpt fidelity + paint consistency | Fabric + stitching quality | Mold precision + material flow |
| Typical tooling cost | Medium–high (sculptural molds) | Low (pattern-based, no hard tooling) | Medium–high (functional molds) |
| Finishing complexity | High (multi-layer paint, tampo, airbrush) | Low–medium (embroidery, trims) | Low (often unpainted or single color) |
| Sampling rounds (typical) | 3–5 | 1–3 | 1–3 |
| Design-to-production timeline | 10–16 weeks | 4–8 weeks | 6–10 weeks |
Timelines and costs vary by figure size, detail complexity, and order volume.
Understanding these structural differences matters most at the planning stage — before a design brief is finalized, before a factory is chosen, and before a budget is set. Buyers who approach vinyl toy sourcing with plastic-injection assumptions about tooling cost, or plush-toy assumptions about sampling speed, consistently build timelines and budgets that don’t match what the category actually requires.
Where Buyers Typically Underestimate Complexity
New buyers most often underestimate the number of distinct skill sets a single vinyl toy project actually requires. A character sketch has to pass through a sculptor’s hands, a mold engineer’s technical review, a paint technician’s process planning, and a QC inspector’s checklist before it becomes a finished product — and each of those roles is typically staffed by a different specialist, not a single generalist production line.
This is different from many plastic housewares or basic plush categories, where one or two skill sets can carry most of the production chain. Recognizing this upfront changes how a buyer evaluates a potential manufacturing partner — the right question is not simply whether a factory can mold vinyl, but whether it has in-house sculpting, mold engineering, and multi-stage paint capability, or whether any of these stages are outsourced. Outsourced stages are not automatically a problem, but they add coordination points where miscommunication, schedule slippage, and quality drift are more likely to occur.
What Happens During the Design and 3D Modeling Stage?
Every vinyl toy begins as a digital 3D model, not a physical sculpt. Even designers who start with hand-drawn concept art or a clay maquette ultimately need a clean, manufacturable 3D file before tooling can begin — because mold cutting, wall thickness planning, and undercut analysis all depend on precise digital geometry rather than an artist’s physical prototype.
The 3D modeling stage converts a 2D character design or reference sculpt into a print-ready and mold-ready digital file. This involves sculpting the form in specialized 3D software, refining proportions so the character reads correctly in three dimensions rather than just from a single flattering angle, and preparing the geometry so it can be split into mold-appropriate sections without losing detail in areas the mold cannot reach.

Core Deliverables of the 3D Modeling Stage
| Deliverable | Purpose |
|---|---|
| Turnaround renders (front, side, back, 3/4) | Confirms proportions read correctly from every viewing angle |
| Wall thickness map | Flags areas too thin or too thick for stable molding |
| Undercut and parting line analysis | Identifies where the mold must split to release the part |
| Articulation points (if applicable) | Defines joint locations and range of motion for jointed figures |
| Scale and size confirmation | Locks final dimensions before tooling investment begins |
Tip: Request a wall-thickness heat map before approving any 3D model for tooling. Areas that are too thin risk warping or sink marks; areas that are too thick risk long cooling times, sink marks on the opposite surface, and higher material cost per unit. Catching this at the digital stage is free — catching it after a mold is cut is not.
Buyers working from a 2D character sheet should expect at least one full review round at this stage, where the studio presents a rendered 3D turnaround for approval before moving to physical prototyping. Skipping this review to save a few days routinely costs far more time later, because proportion issues that are difficult to see in a flat design become obvious — and expensive to fix — once a physical prototype exists.
How Do Prototyping Methods Affect Vinyl Toy Development Cost and Accuracy?
Once the 3D model is approved, it needs to exist as a physical object before any mold is cut. This physical prototype — sometimes called a hard proto or first shot sample — is the last checkpoint where design changes are cheap. Three prototyping methods dominate vinyl toy development, and each carries a different balance of speed, cost, and surface accuracy.
Prototyping Methods Compared for Vinyl Toy Development
| Method | Speed | Surface Accuracy | Best Suited For |
|---|---|---|---|
| SLA/resin 3D printing | Fast (2–5 days) | High — captures fine detail well | Most character figures, detailed sculpts |
| CNC machining (from digital file) | Medium (5–10 days) | Very high, especially on hard surfaces | Vehicles, mechanical or geometric designs |
| Hand sculpting from reference | Slow (2–4 weeks) | Depends heavily on sculptor skill | Highly organic or expressive character work |
Most modern vinyl toy programs default to SLA printing for speed, reserving hand sculpting for projects where a designer wants direct artistic control over the physical form.
SLA resin printing has become the default prototyping method for most vinyl toy programs because it reproduces fine sculptural detail — fabric folds, facial expression lines, small accessories — with a level of accuracy that matches what the final rotocast or injection-molded part will actually look like. This matters because a prototype is only useful if approving it means approving something close to the eventual production result.
Why the Hard Proto Stage Cannot Be Skipped
Some buyers, particularly on tight timelines, ask whether the hard proto stage can be skipped in favor of moving straight from 3D approval to mold cutting. This is technically possible but strongly discouraged, because a digital render on a screen and a physical object in hand reveal different problems.
Weight distribution, how the figure balances on a display base, how paint will catch light across curved surfaces, and how the scale feels relative to a human hand are all things a screen render cannot fully communicate. Mold tooling is the single largest fixed cost in vinyl toy production, and committing to it based on a render rather than a physical proto is the single most common cause of expensive mold rework later in the process.
What Vinyl Materials Should You Choose — PVC, Soft Vinyl, or ABS?
“Vinyl toy” is a category name, not a single material specification, and the material decision has more effect on the final product’s feel, durability, and price than almost any other choice in the process. The three dominant materials each serve a distinct product profile.
Vinyl Toy Material Comparison
| Material | Feel | Typical Use | Relative Cost | Paint Adhesion |
|---|---|---|---|---|
| Hard PVC | Rigid, glossy-capable | Blind box figures, static collectibles | Low–medium | Good with proper primer |
| Soft vinyl (sofubi-style) | Squeezable, slightly flexible | Kaiju-style figures, character toys, plush-adjacent lines | Medium | Requires flexible-compatible paint system |
| ABS | Rigid, high-detail retention | Articulated figures, mechanical accessories | Medium–high | Excellent |
Hard PVC is the most common material for mass-market blind box and designer vinyl figures because it holds crisp detail, takes paint well with standard priming, and keeps unit cost manageable at volume. Soft vinyl — often referred to by its Japanese origin term sofubi — uses a different vinyl compound formulated for flexibility, producing the squeezable, slightly hollow-feeling figures associated with kaiju and character toy traditions. ABS sits at the rigid, high-precision end of the spectrum and is typically reserved for figures with articulation points, snap-fit accessories, or fine mechanical detail that softer materials cannot hold as crisply.

Matching Material to Product Intent
The right material choice depends less on cost and more on what the figure is meant to do. A static shelf collectible sold primarily on visual detail benefits from hard PVC or ABS, where sharp edges and fine sculptural lines translate directly into perceived quality.
A character toy meant to be handled, squeezed, or played with — particularly anything marketed toward younger buyers — benefits from soft vinyl’s forgiving, tactile quality and its better resistance to cracking under repeated flexing. Getting this match wrong is a common and costly mistake: a rigid PVC figure marketed as huggable will crack under normal handling, while a soft vinyl figure marketed purely on sharp sculptural detail will read as visually softer than buyers expect from renders.
Hybrid Material Approaches
Some figures are not built from a single material at all. A common hybrid approach pairs a soft vinyl body with hard PVC or ABS accessories — weapons, helmets, small props — where the accessory benefits from crisp edge definition that soft vinyl cannot hold as reliably. Articulated figures frequently combine ABS skeletal or joint components with a vinyl outer shell, giving the figure structural durability at stress points while keeping the visible surface in a material that takes paint and sculptural detail well.
Planning a hybrid material approach adds complexity to both tooling and assembly — each material typically needs its own mold and its own paint process — but it allows a single figure to combine properties that no single material delivers on its own. Buyers considering a hybrid build should confirm early whether the intended factory has in-house capability for both material types, since sourcing one material from a subcontractor adds a coordination point that affects both cost and schedule reliability.
How Does Mold Making Work for Vinyl Toys — Rotocast vs Injection?
Vinyl toys are produced using one of two fundamentally different molding technologies, and the choice between them shapes cost, detail capability, and production speed for the entire run.
Rotational Casting vs Injection Molding for Vinyl Toys
| Factor | Rotocast (Rotational Casting) | Injection Molding |
|---|---|---|
| Typical mold cost | Lower | Higher |
| Cycle time per unit | Slower (multiple minutes per piece) | Fast (seconds per shot) |
| Best for | Soft vinyl, hollow-body figures, small–medium runs | Hard PVC/ABS, high-volume runs, solid or complex geometry |
| Wall consistency | Can vary slightly, hollow interior | Highly consistent, engineered wall thickness |
| Ideal order volume | Hundreds to low thousands | Thousands and up |
Rotational casting — the traditional method behind most soft vinyl and sofubi-style production — works by pouring liquid vinyl into a heated mold, then rotating and tilting the mold so the material coats the interior surface evenly before curing into a hollow-bodied part. This method produces the characteristic soft, slightly flexible feel of traditional vinyl figures and requires lower tooling investment than injection molding, making it well suited to small and mid-sized runs or figures with irregular, organic shapes.
Injection molding, by contrast, forces molten plastic into a closed mold cavity under pressure, producing dense, dimensionally precise parts far faster per cycle than rotocasting allows. It is the preferred method for hard PVC and ABS figures produced at higher volumes, where cycle speed and dimensional consistency across thousands of units matter more than the tooling cost saved by rotocasting.
Tip: Confirm the molding method before finalizing the order quantity, not after. Rotocast tooling costs less upfront but produces units more slowly and at a higher per-unit labor cost at scale — meaning the economics can flip in favor of injection molding once an order grows past roughly 3,000–5,000 units, even accounting for the higher initial tooling investment.

Mold Segmentation and Detail Preservation
Both methods require the sculptural form to be divided into mold sections that can physically separate to release the finished part — a process called mold segmentation. Poorly planned segmentation shows up as visible parting lines running across a figure’s face or through fine detail areas, which is one of the most common cosmetic complaints in vinyl toy production. Reviewing the proposed parting line placement on the 3D model before mold cutting begins, and requesting adjustments to route lines through less visually sensitive areas such as the back of the head or underside of a limb, is a low-cost step that prevents a permanent cosmetic issue.
Mold Lifespan and Maintenance
Mold longevity differs meaningfully between the two methods and affects long-run cost planning for figures expected to stay in production over multiple years. Rotocast molds, typically machined from aluminum, tolerate a moderate number of heat cycles before surface detail begins to soften at the finest sculptural edges, making them well suited to runs that will not need to be repeated indefinitely. Injection molds, generally built from hardened steel, tolerate a far higher number of cycles and are the more economical choice for a design expected to stay in continuous or repeated production over an extended period.
Regardless of mold type, periodic maintenance — clearing residue buildup, checking vent channels for blockage, inspecting for early wear at high-stress mold features — extends usable mold life and helps maintain dimensional consistency across repeated production runs of the same figure. Buyers planning a design as an ongoing product line rather than a one-off release should factor mold durability into the initial molding-method decision, not just the upfront tooling cost.
How Is Color Applied — Spray Painting, Tampo Printing, and Airbrushing Explained?
Vinyl toys leave the mold in a single base color and reach their finished appearance through one or more distinct paint application methods, each suited to different types of detail.
Vinyl Toy Paint Application Methods
| Method | What It’s Used For | Detail Level | Cost per Unit at Volume |
|---|---|---|---|
| Spray/base coating | Overall body color, primer layers | Low (flat coverage) | Low |
| Tampo printing (pad printing) | Logos, facial features, repeatable fine graphics | High, highly consistent across units | Low–medium |
| Airbrushing | Gradients, shading, weathering effects | High, but harder to replicate identically | Medium–high |
| Hand-painted detailing | Small accents, eyes, limited-edition finishes | Highest, but least consistent piece to piece | High |
Tampo printing — sometimes called pad printing — is the workhorse technique for repeatable fine detail, such as facial features or logo placement, because a silicone pad transfers an etched image with a precision that stays consistent across a full production run. Airbrushing adds gradient shading and weathering effects that no other method reproduces as convincingly, but it is inherently harder to standardize across thousands of units because it depends on operator technique and spray distance in a way tampo printing does not.
Most vinyl toys combine several of these methods in a defined sequence: a base spray coat, followed by tampo-printed features, followed by any airbrushed shading, followed by a protective clear coat. The order matters — printing or airbrushing before the base coat has fully cured causes smearing and adhesion failures that only become visible after the finish dries.
Color Matching Across a Production Run
Maintaining consistent color across a full production run — particularly for multi-color character lines sold as a set — requires a locked Pantone reference for every color used, checked against physical color chips rather than screen renders, since monitor calibration varies enough to make on-screen color approval unreliable for production purposes. Buyers should request physical color swatches, not digital color codes alone, before approving a paint scheme for mass production.
Curing Time Between Coats
Each paint layer needs adequate curing time before the next layer or process step begins, and this is one of the more common places where schedule pressure quietly damages product quality. A base coat that has not fully cured before tampo printing begins can cause the printed layer to smear or fail to bond properly, producing detail that looks acceptable at final inspection but chips or lifts during shipping and normal handling.
Curing times vary by paint system and ambient humidity, and factories under deadline pressure sometimes compress this window to keep a production schedule on track. Buyers working against a tight timeline should ask directly what curing time each paint stage requires and confirm that the overall schedule leaves room for it, rather than assuming the factory will flag a conflict on its own — production teams under deadline pressure are more likely to compress curing time than to raise the issue proactively.
What Quality Control Checks Matter Most in Vinyl Toy Production?
Vinyl toy quality control spans structural integrity, paint accuracy, and safety compliance, and each of these requires a different inspection method applied at a different point in the production sequence.
Vinyl Toy Quality Control Checkpoints
| QC Checkpoint | What It Verifies | When It Happens |
|---|---|---|
| Incoming material inspection | Resin batch consistency, color pellet accuracy | Before production begins |
| First-shot/first-article inspection | Mold dimensional accuracy against approved sample | Start of production run |
| In-process visual inspection | Flash, sink marks, short shots, surface defects | Throughout molding run |
| Paint registration check | Alignment of printed/painted details to sculpted features | After each paint stage |
| Adhesion and durability testing | Paint chip resistance, joint stress testing (jointed figures) | Sample-based, periodic |
| Final AQL inspection | Overall defect rate against agreed acceptance quality level | Before shipment |
Tip: Ask specifically for a paint adhesion test report using a cross-hatch or tape-pull method, not just a visual inspection photo. Paint that looks correctly applied at final inspection can still fail adhesion testing and chip during shipping or normal handling — a defect that visual inspection alone will not catch.

The first-shot inspection is the highest-leverage checkpoint in the entire QC sequence, because it is the first physical output from the actual production mold, compared directly against the approved prototype. Dimensional drift, unexpected sink marks, or detail loss at this stage signals a mold or process issue that should be corrected before thousands of units are produced with the same flaw — not discovered during final inspection when the entire run already exists.
Why Paint Defects Dominate Vinyl Toy Complaint Rates
Across vinyl toy categories, paint-related issues — color mismatch, registration drift, chipping, and incomplete coverage — consistently account for a larger share of quality complaints than structural or material defects. This is because painting is the most operator-dependent stage in the entire process, involving more manual handling and more variables than the largely automated molding stage. Factories with dedicated paint QC stations, separate from general final inspection, consistently produce more consistent results than those where paint checking is folded into a single end-of-line inspection.
Setting an Acceptable Quality Level for Vinyl Toys
Most vinyl toy production agreements specify an acceptance quality level, or AQL, that defines how many defective units in a sampled batch are considered acceptable before a shipment is rejected. Vinyl toys, because of their multi-stage finishing process, often warrant a tighter AQL for cosmetic defects — paint issues, registration drift — than for purely structural defects, since cosmetic flaws are both more common and more visible to an end customer than a minor dimensional variance.
Buyers should agree on separate AQL thresholds for critical defects (safety-related), major defects (structural or significant cosmetic issues), and minor defects (small cosmetic imperfections) rather than a single blended standard, since this gives both the factory and the buyer a clearer, more actionable quality target than a single combined number.
How Do Sampling and Approval Rounds Work Before Mass Production?
Vinyl toy sampling typically runs through more approval rounds than plush or standard plastic categories, because sculptural accuracy, material feel, and paint finish each require separate confirmation before a buyer can be confident mass production will match expectations.
Typical Vinyl Toy Sampling Sequence
| Sample Stage | What Is Being Confirmed | Typical Timeframe |
|---|---|---|
| 3D render approval | Proportions, pose, overall design accuracy | 3–5 days |
| Hard proto (unpainted) | Physical scale, weight, sculptural detail | 5–10 days |
| First shot (from mold, unpainted) | Mold accuracy, material feel | 1–2 weeks after mold completion |
| Painted pre-production sample | Color accuracy, finish quality, full approval | 1–2 weeks after first shot approval |
| Golden sample (final reference) | Locked benchmark for mass production QC | Confirmed alongside PP sample |
Tip: Keep the approved golden sample in your own possession, not only at the factory. It becomes the physical reference point for resolving any quality disputes during mass production, and having your own copy prevents disagreements about what was actually approved.
Each sampling round exists to catch a specific category of problem before it multiplies across a full production run. Skipping the unpainted first-shot review to save time — moving straight from hard proto to painted sample — is a common shortcut that occasionally backfires, because it becomes difficult to tell whether a flaw in the painted sample originated in the mold itself or in the paint application, complicating the fix.
What Determines Vinyl Toy Manufacturing Cost?
Vinyl toy pricing is shaped by a combination of fixed development costs and variable per-unit production costs, and understanding which costs are one-time versus recurring is essential for accurately budgeting a project at any order volume.
Vinyl Toy Cost Component Breakdown
| Cost Component | Type | Primary Drivers |
|---|---|---|
| 3D modeling and sculpting | One-time (fixed) | Design complexity, revision rounds |
| Prototype/hard proto | One-time (fixed) | Method used, size, detail level |
| Mold tooling | One-time (fixed) | Molding method, number of mold sections, figure size |
| Material cost per unit | Variable | Material type (PVC/soft vinyl/ABS), part volume/weight |
| Paint and finishing per unit | Variable | Number of colors, method complexity, hand-finishing needs |
| Labor per unit | Variable | Assembly complexity, articulation, accessory count |
| QC and testing | Semi-fixed | Compliance requirements, inspection depth |
| Packaging | Variable | Blister, window box, or blind box format |
Tooling and development costs are front-loaded and do not scale with order volume, which is why per-unit cost drops meaningfully as order size increases — the same fixed mold investment is simply spread across more units. This is also why small test-batch orders of a few hundred units carry a noticeably higher effective unit cost than the same design produced at several thousand units, independent of any change in material or labor cost.

Where Buyers Most Often Underbudget
The most commonly underbudgeted cost category in vinyl toy projects is paint and finishing labor, particularly for figures with three or more colors, gradient shading, or hand-applied accents. Buyers frequently price a project based on a single reference quote for a simple single-color figure and then apply that same per-unit assumption to a multi-color, multi-process design — a mismatch that shows up as an unwelcome price increase once a detailed quote is generated against the actual approved design.
Volume Break Points Worth Planning Around
Because tooling and development costs are fixed, per-unit cost drops in a step pattern rather than a smooth curve as order volume increases — meaningful cost reductions tend to cluster around specific volume thresholds rather than declining evenly with every additional unit. Small increases in order quantity near one of these thresholds can produce a proportionally larger drop in effective unit cost than the same size increase elsewhere in the volume range, because the fixed cost base is being spread across a meaningfully larger denominator.
Buyers planning an order close to one of these thresholds should ask the factory directly where its own pricing breaks occur, since a modest increase in committed volume — sometimes achievable by combining a second color variant or a companion figure into the same production run — can produce a disproportionate improvement in overall project economics.
How Long Does Vinyl Toy Production Take From Design to Delivery?
A realistic vinyl toy production timeline runs longer than most first-time buyers expect, largely because of the sequential nature of sampling — each stage depends on approval of the one before it, and stages cannot meaningfully be compressed by running them in parallel.
Typical Vinyl Toy Production Timeline
| Stage | Typical Duration |
|---|---|
| 3D modeling and design approval | 1–2 weeks |
| Hard proto sculpting and approval | 1–2 weeks |
| Mold tooling (rotocast) | 2–4 weeks |
| Mold tooling (injection) | 3–5 weeks |
| First shot and paint sampling | 2–3 weeks |
| Mass production | 2–5 weeks (volume-dependent) |
| QC, packaging, and shipping prep | 1–2 weeks |
Total design-to-delivery timeline typically runs 10–16 weeks depending on molding method, figure complexity, and order volume.
Tip: Build in buffer time around the mold tooling stage specifically — it is the single largest source of schedule slippage in vinyl toy projects, since correcting a mold issue discovered at first-shot inspection can add two to three weeks that most project timelines do not account for.
Seasonal demand also affects realistic lead times. Factories serving the collectible and designer toy market see meaningful capacity pressure ahead of major toy trade shows and Q4 retail deadlines, and a mold tooling slot booked during peak season should be expected to run at the longer end of the typical range rather than the shorter end.
What Compliance and Safety Standards Apply to Vinyl Toys?
Vinyl toys sold in regulated consumer markets must meet the same category of safety requirements as other toy types, with particular attention to material chemistry given that vinyl compounds historically raised regulatory scrutiny around plasticizer content.
Common Compliance Requirements for Vinyl Toys by Market
| Market | Key Standard | What It Covers |
|---|---|---|
| United States | ASTM F963 / CPSIA | Mechanical safety, lead content, phthalate limits |
| European Union | EN71 (Parts 1–3) / REACH | Mechanical/physical safety, flammability, chemical migration |
| General material chemistry | Phthalate/plasticizer testing | Confirms softening agents in PVC/soft vinyl meet limits |
| Surface coating testing | Heavy metal migration testing | Confirms paint layers do not exceed lead/cadmium limits |
Phthalate testing deserves specific attention in vinyl toy sourcing because the plasticizers that give soft vinyl its flexible feel are chemically regulated substances, with different markets setting different allowable limits and different rules for which phthalate types are restricted entirely versus limited by concentration. A supplier’s default vinyl compound formulated for one market’s requirements is not automatically compliant for another, and this should be confirmed explicitly rather than assumed.
Documentation and Traceability
Beyond the test reports themselves, regulated-market buyers should maintain a documentation trail that connects each production batch back to its specific material lot and test certificate — not just a general compliance certificate covering the product line as a whole.
This traceability matters most when a compliance question arises after products have already shipped, since it allows a specific affected batch to be identified and addressed without assuming an entire product line is implicated. Factories with mature compliance systems maintain this batch-level documentation as standard practice; requesting it explicitly during supplier evaluation, before an order is placed, is a reasonable way to gauge how seriously a given factory treats regulatory compliance as an ongoing discipline rather than a one-time certificate exercise.
Tip: Request phthalate and heavy metal test reports for the specific finished product, not just a general material certificate for the base resin. Paint layers, printed inks, and any secondary components such as joints or accessories can each introduce restricted substances independently of the base vinyl compound.
What Are the Most Common Defects in Vinyl Toy Manufacturing, and How Are They Prevented?
Certain defect types recur consistently across vinyl toy production, and most trace back to a specific, identifiable point in the process rather than random manufacturing variance.

Common Vinyl Toy Defects and Root Causes
| Defect | Typical Root Cause | Prevention Approach |
|---|---|---|
| Sink marks | Uneven wall thickness, insufficient cooling time | Wall thickness review at the 3D modeling stage |
| Visible parting lines | Poor mold segmentation planning | Parting line review before mold cutting |
| Color drift across units | Inconsistent pigment batching, uncalibrated spray equipment | Locked Pantone reference, physical color chip approval |
| Paint chipping/poor adhesion | Insufficient primer, curing time skipped under schedule pressure | Adhesion (cross-hatch/tape-pull) testing before mass production |
| Registration misalignment (tampo printing) | Fixture wear, inconsistent part positioning | Periodic fixture calibration checks during the run |
| Warping | Uneven cooling, thick-to-thin wall transitions | Gradual wall thickness transitions in the design phase |
Most of these defects share a common pattern: the cheapest and most effective prevention point is earlier in the process than where the defect actually becomes visible. Sink marks are prevented at the design stage, not caught at final inspection. Color drift is prevented through a locked physical reference, not corrected after a batch is already painted. This is the core argument for investing review time upstream — every stage skipped early adds cost and delay when the resulting problem surfaces later.
Setting Realistic Defect Rate Expectations
Buyers new to the category sometimes expect a zero-defect production run, which is not a realistic standard for any manufacturing process involving this much manual finishing work. A more useful approach is agreeing on a realistic defect rate benchmark upfront — informed by the factory’s own historical data for comparable products — and structuring the QC and rework process around catching and correcting units that fall outside that benchmark before shipment, rather than expecting the benchmark itself to be zero.
Factories that present an unrealistically low defect rate during the sales process, without supporting historical data, are worth questioning further, since an overly optimistic defect claim at the quoting stage often signals either inexperience with the category or an incentive to understate quality risk in order to win the order.
How Should You Choose Between Small-Batch and Mass Production Runs?
The choice between a small-batch run and a full mass production commitment affects molding method, tooling investment, and per-unit economics in ways that are worth mapping out before committing to either path.
Small-Batch vs Mass Production for Vinyl Toys
| Factor | Small-Batch (Hundreds of Units) | Mass Production (Thousands+) |
|---|---|---|
| Typical molding method | Rotocast or low-volume injection | Injection molding (often multi-cavity) |
| Tooling investment | Lower, sometimes soft/aluminum tooling | Higher, hardened steel tooling for durability |
| Per-unit cost | Higher | Lower |
| Design risk tolerance | Better suited to testing untested designs | Best reserved for validated, market-tested designs |
| Typical buyer profile | Independent designers, limited editions, crowdfunded projects | Established brands, licensed IP, retail distribution |
Small-batch production makes the most sense for validating an unproven design before committing to full tooling — testing market response, working out finishing details, or fulfilling a limited-edition or crowdfunded run where a few hundred units fully meets demand. Mass production tooling, by contrast, is a commitment best made once a design has already demonstrated demand, because the higher fixed tooling cost only pays off across a sufficiently large unit volume.
Some projects follow a deliberate two-stage path: a small rotocast or low-volume run to validate the design and finish, followed by a transition to full injection tooling once volume projections justify the larger fixed investment. This staged approach limits financial exposure on an unproven concept while preserving the option to scale efficiently once the design is confirmed.

Conclusion
Vinyl toy manufacturing rewards buyers who treat it as a sequence of connected decisions rather than a single production order. The material chosen shapes how the figure feels and what molding method makes sense. The molding method shapes tooling cost and how fine sculptural detail survives into the final part. The paint application method shapes both visual quality and the consistency of the finished run. Each decision constrains the ones that follow — and problems introduced early are consistently cheaper to fix at the point of origin than at final inspection or, worse, after a batch has already shipped.
The buyers who get the best results from vinyl toy manufacturing are not necessarily the ones with the largest budgets, but the ones who invest review time at the stages where mistakes are still cheap to correct — the 3D model, the unpainted hard proto, the first shot from the mold, and the locked color reference — rather than discovering misalignment only once a full production run already exists. The process outlined in this guide reflects the sequence that consistently produces that outcome: careful digital modeling, an honest physical prototype review, a deliberate material and molding method match to the product’s purpose, and quality checkpoints placed where they can still change the result.
FAQ
Q1: How much does it typically cost to develop a custom vinyl toy from scratch, including tooling?
Total development cost depends heavily on figure size, sculptural complexity, and molding method, but most custom vinyl toy projects require a combined investment across 3D modeling, prototyping, and mold tooling before the first production unit is even made. Rotocast tooling for a small-to-medium figure typically represents a lower fixed investment than injection tooling for the same figure, but injection tooling pays off faster at higher volumes because per-unit production cost is significantly lower. Buyers should request separate line-item quotes for 3D modeling, hard proto, mold tooling, and per-unit production cost at their target volume, rather than a single bundled number, since this is the only way to accurately compare the economics of different molding methods for a specific project.
Q2: What is the practical difference between hard PVC and soft vinyl (sofubi) figures beyond how they feel?
Beyond tactile feel, hard PVC and soft vinyl differ in durability profile, paint behavior, and typical use case. Hard PVC holds sharp sculptural edges and takes standard paint systems well, making it well suited to display-focused collectibles where visual crispness matters most, but it is more prone to cracking under repeated flexing or drops. Soft vinyl flexes rather than cracks under stress, making it more forgiving for figures that will be handled frequently, but it requires a paint system formulated for flexible substrates — a standard rigid-plastic paint applied to soft vinyl will crack and flake at the flex points over time. The choice should be driven by how the finished product will actually be used, not by cost alone.
Q3: How many sampling rounds should a buyer expect before mass production begins?
Most vinyl toy projects go through somewhere between three and five distinct sampling stages — 3D render approval, an unpainted hard proto, an unpainted first shot from the actual production mold, a fully painted pre-production sample, and a final golden sample that locks the mass production reference. Complex multi-color designs, articulated figures, or projects involving licensed character approval frequently require additional revision rounds within these stages, particularly around paint color matching. Attempting to compress this sequence by skipping stages is possible but increases the risk that a flaw traced to an earlier stage — mold accuracy versus paint application, for example — is not caught until it has already affected a larger portion of the process.
Q4: Can a single mold produce both a soft vinyl version and a hard PVC version of the same figure?
Not directly with identical tooling in most cases. Rotational casting and injection molding are different processes requiring different mold types, and a mold engineered for one method generally cannot be used for the other without modification. Additionally, wall thickness and structural design considerations differ between the two materials — a wall thickness that works well for rigid PVC may not behave the same way in flexible soft vinyl, and vice versa. Producing both a soft vinyl and hard PVC version of the same character design typically requires either two separate molds or a mold specifically engineered with both material behaviors in mind from the design stage, which should be planned for explicitly if a dual-material release is the goal.
Q5: What causes color inconsistency between units in the same production batch, and how is it prevented?
Color inconsistency most commonly stems from three sources: pigment batching variation between production runs, spray equipment calibration drift over the course of a long production run, and reliance on screen-based color approval rather than physical reference standards. The most effective prevention approach combines a locked physical Pantone color chip — approved by the buyer before production, not a digital color code alone — with periodic in-line color checks against that physical reference throughout the production run, rather than only checking color at final inspection when an entire batch may already share the same drift.
Q6: Is rotational casting or injection molding better for a first-time vinyl toy project?
For most first-time projects, particularly those testing an unproven design at a few hundred to low-thousands of units, rotational casting is generally the more practical starting point because of its lower tooling investment and better suitability for smaller order volumes. Injection molding becomes the more economically sensible choice once projected volume climbs into the thousands of units, where its faster cycle time and lower per-unit production cost outweigh the higher upfront tooling investment. Some designers deliberately start with a small rotocast run to validate market demand before committing to injection tooling for a larger follow-up production run, which limits financial exposure on a design that has not yet proven itself commercially.
Q7: What safety testing is actually required before a vinyl toy figure can be sold in the US or EU?
Vinyl toys sold in the United States generally need to meet ASTM F963 mechanical and chemical safety requirements along with CPSIA lead content and phthalate limits, while products sold in the European Union need to meet the relevant parts of EN71 covering mechanical and physical safety along with REACH chemical compliance. Because vinyl compounds rely on plasticizers to achieve flexibility, phthalate testing is a particularly important checkpoint that should be confirmed for the specific finished product rather than assumed from a general base-resin certificate, since paint layers, printed inks, and any secondary components can each introduce regulated substances independently of the vinyl itself. Buyers selling into regulated markets should request test reports specific to their finished, painted product before finalizing a mass production order.